Sunday, March 23, 2008

happy easter: hot cross buns with cinnamon icing


I grew up eating hot cross buns at Easter. My mom would come back from the grocery store with a bag filled with a double layer of 8 hot crossed buns. We'd heat them up in the oven for a few minutes and then eat the warm buns for breakfast. The only thing I hated about the buns was that they were always studded with candied fruit, which I'd pick out and leave on my plate in a little heinous pile. Candied fruits are the roots of all evil and I had no idea why someone would sully a perfectly good treat with those little bites of raunch.


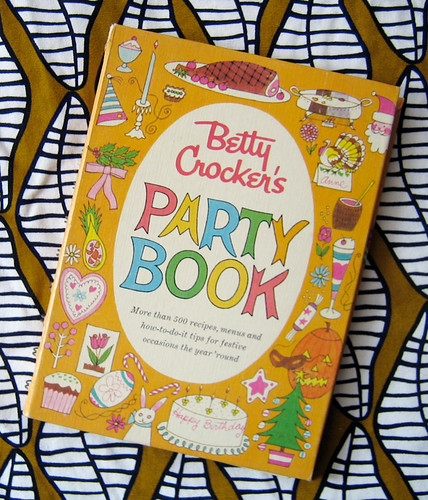
I haven't had a hot cross bun in years and while strumming through an old Betty Crocker kid's cookbook that I had thrifted ages ago, I came across a perfect recipe. Why was it so perfect? Well, truth is, I'm intimidated by baking with yeast. I don't know why, but somehow I associate baking bread with serious devotion....an undertaking I didn't feel quite ready to tackle. Until now. I mean, this recipe is meant to be made by children, so really, how hard can it be? I felt perfectly at home trying this recipe instead of one I had been eying for years which seemed too complex and frightening for a newbie like me.

For a greenhorn, I chose right. It may not be as authentic as Delia's, but my hot cross buns were delicious (my husband called them delectable) and I was able to get over my fear of baking with yeast in one fell swoop. They were light and crispy on the outsides just out of the oven and the icing I doctored with vanilla and cinnamon was the perfect accompaniment. Plus, the best part was that I subbed out those nasty candied fruits with fresh orange zest to wonderful effect! The fruity orange essence was present without those god-awful bitter vile beasties. Oh yah, let my bread baking adventures begin! It's on, bitches.
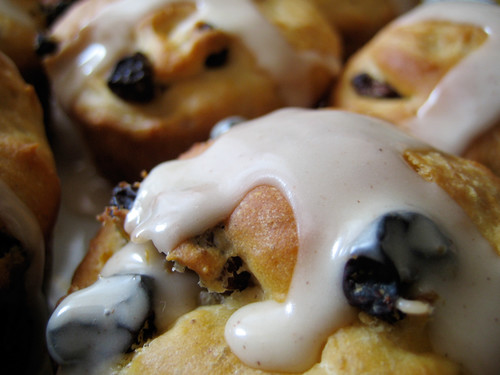

hot cross buns with cinnamon icing
1 c warm water (not too hot)
1 pkg. active dry yeast
2 T sugar
2 1/4 c flour
1 t salt
1 1/2 t cinnamon
2 pinches nutmeg
1 egg
2 T butter, softened
1/2 c raisins
zest from 1 orange

icing:
2 heaping T icing sugar (powdered sugar)
a drop or two of milk
1/2 t vanilla
1/4 t cinnamon

1. In a mixing bowl, disolve yeast into water and stir in sugar. Wait until the yeast doubles in volume (this is called proofing the yeast - if it doesn't, you've got bum yeast. Try again with another packet). Stir in half of the flour, salt and spices. Add in egg and butter and mix well. Add in rest of the flour along with the raisins and zest and beat until smooth. Scrape down the sides of the bowl and cover the bowl with a cloth, letting rise in a warm place until doubled in size, about 30 minutes.

2. Oil up a large muffin tin and set aside. Stir down the batter and spoon dough into prepared muffin cups filling half full. Cover tin with cloth and let rise until doubled in volume, another 30 minutes. Heat oven to 400 degrees and bake for 15 minutes or so until golden brown. Remove from oven and let cool on a wire rack.

3. Prepare frosting by mixing together icing sugar with a few drops of milk and vanilla. Stir in cinnamon, adding another droplet of milk if necessary to get a smooth, creamy consistency. When buns have cooled, use a spoon to drizzle icing over the buns forming a cross. Place on a plate to catch any drippings.

Labels: , , , , , , ,

Thursday, March 15, 2007

taste of summer


Like I mentioned in a previous entry, I've begun Operation: Cupboard Clean-Out to make moving apartments seem like less of a chore. This tactical maneouver isn't only about cleaning out the cupboard....the freezer is fair game as well. Last summer I played a weekly game of tennis around a bramble of blackberry bushes and managed to pick and freeze a fair amount of the deep, dark berries. I've used the blackberries in smoothies, cakes, pancakes and fruit crumbles but it seemed like no matter how many berries I used, my freezer held an endless supply. I'm not complaining, mind you. I love blackberries and using them unseasonally in the wintertime makes the memories of summer that much sweeter. Tonight, to take a break from all the moving boxes I'm swimming in, I decided that I'd bake a little cake and maybe use up the rest of the frozen blackberries. And so with the extra space left over from a huge container of blackberries, in went a small pint of vanilla ice-cream to fill the gap. Mmmmm, warm blackberries covered in a light cake batter and then topped with a scoop of ice cream. Now, not only is my packing load lightened, but I can taste summer and it's only March.

black(berry) bottom cake
3 c frozen blackberries
½ c plus 1 ½ T sugar
1 c flour
½ t baking soda
¼ t salt
¼ c margarine, softened
1 egg
1 t vanilla
¼ c skim milk
¼ c plain yogurt

1. Lightly butter an 8x8 square pan. Add in the blackberries and toss with the 1 ½ teaspoon of sugar. Set aside.

2. In a mixing bowl, mix together the flour, baking soda and salt. Set aside.

3. In a larger mixing bowl, blend the margarine and the remaining sugar until fluffy. Add in the egg and vanilla and mix until smooth. Alternate adding in the flour with the milk and yogurt until the batter is encorporated. Pour over berries and smooth over with a spatula. Bake at 400° for 35 minutes or until a toothpick inserted in the centre comes out clean. Serve warm with vanilla ice-cream.

Labels: , ,

Saturday, February 17, 2007

some velvet afternoon


I love red velvet cake. I remember hearing so much about this fabled Southern dessert that when I actually made it for the first time, I was a bit disappointed that the only thing that made it red was the addition of food colouring. Fortunately for me, I love the colour red and the cake was moist, rich and most decadent. I've made a multi-tiered layered version for a friend's wedding with a rich cream cheese and pecan frosting and I've made unfrosted cupcakes that taste just as delicious as their frosted counterparts. For a easy and impressive looking cake, red velvet fits the bill.

The other afternoon, I decided to bake a small, personal-sized red velvet cake for a friend celebrating a birthday. I found myself without any buttermilk, which is usually a requirement in making a red velvet cake, but I decided to proceed anyway with some plain yogurt I had in the fridge. Cutting the recipe below in half, I poured the batter into a 4 inch round springform pan and then had enough left over to bake up 4 cupcakes. I figured that eating a cupcake before giving the cake as a gift would ease any worries I had about my yogurt-buttermilk substitution. And indeed, the cupcake was moist, tender and rich and any qualms I had were forgotten. I had reached red-velvet gold.

red velvet (cup)cake
2 1/2 c flour
1 t salt
1/4 c fine-quality cocoa powder
1 1/2 c white sugar
1 1/2 c canola oil
2 large eggs
1/4 c red food coloring (plus 1 - 2 T extra if you want the cake extra red)
1 t pure vanilla extract
1 c plain yogurt
1 1/2 t baking soda
2 t white vinegar

1. Heat oven to 350°. Butter and flour two 9-by-2-inch round cake pans or line a cupcake tray with paper liners. In a medium sized bowl, combine the flour, salt and cocoa powder. Set aside.

2. In another bowl, mix together the sugar and oil until well combined. Add in the 2 eggs and beat well. Next, stir in the food colouring and the vanilla. Add in half of the flour/cocoa mixture, alternating with the yogurt, scraping the sides of the bowl with a rubber spatula as needed.

3.
In a small bowl, mix baking soda and vinegar until combined. Add to batter, and beat for 10 seconds. Divide batter between the prepared pans (if using) or pour batter 3/4 full into the cupcake liners.

4.
Bake for 30 to 35 minutes, or until a toothpick inserted into the centre of the cake comes out clean. Cool for about 5 minutes before removing from pan, then place on wire racks to cool completely. Frost or cover in whipped cream as desired.

Labels: , , , ,

Wednesday, February 14, 2007

love proof


I'm a sucker for love so pretty much every day seems like Valentine's Day. Yesterday Cornelius jokingly said that Valentine's Day is the day where you have to prove your love to the other person! After laughing, I decided that I'd bake up some proof right away. After seeing Gourmet's recipe for a Truffle Chocolate Tart pretty much everywhere, I was smitten. Unfortunately, I didn't have really great dark chocolate at my disposal. I did however have some pretty decent semi-sweet baking chocolate and some really amazing imported French dark dark cocoa. I also had some Callebault white chocolate on hand...so I decided to modify the recipe somewhat and knock me out some love cake. Using 2 different chocolates, I decided to marbleize the ganache and create some pretty looking swirls. And since I was using white chocolate which is quite sweet, I did not add extra sugar to the mix. I'm sure it will be sweet and rich enough without the extra sugar! Truth be told, I haven't taken a bite out of this tart (we're saving it for tonight), but every time I lift the lid off my cake dome, I'm instantly salivating from the heavenly chocolate aroma. Oh my! Bring on the love!

chocolate truffle tart
For crust
28 chocolate wafers* (1 1/2 cups)
6 T butter, melted and cooled

For filling
1/2 c okay-quality bittersweet chocolate, coarsely chopped + 2 fine-quality T dark cocoa
1/2 c fine-quality white chocolate, coarsely chopped
6 T butter, cut into 1/2-inch cubes
2 large eggs, lightly beaten
1/2 c heavy cream
1/4 t salt
1 t pure vanilla extract

Special equipment: an 8-inch (20-cm) round springform pan

1. Make crust: Put oven rack in middle position and preheat oven to 350°F. Wrap a sheet of foil over bottom of springform pan (in case of leaks). Lightly butter side of pan. Stir together ground wafers and butter in a bowl until combined, then pat mixture evenly onto bottom of pan and 1 1/2 inches up side. Bake until crust is slightly puffed, about 10 minutes, then cool completely in pan on a rack, about 15 minutes. Leave oven on.

2. Make filling while crust cools: Whisk together eggs, cream, sugar, salt, and vanilla in a bowl. Divide mixture into 2 even halves. Set aside. Over low heat, melt dark chocolate, cocoa and half the butter in one saucepan and melt white chocolate and the other half of the butter in another saucepan. Stir until smooth and remove from heat. Cool for 5 minutes. Whisk the dark chocolate mixture into one of the egg mixtures and add the white chocolate into the other egg mixture and combine well with a whisk.

3. Assemble and bake tart: Pour white filling into cooled crust and then drizzle the chocolate filling over top in a random pattern. With a fork or the end of knife, create swirls being careful not to mix too much. Rap pan once on counter to eliminate any air bubbles. Bake until filling 1 inch from edge is set and slightly puffed but center trembles slightly when pan is gently shaken, 20 to 25 minutes.** (Center will continue to set as it cools.)

4. Cool tart completely in pan on a rack, about 2 hours. Chill, uncovered, until center is firm, about 4 hours. Remove side of pan and serve.


* I didn't have chocolate wafers, so instead I used vanilla wafers and added in a tablespoon or two of dark cocoa.

** It took about 40 minutes for the batter to not be totally liquid. Maybe I just have an old stove.

Labels: , , , ,