Friday, December 04, 2009

better than from a bakery granola

I love granola for breakfast. Not only do I make it quite frequently, but I do often order it when going out for breakfast. I'm a bit of a granola snob and I definitely know what I like. This granola found in Baked: New Frontiers in Baking cookbook is great. Like really, really great.

Look at it, this granola has clusters! Every granola I have made, while delicious & wholesome, doesn't have the goodness that makes them clump up like the granola found at a great bakery. Look no further. This granola clumps, it's crunchy and it's easy to make. Sure, there's a bit more sugar than I'm used to putting in my granola, but it's worth the extra calories. Do it for the clumps!

Want to make your friends, co-workers and family really happy this holiday? Just bake up a batch, throw it in a large glass jar, top it with a bow, and call it a homemade gift made with love. Better yet, bake up a double batch (I've done it and it works beautifully) so you have some for yourself and a friend. Guaranteed happiness.

better than from a bakery granola
(adapted from Baked: New Frontiers in Baking)
2 c organic large-flake rolled oats
1 t cinnamon
pinch of nutmeg
1/2 t salt
3 T plus 1 t canola oil
1/4 c honey
1/4 c firmly packed light brown sugar
1 t pure vanilla extract
2/3 c whole almonds
2/3 c raisins

Preheat oven to 325 F. In a large bowl, toss oats with cinnamon, nutmeg and salt. In a separate bowl, whisk together the oil, honey, brown sugar and vanilla until blended. Pour the wet mixture in with the dry and use your hands to combine the two until everything is well coated and your hands are gooey. Lick them if you must, but wash your hands right after.

Cover a baking sheet with parchment paper and pour the mixture over top. Spread it out evenly, but also keep in mind clumping is a good, good thing. Bake for 10 minutes and then use a spatula to gently flip the granola over. Sprinkle with almonds and return to the oven for another 10 minutes. Add raisins and bake for another 5 minutes. Remove from oven and cool completely in the pan. Use your hands to break up the granola...but again, don't go overboard (remember the clumps!). Place in a tightly lidded container.

Labels: , , , , ,

Friday, March 20, 2009

irish soda bread with fennel & cinnamon

Heavy, dense, tasteless, dry. Often these are words used to describe the brick-of-a-loaf also known as Irish soda bread. Its bad rap had me wary but I overcame it when I saw Buff Chickpea's lovely looking loaf. The fact that it looked like a perfect vehicle for butter had me sold.

This bread is a quick bread, meaning there's no yeast to bother with. It's a snap to put together...if you can make a biscuit or a scone, this is no different. Plus, there are no eggs, so if you sub in the required non-dairies, you've got a great vegan bread. Normally, Irish soda bread is made with caraway seeds, but I didn't have any on hand and decided to try fennel seeds instead. Definitely, a great choice. Along with the cinnamon, it made the bread super flavourful and definitely not bland or boring.

It is a dense bread, but I didn't mind that one bit, and I definitely did not find this bread too dry. It was great smeared with cold butter the same day and it was even more wonderful toasted the following day. A dab of blackberry jam and a strong cup of coffee, this bread made for a filling breakfast. I don't think I'll have to wait for next St. Patrick's day to make this again.

irish soda bread with fennel & cinnamon
(adapted from Buff Chickpea)
1 c vanilla yogurt
1/3 c skim milk
1/3 c apple-cider vinegar
1 t vanilla
3 1/2 c all-purpose flour, plus more for surface and dusting
2 1/2 t kosher salt
1 t baking powder
1 t baking soda
4 T cold butter, cut into bits
1 c wheat bran
2 T fennel seeds, lightly crushed
2 t ground cinnamon
1/2 c raisins
1/2 c dried cranberries

Preheat oven to 350F. In a small bowl, combine yogurt, milk, vanilla and apple cider and set aside to thicken. In a large bowl, mix together flour, salt, baking powder, and baking soda. Add cold butter into the flour and use your hands to break it up until the mixture resembles coarse meal. With a wooden spoon, stir in wheat bran, fennel, cinnamon, and dried fruit.

Pour in milk/yogurt mixture and stir until the mixture starts to hold together into a ball. Dump the dough onto a floured surface and knead a few times. Pat into a dome-shaped lump and place onto a baking sheet covered with parchment paper or silpat. Sprinkle some flour on top and cut a cross into the loaf. Bake for about 1 hour or so, or until a cake tester inserted comes out clean. This is best eaten the same day...or toasted the next day.

Labels: , , ,

Sunday, December 21, 2008

for maman: date & raisin squares

When I was little, my mom had her standard dessert recipes. She made a really fantastic chocolate chip cake (always in a pretty bunt pan) for birthdays and every summer to make use of the pear bounty from our 2 trees, she made pear crisp. During the winter though, the date square ruled. It seemed healthy since it was full of oats and dates but with all that butter and sugar, this square isn't really fooling anyone. Despite the fact that I would have rather snacked on something chocolate, I really did love my mom's date squares. With a glass of cold milk and a crumbly still-slightly-warm square, it was the perfect treat.

My mom isn't doing very well health-wise and she's currently in the hospital. I wanted to do something extra special in my holiday package to my parents. Of course I packaged off my dad's favorite cookies along with trying to recreate her date square. Despite having only half the amount of dates needed and subbing in raisins for the balance, I think I surpassed her version. My friend who ate a square thought they were the most flavourful date bars she had ever eaten and some friends of Cornelius who lucked into a couple of squares immediately wanted the recipe. So here it is. Sweet, buttery, oaty goodness. Pure and simple. I know my mom will love them.

Oh, and please stop by the Canada's Food Network blog to read my latest post on my brunch experience at a new local neighbourhood restaurant, 2 Chefs and a Table.

date & raisin squares
oat mixture:
1 1/2 c flour
1/2 t baking soda
1 t baking powder
1/2 t salt
1 c butter, room temperature
1 c brown sugar
1 1/2 c rolled oats

filling:
1 c dates, cut up
1 c raisins, cut up
3 T brown sugar
1 T sour cherry jam
1 T amber rum
zest from 1 lemon & 1 orange
1 c orange juice
1 t lemon juice
1 t cornstarch mixed with a little bit of cold water to create a slurry (optional)

1. Add flour, baking powder , soda, and salt into a large mixing bowl. Mix in butter, sugar and oats and combine well. Press half of the mixture into a 13 x 9 inch baking pan.

2. To make filling, combine all ingredients except for the cornstarch in a small saucepan. Cook until thick and smooth. If it's not thick and smooth, add in the cornstarch slurry and cook for 3 more minutes until thick. Set aside and cool.

3. Pour cooled date mixture over the oats and spread evenly. Cover with remaining oat mixture and bake for 30 minutes at 350 degrees. Cut into squares while still warm and cool in pan.

Labels: , , , , , , , , , ,

Wednesday, November 19, 2008

healthy & wise: ginger-studded molasses bread

By Sunday evening, I felt my mojo returning. I was feeling healthy again, but I didn't want to bust up the joint by letting all hell break loose, so I started off with some wholesome baking. And I mean wholesome. Don't fool yourself that you are making gingerbread. This isn't very sweet and the ginger and molasses pack a powerful one-two punch. But it's also delicious and makes a very nice breakfast with strong coffee and a slice eaten late at night with a pot of tea still seems a little sinful.

When I first tasted this bread, I though that maybe I should have increased the candied ginger instead of adding in raisins. The ginger flavour was there but not as gingery as I was hoping. The next day however, the flavours had really intensified and I'm glad I didn't up the ginger ante. I decided to divide the batter into 2 loaf pans rather than make just one loaf. So I tightly wrapped the one destined for the freezer in plastic wrap to be enjoyed at a later date.


ginger-studded molasses bread
1 c whole wheat flour
1 c all-purpose flour
1 t baking powder
1 t ground ginger
1 t cinnamon
1/4 t ground cloves
1/2 t salt
1 t baking powder
1/2 t baking soda
2 eggs
1/3 c packed brown sugar
1 c buttermilk
1/2 c blackstrap molasses
1/4 c canola oil
1/4 c candied ginger, diced
1/4 c raisins (optional)

1. Preheat oven to 350F. In a mixing bowl, combine the flours, spices, salt, baking powder and baking soda together. Set aside.

2. In another large bowl, mix the brown sugar, eggs, buttermilk, molasses and oil together. Beat in the flour mixture and then fold in the ginger and raisins.

3. Pour batter into a greased and floured bread tin and bake for 50 minutes, or until tester comes out clean.

Labels: , , , ,

Thursday, June 19, 2008

a plain jane: buttery raisin biscuits

I've been swamped with work so it's been nothing but crickets around here from my end. I haven't had much to write about really, as all the cooking that I've been doing has involved just emptying out all the bits n' bobbins from my pantry. It's tasty, in a gotta-do-it kind of way, but not all that exciting.

Yesterday I did celebrate one small work milestone with a bit of baking. After some website mockups that I had sent to a client were approved, I figured that a bit of celebratory baking was required. The thing was, I still had loads of other work to complete, so the prep and baking had to be quick so that I could get right back into the swing of things work-wise. Lucky me, I had just finished reading this post on Cook (almost) Anything at Least Once. The photo reminded me of my favorite bakery item: the eccles cake. I know that some people are all about chocolate or a macaron or a cupcake. But for me, if I spot an eccles cake, it's mine. It's not the prettiest or the sweetest thing on the shelf...in fact, it's just a little bit dowdy and plain Jane. But I know that what it lacks in beauty, it makes up for in taste. Buttery, crispy and chewy all at once, and studded with lemony currants, it's my idea of bakery perfection. Take that you starry-eyed cupcake!

So getting back to the real star of this post, the buttery raisin biscuit. Now, I'm calling these a biscuit in the way the British refer to cookies. These are not to be confused with the Southern-style biscuits dripping with gravy or clotted cream. Nope, these are a bar cookie of sorts or something akin to shortbread. I made the recipe as directed, except I used plain ol' raisins instead of fancy currants and added a bit of lemon zest just to remind me of those eccles cakes. I started preparing the recipe, weighing the ingredients at the top of the hour and by half past, the biscuit was on my kitchen table cooling. A 30 minute treat, indeed. I don't have a fluted tart pan, so I made do with my small 7 inch springform cake pan that worked just fine. When I cut into the biscuit, it didn't have the crunch I was after, but it did have a good texture that was somewhere between a dense brownie and a scone. Next time (and oh, there will be a next time), I will bake it a bit longer for a bit more bite. This recipe only makes a small batch of biscuits as I was able to cut 8 wedges and after they disappeared, I wanted more. So go ahead and make a double-batch!

buttery raisin biscuits
120 g ap flour
90 g cold butter, cut into cubes
50 g white sugar
120 g raisins
zest from 1 lemon
1 egg, lightly beaten

Preheat oven to 350 degrees. In a medium sized bowl, combine flour and butter. Get it all crumbly using your fingers until it resembles coarse meal. Add in sugar and stir with a wooden spoon until combined; add raisins and zest, stirring gently until evenly distributed. At this point, the mixture will still resemble coarse meal. Slowly add in a little bit of the egg and stir until a soft dough forms. You don't want a dough that is too sticky. I used only half of an extra large egg, but I could have used a bit less.

Pat dough into a tart pan or a small springform cake pan. Make sure to get even coverage and then use the remaining egg to brush the top of the dough. Bake for 20 minutes or until the tops and edges are golden.

(recipe adapted from Cook (almost) Anything at Least Once)

Labels: , , , , ,

Sunday, March 23, 2008

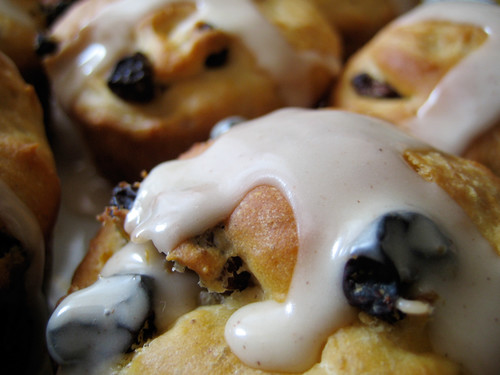
happy easter: hot cross buns with cinnamon icing


I grew up eating hot cross buns at Easter. My mom would come back from the grocery store with a bag filled with a double layer of 8 hot crossed buns. We'd heat them up in the oven for a few minutes and then eat the warm buns for breakfast. The only thing I hated about the buns was that they were always studded with candied fruit, which I'd pick out and leave on my plate in a little heinous pile. Candied fruits are the roots of all evil and I had no idea why someone would sully a perfectly good treat with those little bites of raunch.


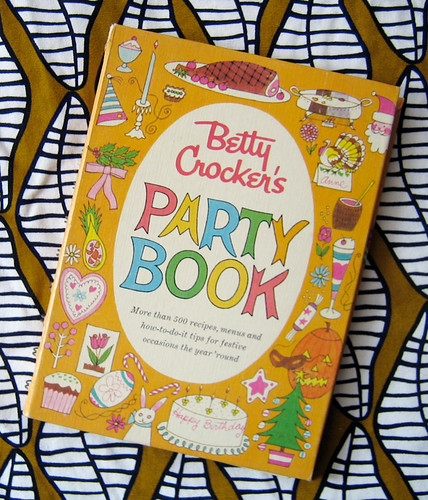
I haven't had a hot cross bun in years and while strumming through an old Betty Crocker kid's cookbook that I had thrifted ages ago, I came across a perfect recipe. Why was it so perfect? Well, truth is, I'm intimidated by baking with yeast. I don't know why, but somehow I associate baking bread with serious devotion....an undertaking I didn't feel quite ready to tackle. Until now. I mean, this recipe is meant to be made by children, so really, how hard can it be? I felt perfectly at home trying this recipe instead of one I had been eying for years which seemed too complex and frightening for a newbie like me.

For a greenhorn, I chose right. It may not be as authentic as Delia's, but my hot cross buns were delicious (my husband called them delectable) and I was able to get over my fear of baking with yeast in one fell swoop. They were light and crispy on the outsides just out of the oven and the icing I doctored with vanilla and cinnamon was the perfect accompaniment. Plus, the best part was that I subbed out those nasty candied fruits with fresh orange zest to wonderful effect! The fruity orange essence was present without those god-awful bitter vile beasties. Oh yah, let my bread baking adventures begin! It's on, bitches.


hot cross buns with cinnamon icing
1 c warm water (not too hot)
1 pkg. active dry yeast
2 T sugar
2 1/4 c flour
1 t salt
1 1/2 t cinnamon
2 pinches nutmeg
1 egg
2 T butter, softened
1/2 c raisins
zest from 1 orange

icing:
2 heaping T icing sugar (powdered sugar)
a drop or two of milk
1/2 t vanilla
1/4 t cinnamon

1. In a mixing bowl, disolve yeast into water and stir in sugar. Wait until the yeast doubles in volume (this is called proofing the yeast - if it doesn't, you've got bum yeast. Try again with another packet). Stir in half of the flour, salt and spices. Add in egg and butter and mix well. Add in rest of the flour along with the raisins and zest and beat until smooth. Scrape down the sides of the bowl and cover the bowl with a cloth, letting rise in a warm place until doubled in size, about 30 minutes.

2. Oil up a large muffin tin and set aside. Stir down the batter and spoon dough into prepared muffin cups filling half full. Cover tin with cloth and let rise until doubled in volume, another 30 minutes. Heat oven to 400 degrees and bake for 15 minutes or so until golden brown. Remove from oven and let cool on a wire rack.

3. Prepare frosting by mixing together icing sugar with a few drops of milk and vanilla. Stir in cinnamon, adding another droplet of milk if necessary to get a smooth, creamy consistency. When buns have cooled, use a spoon to drizzle icing over the buns forming a cross. Place on a plate to catch any drippings.

Labels: , , , , , , ,

Sunday, October 28, 2007

can't eat just one: peanut butter raisin bars


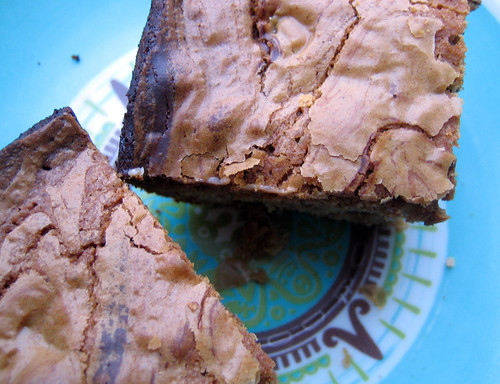
When I saw these squares on this blog, I wanted them in my belly, stat! But like all food porn, I knew I'd have to wait until I could make these myself. And boy, was it worth the wait. I wouldn't call these a bar cookie or a square, instead, they fit nicely in the brownie/blondie category. They reminded me of my most favorite stand-by brownie recipe in that everything is all mixed up in one pot. Chewy, dense and with a golden (almost flaky) top, these are a perfect snack. And I say snack for those of you who have restraint. Me, almost never. After one small square, I had to have another and another. I wasn't alone either....Cornelius kept heading back for seconds and thirds bits of peanut-buttery-raisiny-chocolate goodness. It's amazing that these lasted 4 days!


I made a few changes to Lynn's recipe but loved the results. I always use natural peanut butter instead of the processed stuff and this recipe didn't suffer for it one bit. I also reduced the raisins and subbed in some chocolate chips to make things a bit more decadent. Try them and see if you can resist a second piece. Be the better person...or not.

peanut butter raisin bars

1/2 c natural peanut butter
1/2 c unsalted butter
1 c white sugar
1/2 c brown sugar
2 large eggs
1 T vanilla
1 c all-purpose flour
1 1/2 t baking powder
pinch of salt
1 c raisins
1 c semi-sweet chocolate chips

1. Preheat oven to 350 degrees. In a medium sized pot, combine peanut butter and butter on medium heat until melted. Remove from heat and add in sugar. Mix well and then add in vanilla and eggs. Stir in flour, baking powder and salt and combine. Add raisins and chocolate chips. Stir well.

2. Pour batter into a greased 9x9 square pan. Bake for 35-40 minutes or until a toothpick inserted in the centre comes out clean. Cool.

Labels: , , , , , , , ,

Tuesday, April 10, 2007

puddin' n' tain


When I have leftover rice, I usually end up making some fried rice, a cold rice salad or fried rice patties. This time, I decided to experiment with making something sweet. I was all set to make some totally faux-horchata but at the last minute decided on rice pudding instead. I've made rice pudding before with arborio rice using a custard base, but this recipe is a bit different as no eggs are necessary, so it would be really easy to make this dessert vegan by using rice or soy milk instead of dairy. For me, this dessert manages to kill two birds with one stone: not only do I get to use up leftover rice, but I also can finish up my open can of coconut milk leftover from last night's peanut sauce. This pudding thickens up quite nicely and resembles the kind of coconut rice pudding dessert found at Indian restaurants. I love the taste of cardamom here and the crunch of the almonds adds a nice twist to this creamy, coconutty dessert.

coconut rice pudding
2 c cooked long grain rice
2 c skim milk
1 c half & half cream
1 1/2 c coconut milk
1/2 c white sugar
1 t cinnamon
1/2 t ground cardamom
1/2 c raisins
1/4 c coarsely chopped almonds

1. In a medium saucepan, heat 2 cups of skim milk with the rice over medium-high heat. When the mixture starts to boil, lower heat and stir until thickened, about 5 minutes.

2. Add in the cream, coconut milk, sugar, cinnamon and cardamom and return heat to medium-high. When mixture boils, stir for a few minutes and then lower heat to a simmer. The milk will start to evaporate and the mixture will thicken. Stir occassionally, making sure the mixture isn't getting too hot (ie. sticking to the bottom of the pan!). Stir in raisins and almonds, shortly before removing from heat. Remove pudding from heat when mixture is just shy of rice pudding consistency. The mixture will thicken up when cool. Place pudding into a large bowl and cover with cling film touching the surface to prevent skin. Serve at room temperature or cool.

Labels: , , , , ,

Thursday, December 01, 2005

off the cuff.

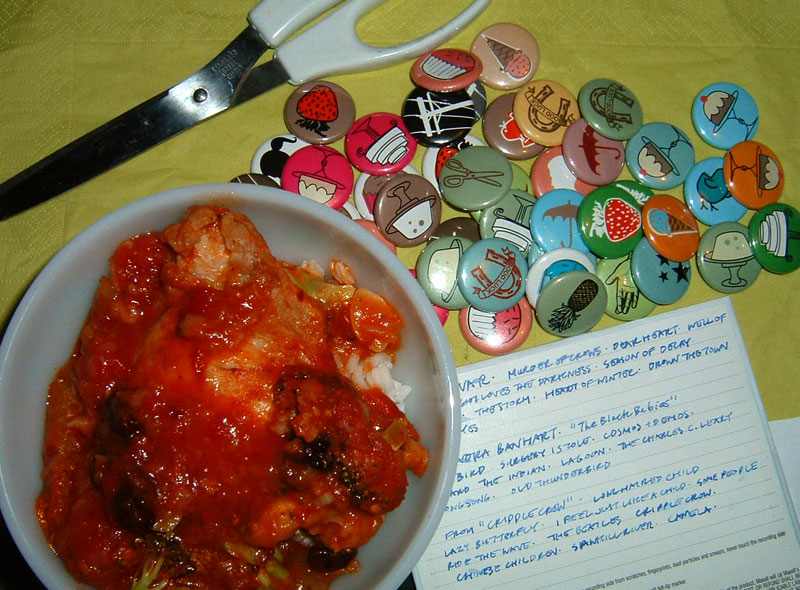
Today I took work off my plate and decided to concentrate on Christmas crafting. Inspired by last night's button-making party/ANTM watching at my friend Carley's house (I brought those mint chocolate cookies!), I decided to sew rickrack on my screenprinted tea towels and tie up everything in ribbon. I also had plans on making felt ornaments, but didn't get as far along as I had hoped. Before too long, it was time for dinner and I had 4 chicken thighs defrosted just waiting to be used. I wanted to make an African-style meal that had a bit of spice, a bit of sweetness and a bit of sour. I looked through my cookbooks and I spent a few runs through Google typing in various ingredients, but my search was fruitless. So I decided to tackle dinner on my own. The end results were fantastic and it was a perfect meal for a chilly evening.

I used a homemade spiced pear jam in the recipe, but you really could use anything you had handy; peach jam, mango chutney, honey, molasses would all do a fine job I'm sure! I also didn't have any onions. If I had one, I would have added one. Have fun & play!

my african-inspired chicken stew
½ c flour
salt & pepper
4 skinless chicken thighs
1 T olive oil
1 large can of tomatoes
water
1 T spicy onion soup base
½ head of garlic, chopped
1 large knob of ginger, chopped
2 stalks of celery, chopped
1 green pepper, chopped
1 carrot, sliced into rounds
1 c broccoli, chopped
1 t red chili flakes
3 T raisins
2 T spiced pear jam
1 ½ t ground cinnamon
salt & pepper
juice of ½ lemon

1. Mix salt, pepper and flour together in a plate. Dredge chicken thighs in the flour.

2. Heat olive oil in a large heavy bottomed pot. Add the chicken and brown on both sides.

3. Add the can of tomatoes into the pot and fill half the can with water and add that too. Add ginger, garlic, chili flakes salt, pepper, and onion soup base to the simmering pot and mix to combine. Simmer over medium heat.

4. Add celery, carrots, broccoli, mix to combine and cover for 15 minutes, stirring occasionally.

5. Add the jam, raisins, cinnamon and lemon juice and mix well. Cover and simmer on low heat for 20 minutes, stirring occasionally. Add lemon juice into pot and mix well before serving.

6. Serve over rice or couscous.

Labels: , , ,