Monday, April 13, 2009

no knead bread

Easter Monday is kind of a weird day. Is it a holiday? I'm pretty sure it is in Canada, many shops and businesses are open but banks, libraries and most offices are closed. I'm feeling a bit torn. I have work to do but I also want to raid the half-off Easter chocolate displays at the local drug store for candy. I'm feeling the pull since we didn't really do anything particularly Easter-ish this weekend and discount candy should count for some kind of celebration, right?

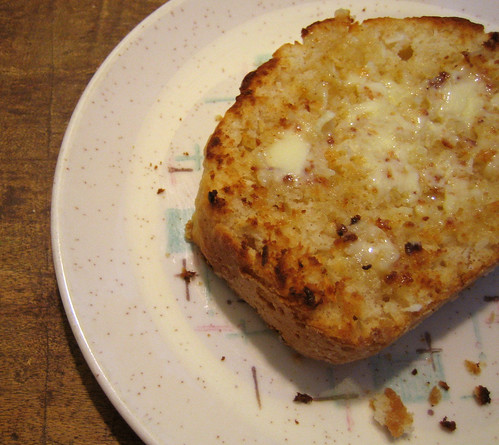
Maybe I should also feel a bit triumphant because this weekend I did make no-knead bread for the first time. It was amazing. Amazing! Look at it. It's beautiful, it's got the perfect crust and the insides were wonderfully soft and tender. It was perfect...but it also was an exercise in patience. There's not a lot of work involved, but there is a lot of waiting and waiting isn't one of my strong suits. But as long as you love your kitchen timer (I use the one on our microwave) and you've got yourself a cast iron pot/dutch oven, make friends with this bread. It is delicious and simple.

no-knead bread
3 c all-purpose + more
1/2 t instant yeast
1 1/4 t salt
1 1/2 c water
cornmeal

Mix flour, yeast and salt together and blend well. Slowly add water, stirring until dough forms. The dough should be "shaggy" and not to sticky...if it's too wet, add in some more flour. Oil up a large bowl, dump in dough and cover with plastic wrap. Let sit for about 15 hrs.

Dump the dough onto a floured surface, folding it gently and let it rest for 15 minutes. Form it into a ball and let it rest for 2 hrs, covered with a clean tea towel. At the 1.5 hr mark, turn on oven to 450F and put cast iron pot inside with lid on top to heat up for 30 minutes. Remove pot from oven carefully (it's hottt) and add in some cornmeal to dust the bottom. Remove the towel from the dough ball and give it a poke...if the indent takes and closes up slow, the dough is ready. Place dough gently into pot and cover with the lid. Bake for 20 minutes. After 20 minutes, remove lid and bake for another 20 minutes. Remove from oven and let cool before you slaughter the poor thing. Eat with cold butter and a drizzle of honey.

Labels: ,

Sunday, January 04, 2009

have stale bread? make bread soup!

I love simple meals and this is one of the simplest. A few days before the holidays struck, I realized that I had a half loaf of some very delicious olive & rosemary sourdough in the fridge. Unfortunately, I had let it get stale and hard. Completely my bad. I hate letting things go to waste, but instead of making bread crumbs or croutons with it, I decided to try my hand at making bread soup. It turned out wonderfully and a friend who had unexpectedly stopped by happily ate 2 bowls of it. It's hearty and it definitely warms the bones and with all of this crazy snow and cold weather that we Vancouverites have had to put up with this winter, it definitely hits the spot.

An aside, I will be in Victoria, BC for a couple of days this week, so please send me your list of favorite restaurants and fun things to do in that city. Gimme your best tips!

bread soup

1 T olive oil
1/2 onion, diced
4 cloves garlic, chopped
1 stalk celery, diced
1 t dried hot chili flakes
1 t dried oregano
4 c vegetable stock
1/2 small loaf of stale bread, cubed
1 small can of diced tomatoes
1 bunch spinach
2 T Parmesan cheese
salt & pepper to taste

Saute the onion, garlic and celery in the oil over medium-high heat. When softened, add in the chili flakes, oregano and some salt and pepper. Add in vegetable stock and tomatoes and simmer over medium heat for a couple of minutes. Add in bread and spinach, stir and cover pot. When bread is soft and spongy and the spinach is wilted, throw in some cheese. Taste adding more salt or pepper if necessary. Serve with more cheese, if that's the way you wanna go.

Labels: , , , , , , ,

Sunday, January 27, 2008

diner style: all-purpose biscuits


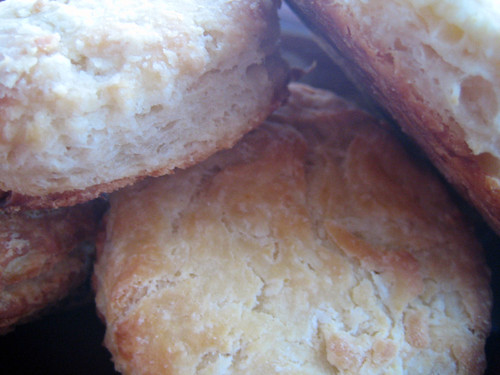
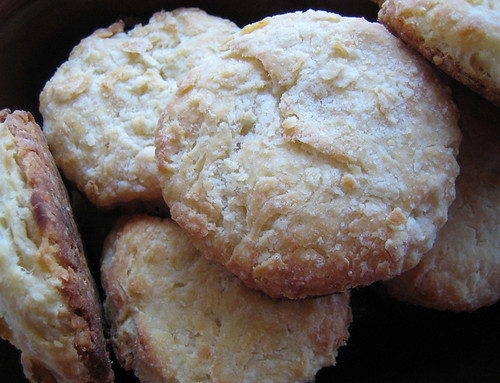
So you've been successful at making poached eggs, right? Well, hell, why not try your hand at some buttery biscuits to slide right underneath that egg? First, I should preface this entire entry by stating right off the bat that my biscuit-making chops are only a couple months old. In fact, I don't think Canadians really eat biscuits...to me, it's an American thing like chicken fried steak and well, biscuits and gravy. A biscuit is like a Southern cousin of the scone and is meant to be flaky and light and not just eaten for breakfast - my recently transplanted to North Carolina friend just told me about a place by her house that is a biscuit-only restaurant (with drive-thru, of course). When I've taken trips below the 49th parallel, I've definitely had my share of biscuit n' gravy eating and the best ones I've ever had were at the Dish in Seattle. It was high time to recreate that buttery, light perfection!


When I stumbled across a biscuit recipe from The Non-Dairy Queen it looked relatively fool-proof to a newbie like me, so I decided to give it a go. Rumor has it that Canadian flour has extra gluten (read: heavy) compared to the stuff found down South, so I'm sure these aren't authentic in the least, and these aren't as feather-light as the ones I've had in American diners. But it's a simple recipe and it's pretty damn good one at that...especially since I've played with the recipe a few times adding and substituting like I love to do. I've made this recipe with only all purpose flour and most recently a mix of white and whole wheat. Didn't matter, these biscuits still turned out delicious. I also have made this with just skim milk but then this morning ran out of most of my milk so I subbed in some plain yogurt to make up the difference and once again, the recipe wasn't worse for wear. So go ahead, try your hand at biscuit making. If you do decide to use Earth Balance, I'd suggest reducing the salt or getting rid of it entirely.


These are great smeared with blackberry jam or torn into two halves to make a great poached egg breakfast sandwich. Or give your healthy resolutions a break and stir up some gravy to go alongside. It will be our little secret.

all-purpose biscuits
1 c ap flour
1 c whole wheat flour
1 T baking powder
1/2 t salt
1/2 c unsalted butter or Earth Balance
1/2 c yogurt
1/4 c skim milk

1. Preheat oven to 450 degrees. In a large bowl, combine flours, baking powder and salt. Cut in butter until you get something resembling coarse meal.

2. In a mixing cup, combine the yogurt and milk and stir until blended. Add to the flour mixture and gently stir to combine the mix into one lump of dough. Don't over blend.

3. Dump onto floured counter top or an unfloured Silpat mat and flatten into a 3/4" thick circle. Cut out circles with biscuit butter and place on a cookie sheet. The Non Dairy Queen says to keep them touching for soft sides, but I like them crispy on the outside so every biscuit has a wide berth. Bake for 8-10 minutes or until they are slightly golden on the outside.

Labels: , ,

Tuesday, March 13, 2007

i had a beer and now i have bread!


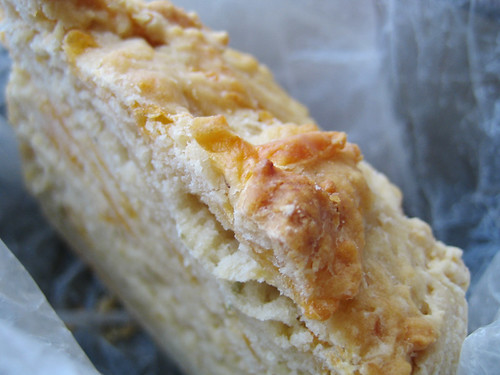
You may have read that I'm a bit antsy about yeast. I don't know where the fear comes from since my mom used yeast to make breads and cinnamon buns and even pancakes with amazing results! It's a totally unfounded fear yet it exists in my subconscious and it prevents me from going ahead and trying new things. Last year, I bought one of those dry yeast 3-packs with the full intention of baking bread. Cornelius said he was totally going to help me out and yet those 3 little packages of yeast are still unopened. They exist in my cupboard to taunt me. I will conquer my fear....just not yet. Right now, I've found a solution. I can have my bread and eat it too without even using yeast. Just crack open a can of beer, refrain from shot-gunning it and make a loaf of pretty tasty bread. Really! This certainly isn't my idea, this easy bread from beer. It comes by way of Farmgirl Fare and it's simple to make and goes perfectly with a nice hot bowlful of baked beans. It's okay, I can be a bit antsy a little bit longer. Right now, I've got some freshly baked bread to eat!

beer bread

(Recipe based from Farmgirl Fare)
3 c all-purpose flour
1 T granulated sugar
1 t salt
1 T baking powder
1 t dried rosemary
2 T parmesan cheese
1/2 c old cheddar cheese, shredded
1 can of beer

Preheat oven to 375 degrees. In a large bowl, mix together the flour, sugar, salt, baking powder, rosemary, parmesan and cheddar. Slowly stir in beer and mix just until combined. Batter will be thick. Spread in a greased 8-inch loaf pan and bake until golden brown and a toothpick stuck in the center comes out clean, about 45 minutes.

Cool in the pan on a rack for 10 minutes. Remove from pan and cool 10 more minutes. Serve warm or at room temperature.

Labels: , ,

Sunday, December 10, 2006

now, that's an order!


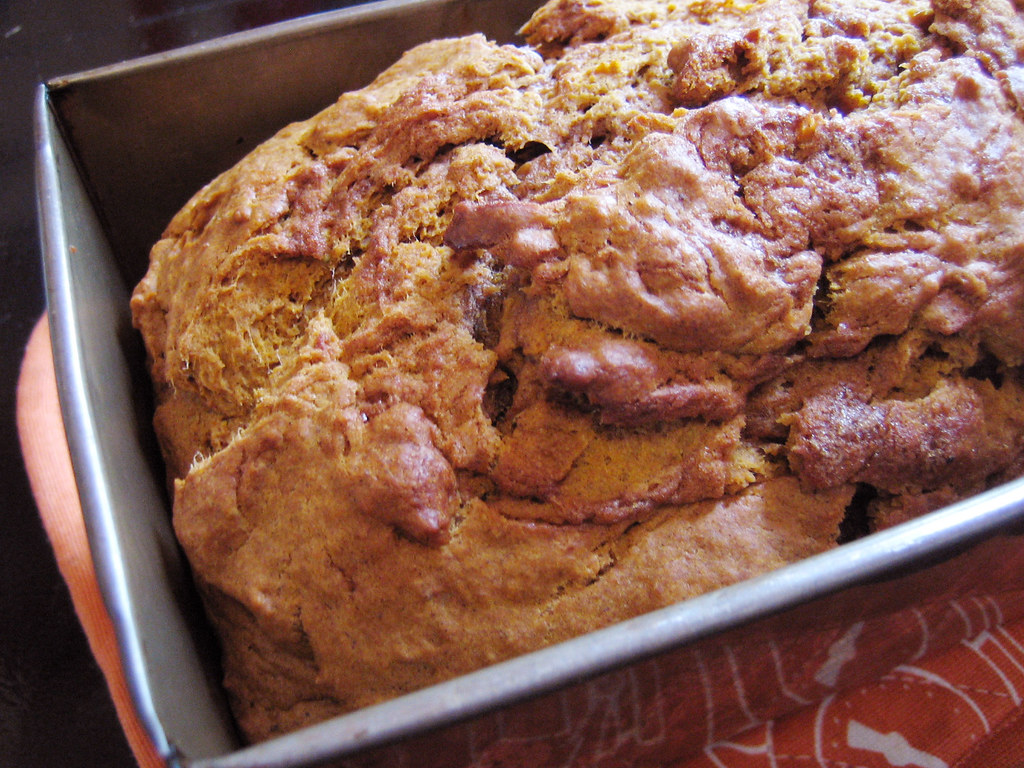
Ever since returning from my trip last week, it's been slow going in the blog-reading department. However, I made sure I got all caught up on my blogroll this morning. So many impressive recipes caught my eye, including Honey Roasted Chunky Peanut Butter Cookies from Joe at Culinary in the Desert, Soft Chewy Ginger Cookies at Kaji's Mom, and this not-so-humble Tuna Salad at Cumin & Coriander. Yummy!! But drooling onto my keyboard is one thing, getting breakfast ready was another. When lo and behold, I spotted this lovely Chai Pumpkin Bread at the always wonderful 28 Cooks. I whipped up this simple recipe and in no time my kitchen was smelling like the holidays. Now, not only do I have some delicious pumpkin bread to keep me company this afternoon, but I've got a feeling I'll be making some soup for dinner with the leftover canned pumpkin. Stay tuned!

Labels: , , ,

Tuesday, November 28, 2006

snow day


Vancouver is in the midst of a winter wonderland and I'm certainly not complaining. Snow is a rarity here in winter and although I'm favorable to the warmer temperatures we get here on the wet coast, I'm not missing all the rain. I love snow! I like how it makes everything sparkle! I like wearing mittens and sporting rosy cheeks! It's also wonderful to wear boots as something other than a fashion statement. And because Vancouverites aren't used to snow, snow days (ie. days off work/school/etc.) are just part and parcel of a little snowfall. So even though I work from home, many of my clients don't, so it's been a little quiet here in my home office, which means it's catching up time for all of my other little self-directed projects. So when nature dumps snow on my doorstep, I find that it's the perfect time to treat myself to an extended morning. Yesterday I made yogurt waffles with walnuts and caramelized bananas (the bananas were for Cornelius) and today I made scones. Mmmmm, fragrant with a heady aroma of ginger and vanilla, they were the perfect way to stretch my morning into something special. Delicious.

ginger & vanilla scones
1/2 c milk
1 egg
2 c flour
2 t baking powder
½ t salt
1/4 c cold butter, cubed
3 T white sugar
2 T crystallized ginger, diced finely
2 T chopped walnuts
2 t vanilla extract

1. Preheat oven to 425 degrees Fahrenheit.

2. Mix the milk and the egg together until frothy and then set aside. In a large bowl, blend the flour, baking powder, and salt. Add the cubes of butter and crumble the mixture through with your hands until it's blended through and you have no lumps larger than a pea. Add the sugar, walnuts and ginger and encorporate into the flour. Add in the vanilla and milk mixture, reserving about a tablespoon of the milk as a glaze for later. Mix gently with a fork.

3. Turn dough out onto a clean counter and knead it no more than 12 times. Pat dough into a round approximately 1/2 an inch thick, and cut into 8 wedges. Place on an ungreased baking sheet or a Silpat. Using a pastry brush, glaze wedges with remaining egg/milk mixture. Bake for 10-15 minutes, or until golden. Cool on a wire rack.

Labels: , , , ,

Thursday, September 28, 2006

food of the gods


Cornelius is picking up the car and soon we'll be jetting down the highway down to Seattle to see a band, eat some good food and do a bit of shopping, American-style. I love road trips...even short ones. Another thing I love is dinner parties and last night I held a small one as a send off to my two friends who will leave on Saturday by bicycle to ride to Mexico and beyond for the next 6 months. It was a wonderful evening, with lots of delicious vegan food, good red wine and lots of laughter. There's nothing more perfect than that, really.

In keeping with this short post, I'm leaving you with this very short "recipe". Really, it's not a recipe but just a simple little thing to whip up after dinner that reads as an elegant end to a meal. I love dark chocolate and I love salt. Combine the two and you have a special piece of heaven put onto a little round toast.

dark chocolate & fleur du sel toasts
Cut up a baguette into rounds, drizzle with a little bit of good olive oil, place 2 squares of dark chocolate on top and sprinkle with a bit of fleur du sel. Put into a 350 degree oven until the chocolate gets a bit melty but still retains it's shape. Remove from oven and serve. Be careful not to burn the roof of your mouth and sit back and enjoy the accolades for the best meal ever.

Labels: , , , ,

Friday, April 28, 2006

the personal is political

I have a great many cookbooks and I peruse them constantly when I'm at odds on what to cook or bake. But sometimes, I can't find exactly what I'm looking for and let's just face it, sometimes it's easier to look online. The joys of the intermanet is the huge amount of recipes available at your fingertips. It's so easy to plug into Google a few ingredients and have it return a million and four recipes back for your choosing. I love technology, especially since it makes my dinner options so vast. Food blogs are another matter altogether. They can be flippant, friendly, all-business or have something important to say. With a food blog, you not only get a recipe, but you get a backstory or a bit of history or a personal connection with the author. In a world where people are less involved in civic and community life, where we more often than not "bowl alone", it's nice to be able to create and participate in an active online community. Yes, I am talking about you, food blog. I read a whole whack of food blogs and I feel connected to how others live and eat and write about something so common to us all.

Enough with the jibbery-jab and on with the recipes. All this long long winded introduction brings me to 2 new recipes this week, both found on food blogs. The first comes from Baking Sheet and a recipe I had bookmarked for quite a while now. The other day, I went to visit with my friends who had a baby and figured that along with a few presents I should bring something edible and just a bit sweet. After all, a couple with a new baby need all the sustinence and treats that they can handle. I thought this recipe for coconut bread fit the bill and it's most perfect for breakfast toasted with a bit of butter. Yum!

bill's coconut bread (from Baking Sheet)
2 eggs
1 1/4 c milk
1 t vanilla
2 1/2 c flour
2 t baking powder
1/2 t salt
2 t cinnamon
1 c and a bit caster sugar
2 c shredded coconut
1/3 c butter, melted

Preheat oven to 350 degrees.

1. Whisk together eggs, milk and vanilla in one bowl.

2. Sift together flour, baking powder, salt, cinnamon. Stir in sugar and coconut. Make a well in the center and pour in egg mixture. Stir until just combined. Add butter and stir until just smooth, being careful not to overmix.

3. Pour into a greased and floured loaf pan and bake for 1 hour, or until tester comes out clean. Cool in tin for 10 minutes, then transfer to a wire rack.

+++

My second recipe for this post comes from one of my favorite blogs, Bunny Pie. I originally found this blog from an art site and then clicked along to find this. Updates are seem too few and far between for my tastes, but I'm sure it's just cuz I'm being greedy and I want more of the beautifully photographed pictures and vintage dishes. When Debs recently posted a recipe for a Norwegian Apple Cake, I thought it would be a perfect no-fail recipe for my mother-in-law's birthday cake. The recipe is simplicity itself with no need for oil or butter. It's got a lovely crusty exterior and a sublimely chewy interior and is perfect served with vanilla ice cream. If you want to eat cake everyday, this is the cake for you!

norwegian apple cake (from Bunny Pie)
3/4 c sugar
1/2 c flour
1/2 t salt
1 t baking powder
1 egg
1 rounded cup diced apples
1/2 c chopped walnuts
*I also added 1 t of cinnamon & a t of vanilla to great effect

preheat oven to 350 degrees.

1. Mix together the sugar, flour, salt, and baking powder.
2. Break an egg into the center of the mixture and stir together to mix well.
3. Mix in the apples and nuts and pour into a greased 8" pie pan. I used a small floured and buttered cake tin with removable sides.
4. Bake 25 to 30 minutes.

Labels: , , , , ,