Sunday, January 03, 2010

vegan-ish sandwich cookies + portland (+ big changes)

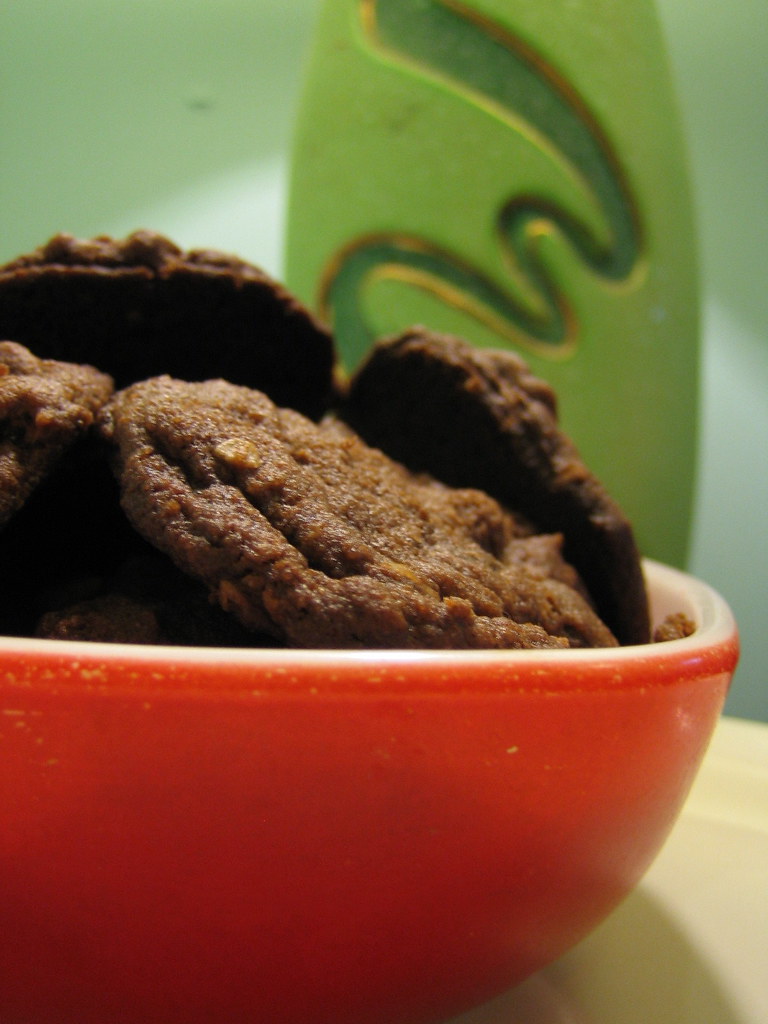
I made these cookies well before the holiday rush way back in early December. I had a friend coming over for dinner and wanted something special for dessert. I had spotted these "no-reos" a few days earlier on a new-to-me blog called The Gluttonous Vegan Loves You (the name is as adorable as the blog itself) and I knew that this was the cookie I was going to try.

I'm not really a fan of iced cookies, but I knew that my friend would love them, so I whipped up a batch. Despite the added component of making frosting, these are quite simple to make. And, the cookies taste amazing....even without the frosting! I think these cookies, plain, will be made again and again when I'm craving something sweet. While the original recipes is fully vegan, I made my frosting totally non-vegan since I didn't have any vegan cream cheeze on hand. But do what you like, vegan, vegan-ish, or made with butter and dairy, these are fine, fine cookies.

But do they taste like the real thing? They really do! The chocolate cookie is nice and dark and not too sweet and together with the vanilla filling, it's the ultimate sandwich cookie. I decided to make a chocolate version to go along with the vanilla, and the chocolate filling turned out better in terms of texture which I'm guessing is because the extra cocoa made it extra sturdy. The vanilla tasted more like an Oreo, but because I was hesitant to add too much icing sugar, it was soft which made the cookies smoosh around after each bite. Which isn't too much of a problem, you know?

Before I solicit any Portland, OR travel tips, I have some exciting blog news! You can find out more here on EverybodyLikesSandwiches.com (hint, hint!). Stay tuned for more details once things get wrapped up on the switch. Now, about Portland...we're heading down for a few days via train which excites me to no end. We're staying downtown at The Nines (got a super-dooper deal) and will be using our feets and public transit to get around. I've waxed about Portland so often, and we definitely have our favorite spots (Pine State Biscuits, Pambiche, Amnesia Brewing, Reading Frenzy, Powell's, The Tin Shed, Hedge House), but again, would love your help in discovering a few more. Food cart recommendations, cozy pubs & drinking spots, great little indie shops, etc. Leave a comment & I'll see you next week!

vegan-ish sandwich cookies
(adapted from The Gluttonous Vegan Likes You)
1 1/4 c all purpose flour
1/2 c cocoa powder
1 t baking soda
1/4 t baking powder
1/4 t salt
1 1/4 scant c sugar
1/2 c vegan margarine, melted
1/4 c canola oil
2 t almond or soy milk

filling
1/3 c vegan cream cheese (or not vegan, if you swing that way)
1/2 c - 3/4 c icing sugar
1 t vanilla
pinch of salt
1 T cocoa powder (optional)

1. Preheat oven to 350F. In a large bowl, mix together the first 6 ingredients (flour through sugar). Pour in the melted margarine and canola oil and mix it well. Stir in the milk. The mixture will be a bit crumbly, but that's just how it is. Go with it.

2. Use a teaspoon to ball up the dough, roll it into a ball and then slightly flatten it down with your palm. These spread quite a bit, so keep the cookies spread apart on your cookie sheet. Bake for 8 minutes or until the tops crack slightly, while remaining soft. Remove from oven and let sit on the cookie sheet for a few minutes before transferring to a cooling rack. Makes about 30 cookies.

3. In a medium sized bowl, combine the cream cheese with the icing sugar, salt and vanilla until the icing is smooth and of a good consistency. If it's too thick, thin it slightly with a tiny bit of milk. If it's too thin, add in more icing sugar. Divide half of the filling and add in the cocoa if you want to make 2 fillings, one chocolate.

4. When the cookies are thoroughly cool, pair up the cookies of equal sizes and spread one half with a dab of the filling. Press the cookies together so that the filling spreads out. Now, try not to eat them all at once.

Labels: , , ,

Tuesday, December 30, 2008

happy new years: glazed chocolate cake with sprinkles

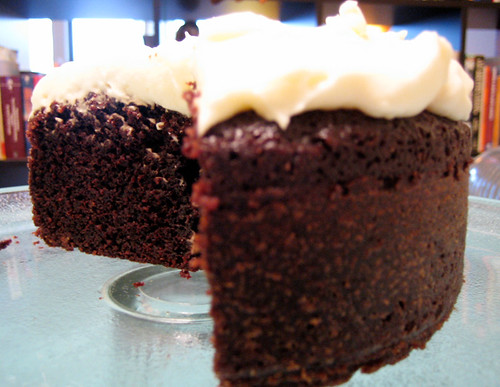
Oh, the holidays...so much going on, lots of parties, and way too many sweets! But c'mon, this rich chocolate cake is way too pretty to ignore. I spied this recipe on the Gourmet website and fell in love with the photo immediately. This cake screamed holidays and glamour and it's nice to end a holiday meal with a bit of a spectacle. I made this as our dessert on Christmas day and the cake was moist but it was the bittersweet ganache that stole the show. Be sure to use a good chocolate for the frosting...I used a dark bittersweet chocolate from Callebault and it was amazing.

A chocolate cake shouldn't be fussy and this one is simple as it is stunning. The red dotty sprinkles helps to make this cake festive and gives everyone a reason to celebrate. And have I got a reason to whoop it up a little. The CBC has listed me as one of the "best of the food blogs". Huzzah!

glazed chocolate cake with sprinkles
(adapted from Gourmet)
1
c all-purpose flour
1/3
c unsweetened cocoa powder
1
t baking soda
1/2
tn baking powder
1/4
t salt
1/2 c
unsalted butter, softened
1
c packed light brown sugar
2
large eggs at room temperature
1
t pure vanilla extract
1/2 c yogurt
1/2 c skim milk

for ganache:

1/4
c half & half cream (+ additional)
3 1/2
oz bittersweet chocolate (not more than 60% cacao if marked), finely chopped
2
ts light corn syrup
sprinkles


1. Preheat oven to 350. Butter and flour a round 9x2 cake tin or bundt pan and set aside. In a large small bowl, sift together dry ingredients (flour to salt). In a large bowl, mix together the butter and sugar until fluffy. Add in eggs, one at a time, and vanilla. Combine the milk and yogurt in a small bowl. Add flour and milk mixture alternating in batches, beginning and ending with the flour.

2. Pour batter into prepared pan. Bake until the cake pulls away from the sides of the pan, about 35 minutes. Remove from oven and cool slightly. Remove from pan and cool on wire rack.

3. While cake cools, bring the cream to a simmer in a small saucepan over medium heat. Add in chocolate and whisk until smooth. If the chocolate is too thick, add in a touch of extra cream. Stir in corn syrup and set aside to cool. Using a spatula, spread glaze over cake and decorate with sprinkles.

Labels: , , , , , ,

Wednesday, June 04, 2008

oat couture: peanut butter granola

Not one to brag, but for the past week, everything that has come out of my kitchen has been amazing. I've been cooking for every single meal and trying new things like making jam and thin crust pizza–and everything has turned out great. It's a good feeling. And it all started with this granola recipe.

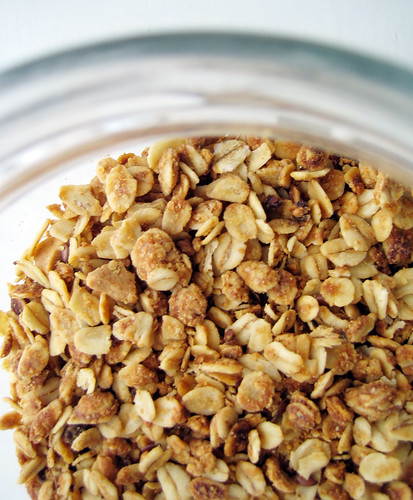
I've been wanting to make a peanut butter granola for a while now and I'm glad I finally gave it a try. It was so successful that I've made it twice in a row...even converting a friend who says that she hates granola! It's that good. In my first batch I decided to throw in a bit of chocolate after becoming inspired by Molly's recipe, but when I made it again without the chocolate, the granola didn't miss a thing. Chocolate or not, it's your call.

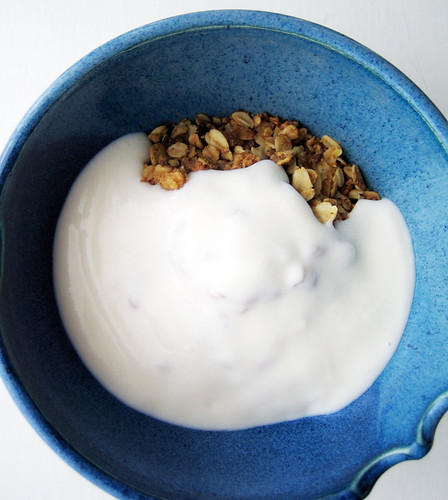
Another tip...when I first made this, the peanut butter jar was new, so the peanut butter near the top (despite all my stirrings) was definitely of the oilier variety and got more liquidy when heated. When I made it again, the peanut butter jar was close to empty, so even melting it was a bit difficult. I could have added more oil to compensate, but I decided to just use a little bit of elbow grease instead and used my hands to break-up and distribute all of that peanut buttery goodness all over those oats. It was a good move. This granola has a nice peanut butter flavour and is just a bit sweet. It's perfect over plain yogurt topped with berries or with a dollop of homemade jam.

This morning another of my posts went up on the Food Network Canada blog. This one is my interview with celebrity chef, Anna Olson. She was amazingly personable, friendly and nice. A dream interview subject, for reals. Take a peek!

More granola recipes from my archives:
Cocoa-coconut granola
No-fail granola
Vanilla-almond granola

peanut butter granola
2 1/2 c oats
1/2 c wheat germ
1 t vanilla extract
2 T canola oil
3 T natural peanut butter
2 T brown sugar
3 T chopped chocolate (optional)

In a large bowl, mix oats and wheat germ together. Set aside. In a small saucepan, heat up oil, peanut butter, vanilla and brown sugar over medium high heat and let it all get melty together. Pour hot mixture over oats and stir well, so that everything is covered. You may have to use your hands if your peanut butter mixture is extra stiff. Add chocolate, if using, and mix well. Spread mixture on a baking sheet or large glass baking pan and toast in a 325 degree oven for 20-30 minutes, checking on it and stirring it occasionally until mixture is dry. When cool, store in a tightly lidded container.

Labels: , , , ,

Friday, May 16, 2008

chocolate for breakfast: cocoa-coconut granola

Well, we made it back from our 10 days on the road no worse for wear. Our trip was amazing and I still have a ton more photos to upload onto Flickr. The painted hills in Oregon were beautiful, we had a great warm night of camping in the Washington Okanogan, we drank delicious beer at the Silver Moon Brewery in Bend (and also had some really good Hawaiian beer & my birthday dinner at the Kona Mix Plate)...and then there was Portland! Oh boy, do I love that city. We ate at Pine State Biscuits twice for breakfast, thought we might win at trivia at the Basement Pub (we didn't), played many games of darts at various locales, and drank my favorite beer at Amensia Brewing (their Copacetic IPA, if you must know).

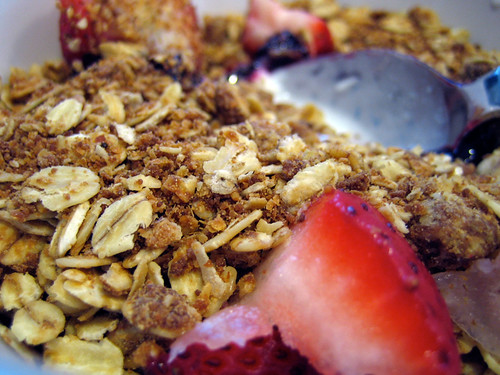
But now I'm back home, the weather in Vancouver is not only sunny but HOT. Hooray! I made this granola a few weeks ago, but like all granola, once it's tightly put away in a cupboard it can last ages. And oh boy, it was the perfect breakfast treat to make a Vancouver homecoming breakfast truly worthwhile. I took Nigella's recipe for cocoa granola and omitted the peanuts (but golly, that sounds good too!) and added coconut and almonds instead. So far I've eaten it with strawberries while the husband enjoyed his with bananas...but the best was scooping up the deliciousness with Granny Smith apple slices. No spoon required! It also helped that I was eating my granola with my favorite store-bought yogurt, Liberté's coconut yogurt. It seriously made the chocolate and coconut in the granola just a bit more special.

While you might think this is a decadent breakfast (and it is), it's also low fat. There's applesauce instead of a lot of oil and if you don't have applesauce on hand, it's really easy to whip some up. This granola was crunchy, sweet (but not tooth-achingly so) and if you wanted to make this all vegan, just sub in some more agave or brown rice syrup to replace the honey. I'll definitely be making this again.

And if you want a bit more reading, why not check out my latest post over at the Food Network Canada blog, Bazaar. It's a post about my favorite Vietnamese sandwich which is found in Vancouver's Chinatown for a mere $3.15. And you can find out just how mis-named this blog really is...do I really like sandwiches? Find out now!

cocoa-coconut granola
1/4 c cocoa
4 1/2 c rolled oats
1 c shredded coconut
1/2 c sunflower seeds
1 c roughly chopped almonds
1 t kosher salt
2 t ground cinnamon
large pinch each nutmeg & cardamom
3/4 c brown sugar
1/3 c agave nectar
1/4 c honey
3/4 c applesauce
2 T olive oil

Preheat oven to 300. In a large bowl, combine all the dry ingredients together. In a small saucepan, heat up agave nectar, honey, apple sauce and olive oil just until extra runny and then pour over dry ingredients. Mix until everything has been coated with the wet sticky stuff. Pour into a large glass baking dish or several walled cookie sheets and place in the oven, turning over occasionally so that everything dries out evenly. After 40 minutes to an hour, remove from oven and cool on counter. Store in a tight lidded container.

Labels: , , , , , , , ,

Sunday, April 27, 2008

put the crack in cracker: chocolate-covered caramel crunch

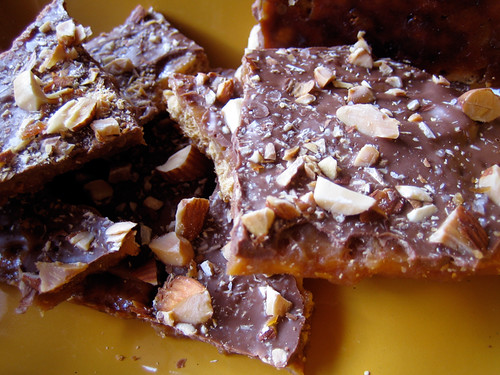
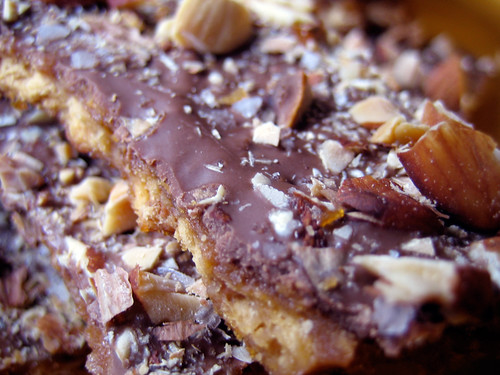
What more can be said about this super addictive snack (crack)? It's been written in about a hundred different places and it all started here. It's seriously good. Insanely addictive. Shall I go on?

The crazy thing about this candy is that it uses Matzoh crackers. For reals. The only Matzoh I had on hand was the ground up meal (perfect for making matzoh balls), but not so good for making candy. So I turned to the next best thing in my cupboards: Stoned Wheat Thins. I actually had to run to my cupboards to double check this and yes, they are indeed, labeled "stoned". The drug-addled theme of this post is not lost on me!

These are easy to make...in fact, too easy to make. No candy thermometer needed. Make a batch, share them with your friends and then pass along the recipe because they will ask for it. They taste like a homemade Skor bar and you'll find yourself going back for "just one more piece". Want to make this vegan? Get yourself some vegan crackers, some Earth Balance and your favorite vegan chocolate. Get hooked today!

chocolate-covered caramel crunch
enough crackers to line a baking sheet
1 c unsalted butter, cut into chunks
1 c packed light brown sugar
big pinch of fleur du sel (optional)
1/2 t vanilla extract
1 c semisweet chocolate chips
1 c toasted coarsely chopped almonds

1. Line baking sheet with foil, making sure you have enough to create a tall rim around the pan. Line pan with crackers, breaking up pieces if you have to, to fill in any cracks. Preheat the oven to 375F.

2. In a medium sized saucepan, melt the butter and brown sugar together over medium heat. Stir frequently until the mixture begins to boil. Boil for 3 minutes, stirring constantly. Remove from heat and add in vanilla. If you are using unsalted crackers, add in salt. Pour caramel over crackers and spread evenly with a silicone spatula.

3. Put the baking sheet in the oven, reducing heat to 350F. Bake for 15 minutes, watching carefully that the caramel does not burn.

4. Remove from heat and cover with chocolate chips. Let stand 5 minutes until chocolate melts and then spread evenly with a spatula. Sprinkle with toasted almonds and fleur du sel or whatever toppings you desire. Let cool completely and then break into pieces, storing in an airtight container.

Labels: , , , , , ,

Tuesday, March 04, 2008

balls! balls! balls! buckeyes and snowballs for all!


My friend just had her birthday a little while ago and because I got sick and then she got sick, I haven't gotten around to passing along her gifts yet. Tonight the hand-off will take place, barring any unforseen sicknesses! After wondering what to give as a special vegan birthday treat, I decided to make 2 different kinds of uber-yummy balls.

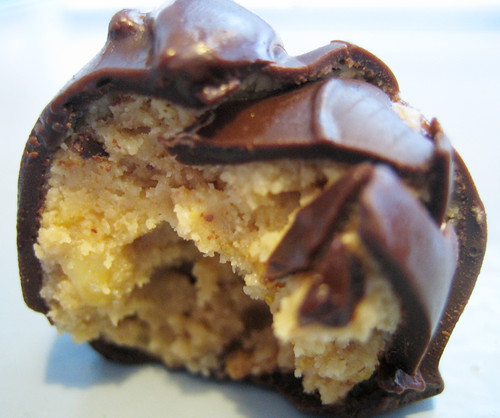
Buckeyes are an insanely addictive peanut butter and chocolate confection that I had seen on my friend's flickr stream. When I googled for the recipe, a ton of variations came up, so I decided to forge ahead and give it a go, cutting back the amount of sugar and butter, along with making it vegan-friendly. Most recipes call for rice krispies but I only had Vector (which is my favorite store-bought cereal because of the cinnamon and crunch, by the way) and it worked out really really well. If I make these again (and Cornelius totally wants me to), I'll add in even more cereal just for more of a crunch. Beware, besides being super addictive, they are also kinda melty, so keep in the fridge and don't eat outside in the hot sun or you'll be a tasty delicious mess.


The next kind of vegan ball (hee hee), is a recipe I found tucked into an old thrifted vintage cookbook. The kind of found hand-written note that someone used as a bookmark. I love it for that reason alone! Besides turning this recipe into one a vegan could love, I also cut the recipe in half because it was a gift and I didn't want to end up eating the leftovers all myself! Feel free to double this recipe as it was meant to be. These aren't super sweet which is nice but you can definitely use sweetened coconut if you want a sweeter flavour. I added in some chopped almonds, but any kind of nut or dried fruit (or not!) would do.

peanut butter buckeyes
1/4 c Earth Balance margarine
1 3/4 c natural crunchy peanut butter
1 c powdered sugar
1 c of crispy cereal (I used Vector)
1 c semi sweet chocolate

1. Get your margarine and peanut butter to room temperature and combine them, adding in the powdered sugar. Stir well. Crush cereal with your hands (oh the power!) and mix them in too. If you aren't using a flake cereal, you may not need to crush (poor you). Roll mixture into balls and freeze.

2. Melt chocolate in microwave and roll each ball in the melted chocolate and place on a cookie sheet. Freeze until firm. Store in sealed container in the fridge.

coconut snowballs

1/2 c sugar
1/4 c Earth Balance margarine
1 t vanilla
1/4 c cocoa
1/4 c almond milk
1/2 c shredded coconut (plus more for snowy coating)
1/4 c chopped almonds
1 1/2 c oats

1. In a medium sized pot, combine the sugar, margarine, vanilla, cocoa and almond milk over medium-high heat until everything is melted and comes to a simmering boil. Let boil for 3 minutes and remove from heat.

2. Add in the coconut, almonds and oats and stir well. If it's a bit too wet, add in a bit more coconut. When cooled slightly, take a tablespoon of the mixture and roll into a ball.

3. Add coconut to a plate and roll ball into it...creating the look of a "snowball". Store balls in a sealed container and refrigerate.

Labels: , , , , ,

Thursday, January 03, 2008

life is better with cake & beer: red ale & chocolate cake


When I first spotted Nigella's recipe for Guinness cake I was excited. Surely this would be the cake to rival all cakes. But I kept putting it aside since I'm an IPA drinker and my husband will drink whatever is cheap (ie. pils). We just never have Guinness in the house. But then after a Boxing Day gathering, someone left a Chocolate Stout in our fridge. It was then I decided that I'd give that Nigella recipe a whirl as Cornelius' birthday cake. But then, that stout was taken to a friend's house for New Years and it was out of our life for good. So when yesterday rolled around, the illustrious day of my husband's birth, all I had in my fridge was some deep red Maple Cream Ale from a local brewer. Maple Cream had to do and I whipped up the cake lickety-split!

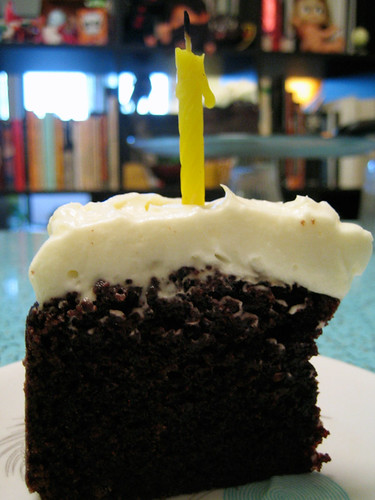
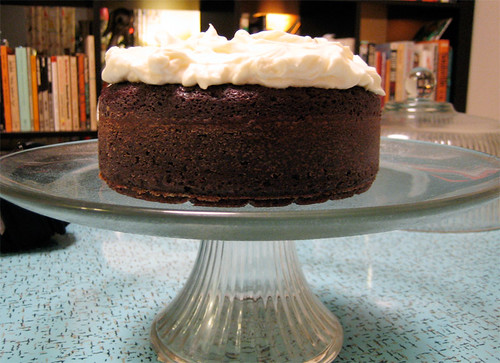
This recipe makes a lovely cake because it's tasty and it's one of those one-pot wonders. Dump everything into a pot and it turns out awesome. Yes, the cake is super delicious, uber-moist (I think Nigella sighs over the word "damp") and looked so frothy topped with a sturdy cream cheese-whipped cream head.

I've never really followed a Nigella Lawson recipe too closely. I've made her eggplant Involtini and a couple salad recipes, but I've never tackled a baking recipe. All of those grams and millilitres frighten even my metric ass! But I did purchase a kitchen scale last summer and decided to put it to use yesterday. Measuring out the ingredients was very satisfying and made me feel like the pro I'm not. The only thing that was a bit vague in her recipe was her directions for frosting. I don't think she mentions to whip the cream, but I did. I wanted to be sure that the frosting that topped this showpiece would stand proud and after a stiff beating, it did. I had achieved frosting perfection.


Some modifications, of course. Besides the beer switcheroo, I used yogurt instead of sour cream. I also didn't use the measurements for the frosting listed below. I used what I had....a 250 g tub of cream cheese, half of a large container of heavy cream and enough sugar to make it sweet but not too sweet. I also threw in some vanilla just to add a bit more flavour. For the cake pan, Nigella doesn't specify what size, but I used 1 kind of small and 1 medium sized spring form pan. They filled up nicely and having 2 different sizes is great because, Cornelius and I can share the small one and the larger one can be transported to a friend's house for a celebration there! 2 cakes for the price of 1!


red ale & chocolate cake
250 ml maple cream ale (or Guinness or another stout or deep coloured ale)
250 g unsalted butter, cut into cubes
75 g cocoa
400 g white sugar
142 ml yogurt
2 eggs
1 T vanilla extract
275 g flour
2 1/2 t baking soda

Frosting:
300 g cream cheese
150 g icing sugar
1 t vanilla
125 ml heavy cream

1. In a large pot, melt the butter in the beer. When it's all good and melted, add in the sugar and sift in the cocoa. Remove from head and let cool for a couple of minutes. In a small bowl, mix together the yogurt and eggs and vanilla and then dump into beer pot. Mix. Add in flour and baking soda, whisking well until combined.

2. Butter and flour a round spring form pan and pour in batter. Place in a preheated 350 degree oven for about 40 minutes or so. The size of pan you use will determine the baking time. Let cake cool for a bit before removing the spring form pan. Cool completely on a wire rack.

3. Combine cream cheese, vanilla, and icing sugar in one bowl. In a separate bowl, whip cream until stiff. Gently add the whipped cream to the cream cheese mixture and whip lightly until combined. Gob on frosting to the top of the cake. It should look like beer head so don't get fancy. Stick a candle in it, raise a glass and sing a song!

Labels: , , , , , , , ,

Sunday, December 23, 2007

jingle bells and chocolate shortbread cookies


I think I'm all ready for Christmas. Phew! The only thing I have left to do is our dessert for tomorrow's family dinner and making tonight's cozy supper for two. Every Christmas Eve, Cornelius and I relax, drink boozy cocktails, watch movies and play games. Our bar is stocked, we've got my favorite Christmas movie ever, The Shop Around the Corner, and a bunch of board games all lined up. I was thinking I might make up some moules et frites for this evening, but decided to try another Flemish specialty, a Belgium-beer braised beef stew instead. I'll let you know how things turn out.

But if you are still in the last minute throes of a baking frenzy, I did make a very simple and super delicious holiday cookie this past week that I'm eager to share. These shortbread cookies are chocolately, buttery and easy to make vegan (if that's what you're into). For me, these cookies are pretty hard to resist and I keep sneaking into the cookie tin to try just one more. Even snacking on them straight from the freezer makes them doubly enjoyable!


Enjoy and happy holidays!!

chocolate shortbread cookies
1 c unsalted butter, softened (or use Earth Balance margarine for a vegan version)
2/3 c icing sugar
1 t vanilla
1 1/2 c all purpose flour
1/4 c cocoa
1/2 t kosher salt

1. Blend together the butter, sugar and vanilla in a large mixing bowl.

2. In a separate bowl, sift together the flour and cocoa. Mix in the salt. Add this mixture to the butter and sugar and combine until blended. Wrap dough in plastic wrap and refrigerate for 1 hour.

3. Preheat oven to 275. Roll out dough to 1/8" thickness and cut out with small circle-shaped cookie cutter. Bake for 17-20 minutes and cool on a wire rack.

Labels: , , ,

Monday, November 26, 2007

baking under the gun: chocolate thumbprint cookies


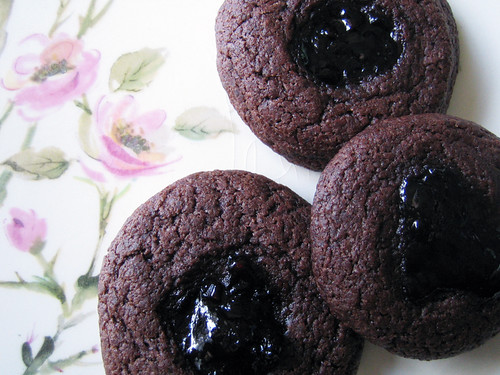
This past weekend was pretty wonderful. On Saturday, Cornelius and I headed out early to run some errands and then walked downtown to the Vancouver Art Gallery where we saw some amazing videos by Mark Lewis and great photographs by Roy Arden and others. It wasn't until we were walking home in the darkness that I realized that I was having a couple friends over that night. Oops!! I decided to make cookies so I needed something that could go from concept to production in half an hour! So I flipped through Vegan with a Vengeance and found a recipe for chocolate thumbprint cookies. I've never made or have ever eaten a thumbprint cookie before, but the recipe looked simple enough and I got right to it. I didn't have the soy milk the recipe called for, but I did have some almond milk, so I used that instead. If you don't want to go the vegan route, go ahead and add dairy.
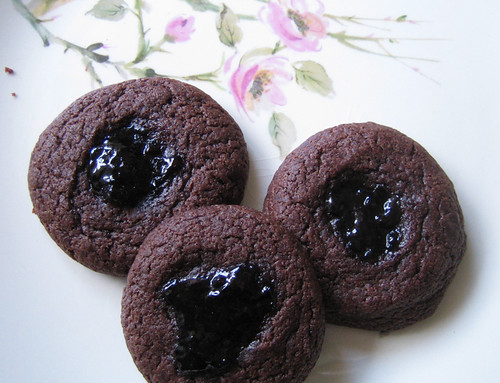
Despite having to sift the flour and cocoa (I never sift!) and pull out the cookies in mid-bake and add the jam, I was able to reach my 30 minute deadline! By the time my friends arrived at 8 pm, the apartment was filled with the heady scent of chocolate and we didn't waste much time digging in. These cookies are delicious! They are super fudgy and have the perfect crisp-chewy texture that I love. Plus, they look extra special with that dollop of jam in the centre. I used blackberry jam since it was what I had on hand, but the cookbook suggests apricot or raspberry.

chocolate thumbprint cookies
1 c all-purpose flour
1/3 c cocoa
1/4 t salt
1/4 t baking soda
1/2 c canola oil
1/3 c almond milk
1 t vanilla extract
1/2 t almond extract
2/3 c sugar
6 t jam

1. Preheat oven to 350. Sift together flour, cocoa, salt and baking soda.

2. In a large bowl, mix together all the wet ingredients (not the jam) plus the sugar. Add the dry to the wet and incorporate well.

3. Roll 1 tablespoon of dough into a ball and press into a disc, place on cookie sheet. Bake cookies for 5 minutes and remove from oven. Press your thumb into each cookie to make an indent and then fill with 1/4 teaspoon of jam into each indendation. If you can't handle the heat, use the back of a melon baller instead of your thumb. Bake for another 6 minutes. Remove from oven and let sit for 2 minutes before transfering to a rack to cool.

Labels: , , , ,

Thursday, July 19, 2007

snackin' cake


As a kid, I used to hate the word "snack". I don't know what it was, but it always made me scowl and cringe with embarassment. Maybe because everyone who said "snack" ended up sounding like a big ol' whiner ("snnnaaaaaaaaaaaack") that it totally drove me up the wall. But times change and pretty much everything about "snack" just seems right. It's true that I love it for it's by-gone day notions...somehow it conjures up family rec rooms and wood paneling and the colours avocado and orange. Snack time and snack break and even "Snackin' Cake" (a commercial cake mix) totally makes me think of being a kid in the '70s.

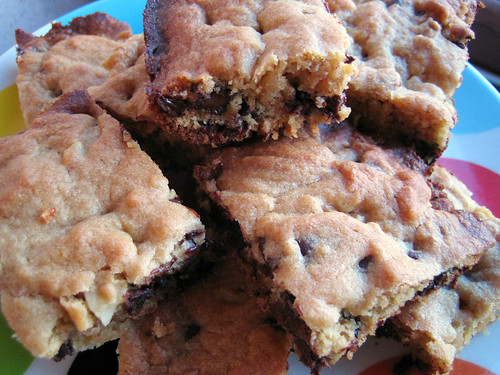
Earlier this week, I was on a snack mission. I wanted something sweet (but not overly so) and easy to make with no muss or fuss. This square is very similar to a brownie in texture, so I guess this is what could be termed a "blondie"? It's dense and chewy and the edges got a bit crispy which is just how I like 'em. Cornelius couldn't get enough of them! And for my snack quota? Totally fulfilled.

chocolate chip walnut squares
1 c brown sugar (not packed)
1/4 c butter, softened
1 egg
1 t vanilla
1 1/4 c flour
1/2 t baking powder
1/4 t salt
1/2 c chocolate chips
1/4 c walnut pieces, chopped

1. In a large mixing bowl, combine sugar, butter, egg and vanilla until smooth. Add in flour, baking powder and salt and beat until combined. Add in chocolate chips and walnuts.

2. Grease up a square baking pan and add batter to the pan. Smooth out tops and bake in a 350 degree oven for 25 minutes or until the top is golden brown.

Labels: , , , , , ,

Thursday, December 21, 2006

have a boozy christmas


All of my Christmas shopping has been done and I just finished my last holiday sweet this evening. Phew! I love giving away pretty containers filled with homemade treats during the holidays and this year's bounty is pretty impressive. I've made a batch of pretty iced Ginger Gems, some white chocolate candy cane bark, plenty of dark chocolate salted mixed nut bark, Orangette's building blocks (with salted mixed nuts, raisins, candied ginger & dried cranberries) and my yummy fleur de sel caramels. But I felt something was missing so I dug into my bag of tricks and came up with rum balls!

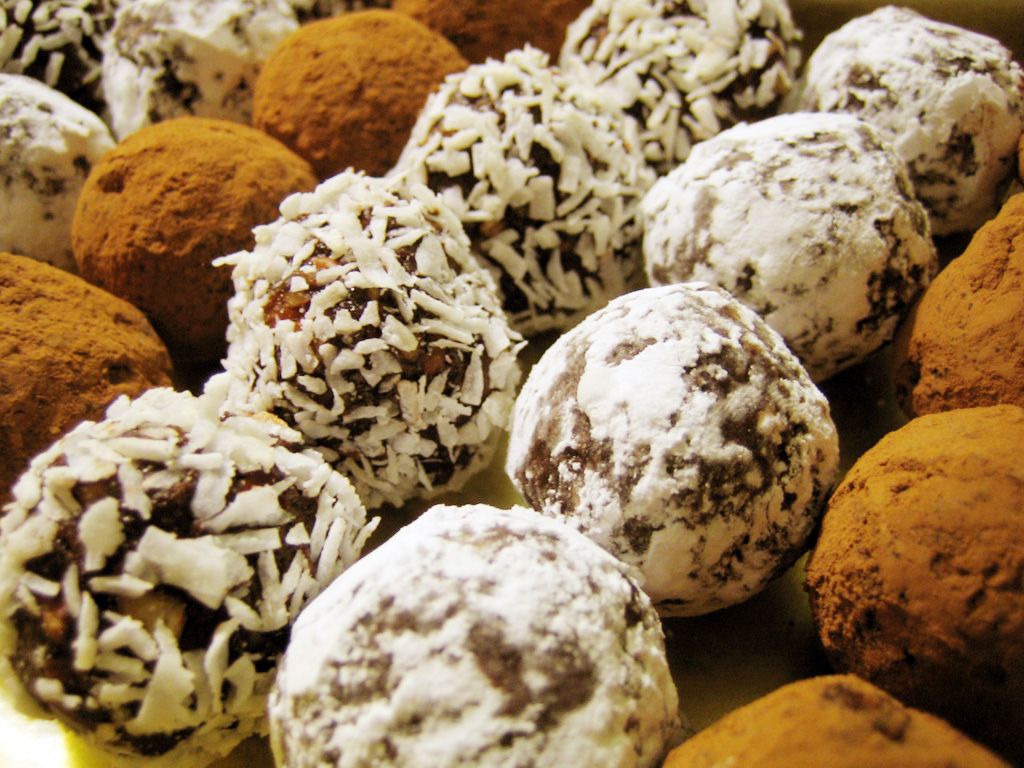
I'm totally new to the world of rum balls...a recent convert so to speak. One afternoon during a long walk on Commercial Drive (a street known for it's hippies, Italian community and local food spots), Cornelius put me up to a rum ball challenge. We stopped off at 3 different bakeries and tried rum balls at all 3 just so that we could figure out which bakery made the best one. So you better trust that even though I'm new to the rum ball existance, I'm certainly no slacker when it comes to determining what makes a great rum ball. And these, my friends, are great rum balls! A great holiday cookie indeed. Since these are no-bake cookies, the rum flavour doesn't burn off and they've got enough of a kick to keep a smile on your face during whatever holiday stress you encounter.

I don't have a food processor, so I chopped all the pecans by hand. This works really well for this recipe because a nice nutty texture is best here and you don't want to end up with a messy paste of finely ground nuts. If you don't have chocolate cookies, give gingersnaps or vanilla cookies a try!

rum balls
1 1/2 c pecans
1 1/4 c chocolate wafer cookies (or gingersnaps or vanilla cookies)
1/2 c powdered sugar
1/4 t cinnamon
2 T cocoa powder
2 T corn syrup
1/4 c amber rum

+ powdered sugar, grated coconut and sweetened cocoa powder

1. Toast the pecans in a 350 degree oven until fragrant (about 10 minutes). Let cool and then chop finely. While pecans are toasting, crush the cookies until fine.

2. In a large bowl, combine crushed pecans, crushed cookies, powdered sugar, cinnamon, and cocoa and stir until well mixed. Add in the rum and corn syrup and mix well. Chill for at least 1 hour.

3. Roll 1 teaspoon of the mixture into balls and roll in your choice of powdered sugar, grated coconut or cocoa powder.

Makes 28 balls...so go ahead and double the recipe!

Labels: , , , , ,

Thursday, September 28, 2006

food of the gods


Cornelius is picking up the car and soon we'll be jetting down the highway down to Seattle to see a band, eat some good food and do a bit of shopping, American-style. I love road trips...even short ones. Another thing I love is dinner parties and last night I held a small one as a send off to my two friends who will leave on Saturday by bicycle to ride to Mexico and beyond for the next 6 months. It was a wonderful evening, with lots of delicious vegan food, good red wine and lots of laughter. There's nothing more perfect than that, really.

In keeping with this short post, I'm leaving you with this very short "recipe". Really, it's not a recipe but just a simple little thing to whip up after dinner that reads as an elegant end to a meal. I love dark chocolate and I love salt. Combine the two and you have a special piece of heaven put onto a little round toast.

dark chocolate & fleur du sel toasts
Cut up a baguette into rounds, drizzle with a little bit of good olive oil, place 2 squares of dark chocolate on top and sprinkle with a bit of fleur du sel. Put into a 350 degree oven until the chocolate gets a bit melty but still retains it's shape. Remove from oven and serve. Be careful not to burn the roof of your mouth and sit back and enjoy the accolades for the best meal ever.

Labels: , , , ,

Saturday, September 02, 2006

wait, there's green in my muffin!

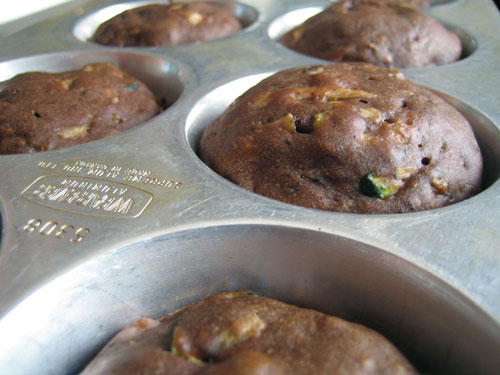
The other night I discovered a new food blog, Pinch My Salt. It's filled with lovely photographs and beautiful looking recipes. And when I spotted the recipe for Chocolate Zucchini Muffins, I knew it would be the perfect recipe to start off the long Labour Day weekend. These muffins use applesauce instead of a lot of oil and I definitely liked the sound of a low-fat treat. I had a little bit of applesauce in the fridge, but I quickly made some more out of 2 very large and truthfully, rather unappealing Granny Smith apples. Here's my very simple recipe for applesauce.

applesauce
2 large apples, diced or sliced thinly
1/4 c of water or more
1 t cinnamon

1. Combine all three ingredients into a medium sized pot. Turn heat to medium and cover. Stir occassionally, adding more water if needed. About 20 minutes later, you should have applesauce! You can blend it or mash it with a fork to acheive a fine purreed consistency. Or enjoy it a bit chunky. Makes about 3 cups.

Cornelius is pretty much enamoured with these muffins...the only thing he would have changed to improve them slightly is to add mashed bananas instead of the applesauce. I'd have to agree.

chocolate zucchini muffins
(adapted from Pinch My Salt)
1/4 c sugar
3 T vegetable oil
2 large eggs
1 c applesauce or mushed bananas
2 c all-purpose flour
2 T unsweetened cocoa
1 1/4 t baking soda
1 t. ground cinnamon
1/4 t salt
1 1/2 c finely shredded zucchini
1/2 c semisweet chocolate chips
cooking spray

1. Preheat oven to 350.

2. In a large bowl, combine the sugar, oil and eggs until pale and creamy. Add in the fruit puree and mix well.

3. In another bowl, combine the flour, cocoa, baking soda, cinnamon and salt. Add this dry mixture to the wet ingredients, stirring until just combined. Add in the zucchini and chocolate chips and mix well.

4. Drop batter into muffins tins sprayed with oil. Fill about 3/4 full. Bake for about 20 minutes or until done. Makes about 18 muffins.

Labels: , , ,

Tuesday, June 27, 2006

let's celebrate

This past weekend was our very first wedding anniversary and I don't think there is any better match for me than Cornelius -- he's my most perfect fella. Last June 25th, we tied the knot in a small little ceremony with all of our friends and family present (well, minus my dad who was too afraid to fly across country). The ceremony and reception was held at an indie gallery/diy workspace called Blim and it was a truely d.i.y. affair, with lots of homemade food and cake, dancing and way too much beer. My dress was handmade out of a set of vintage drapes and I even embroidered on a leaf and flower pattern on the skirt out of colourful buttons and left over fabric. Of course, Cornelius looked handsome in his pink shirt and grey suit found in a Seattle vintage shop. The day was lovely and perfect and way better than anything we could have dreamed up.

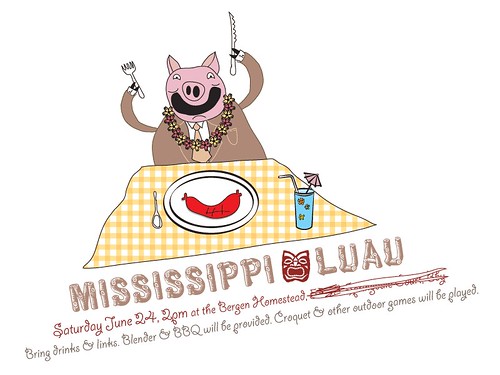
So when the date for our anniversary came around this year, we figured what better way to celebrate than to throw a party....a Mississippi Luau, in fact! We hustled around picking up decorations and groceries and lots of liquor (for the pina coladas and mint julips, dontcha know) and set it all up at Cornelius' (vacationing) parents house in the suburban wilds of Burnaby. Yes, we did ask permission. On Saturday, friends gathered and games of croquet and bocci ball were played and lots of food was grilled and eaten. A most perfect anniversary celebration, I think.

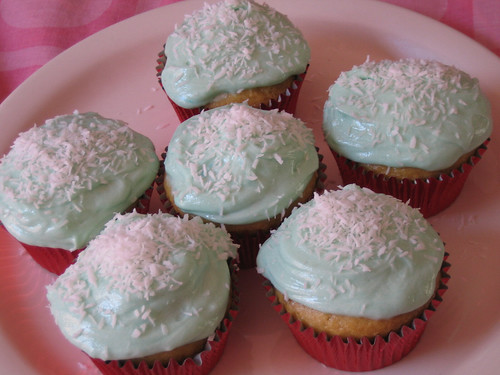
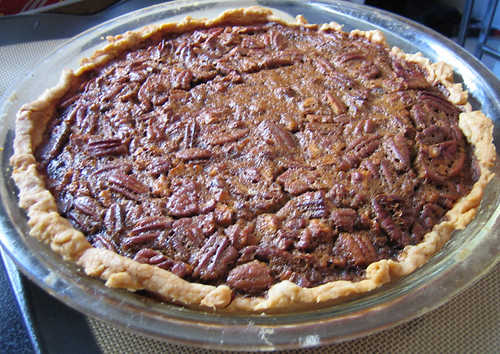
Out of all the food at the party, I was especially proud of my two desserts, the blue hawaii coconut cupcakes and the Chocolate/Bourbon Pecan Pie. I made these vegan cupcakes awhile ago but the pie was a first and very successful. I did run out of corn syrup and I substituted 1/4 cup of maple syrup which I wouldn't recommend...unless you leave out the bourbon. Just too many competing tastes! Just stick to the recipe and you'll do fine.

chocolate bourbon pecan pie
(adapted from epicurious.com)
1/2 c sugar
1/4 c butter, room temperature
1 T flour
3/4 c corn syrup
1/4 c bourbon
1 t vanilla extract
3 large eggs
1 c chopped pecans
1/2 c semisweet chocolate chips
1 pastry crust (cold), rolled out and placed in a pie plate

1. Preheat oven to 375°F. Line pie crust with foil. Fill with dried beans or pie weights. Bake until crust edges begin to brown and crust is set, about 17 minutes. Remove foil and beans. Bake until golden brown, pressing with back of fork if crust bubbles, about 5 minutes longer. Transfer pie crust to rack. Maintain oven temperature. If your pie crust is storebought, I'd just skip this step and put the filling right into the frozen pie crust.

2. Beat sugar and butter in medium bowl until smooth; beat in flour. Gradually beat in corn syrup, then bourbon and vanilla. Mix in eggs, then chopped pecans. Sprinkle chocolate chips over bottom of crust. Pour filling into crust.

3. Bake pie until filling is puffed around edges and just set in center, covering edge of crust if browning too quickly, about 45 minutes. Transfer pie to rack and cool completely. (Can be prepared 1 day ahead. Cover and refrigerate.)

Labels: , , ,

Sunday, June 11, 2006

breakfast can be this good.

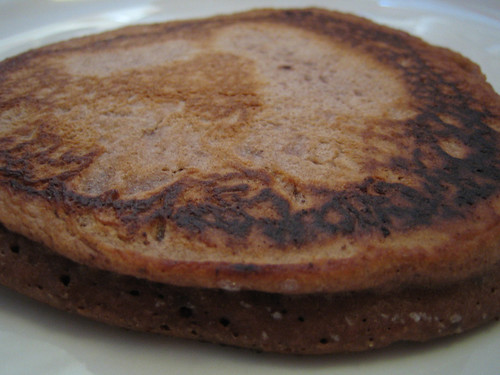
I love weekend mornings. They can be leisurely and relaxing and everything just seems better with a second cup of strong coffee. A short stack of pancakes also keeps that smile on your face just a bit longer too. A fluffy & almost ethereal short stack of spicy chocolate pancakes? Well, I think you've got the makings for a perfect day!

Don't worry, these aren't sweet pancakes, so feel free to add liberal amounts of maple syrup to your pancakes! A touch of sweetened whipped cream certainly wouldn't be out of line, either.

cinnamon chocolate pancakes
1 c flour
1 t baking powder
1 T sugar
1/4 t salt
3 T cocoa
1 t cinnamon
1/2 c milk
1/2 c vanilla yogurt
1 egg
1 T melted butter

1. In a large batter bowl, mix together the first six ingredients until well incorporated.

2. In a large measuring cup, mix together the last 4 ingredients. Add the wet ingredients into the dry and lightly mix together with a fork. The batter should still be a bit lumpy and you don't want to over mix.

3. Cook on a hot, lightly oiled griddle, using about 1/4 cup of batter for each pancake. Cook until bubbles begin to form and the pancake is slightly brown on one side and around the edges; flip.

Makes about 4 fluffy pancakes. Serve with maple syrup.

Labels: , , ,

Friday, March 10, 2006

can't stop, won't stop

I can't stop snacking on these cookies! Usually, I'm not much into double chocolate cookies, but these are just too good and I should have doubled the recipe. They are easy to make and twelve cookies the recipe makes just isn't enough. Make them now and send me your gifts of thanks after you've licked off all the crumbs.

double chocolate oatmeal cookies
3/4 c flour
1/4 c cocoa powder
1/2 t baking soda
1/4 t salt
1/2 c butter, softened (or use a vegan margerine to make these cookies fully vegan)
1/2 c sugar
1/2 t vanilla extract
2 T oats (I used quick oats, but slow oats would work just as well)
1/4 c semisweet chocolate chips

1. Preheat oven to 350°F. In a medium bowl, sift together the first 4 ingredients. In a seperate bowl (or use your mixer), beat butter, sugar and vanilla until fluffy and well blended. Slowly add flour mixture until combined. Mix in oats and chocolate chips.

2. On a prepared cookie sheet (I covered mine with silpat), use a tablespoon to drop balls of dough onto the sheet, about 2 inches apart. Slightly flatten tops with fingers.

3. Bake cookies until center is slightly firm , about 14 minutes. Cool on sheet.

* It really is best to let these cookies cool on the sheet because when they are warm they are very crumbly and prone to break in half.

Labels: , , , , ,

Thursday, December 15, 2005

minty fresh

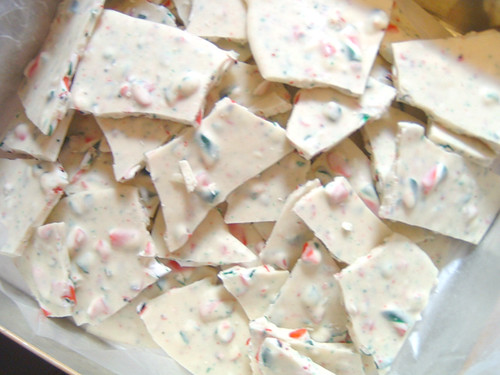
What's the easiest thing to make for the holidays? Candy cane chocolate bark! Two ingredients, chocolate and candy canes. What could be simpler? Not much.

candy cane chocolate bark

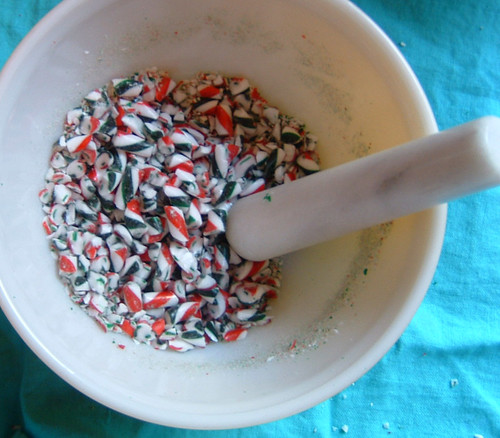
1. Crush 1 package of candy canes (12 regular sized ones will do). How you crush them is a matter of preference. I've tried using a heavy duty freezer bag and a hammer but my favorite method is using a mortar & pestle and pent-up fury. Gets the job done every time!

2. Get your double boiler ready. When the water is boiling, add 500 grams of good chocolate to the double boiler and melt on low heat, stirring constantly until everything is nice and melty. The choice of chocolate is yours. I like using white Belgium chocolate cuz it looks extra pretty and festive.

3. When the chocolate is melted, remove from heat and quickly add and stir in the crushed candy canes.

4. Pour mixture onto a cookie pan lined with waxed paper or parchment paper and spread somewhat thinly with a rubber spatula.

5. Let cool on your counter until the bottom of the pan is no longer warm. Transfer to the fridge to firm up for about 30 minutes or so.

6. Break into bite sized pieces and wrap up nicely to give to someone as a gift.

* I also make this very successfully with mixed nuts. I just add a similar amount of salted mixed nuts instead of the candy canes to some dark or milk chocolate and follow the same directions. I used salted nuts because I love the sweet-salty dichotomy, but if you aren't into that, just use plain nuts!

Labels: , , , ,

Wednesday, November 30, 2005

minty goodness


I've always been a huge fan of chocolate and mint. When I was little, I would only eat green mint chocolate chip ice cream and After Eight mints were always a holiday staple in our house and I'd always manage to find my dad's secret hiding spot for them.

When I saw the mint chocolate chip cookie recipe on Crystal's blog (she makes them at the Austin Folk House) I kept them in mind for future holiday baking. This afternoon when I headed out to refill my coffee supply from the local Italian market, I noticed a lonely bag of mint chocolate chips for only a dollar. I immediately popped them into my basket. It was destiny! I practically ran home to whip up a batch. These cookies were beyond fantastic and I'll definitely be making them again during the holidays.

Crystal notes that the cookie dough is a bit stiff. Luckily, I've got my hearty Kitchen Aid mixer working for me...but if you don't, be prepared for a bit of a workout.

Chocolate Andes Mint Cookies (I didn't use name brand chocolate chips!)

2 1/4 cups all-purpose flour
2/3 cup cocoa powder
1 teaspoon baking soda
1/4 teaspoon salt
1 cup (2 sticks) butter or margarine, softened
3/4 cup granulated sugar
2/3 cup packed brown sugar
1 teaspoon vanilla extract
2 large eggs
1 bag (12 ounces) Andes mint chips (my bag was only 10.5 oz but the resulting cookies were still minty good!)

Preheat oven to 350°F.

Combine flour, cocoa, baking soda and salt in a small bowl. Beat butter, granulated sugar, brown sugar and vanilla extract in a large mixing bowl until creamy. Add eggs one at a time, beating well after each addition. Gradually beat in flour mixture. Stir in chips. Drop by well-rounded teaspoons onto ungreased baking sheets.

Bake for 9 to 11 minutes or until centers are set. Cool on baking sheets for 2 minutes; remove to wire racks to cool completely.

Makes about 5 dozen cookies.

Labels: , , , , ,

Tuesday, October 25, 2005

short and sweet

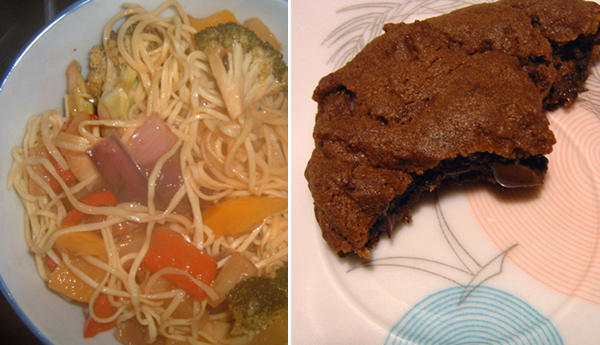
Tonight's dinner was left over bbq pork/vegetable stirfry that I made last night to rave reviews from Cornelius. Dessert? Gingerbread chocolate chip cookies from a Martha Stewart recipe. I didn't follow the recipe exactly, as I didn't flatten the dough, nor did I wait 2 hours for the cookie dough to chill. I let it chill exactly 15 minutes and just scooped the batter out with a spoon and skipped the added sugar bit too. It made 30 yummy cookies that are crispy out the outside and chewy good on the inside. So good.

Chocolate Chip & Ginger Cookies

7 oz chocolate chips
1 1/2 c plus 1 T flour
1 1/4 t ground ginger
1 t ground cinnamon
1/4 t ground cloves
1/4 t ground nutmeg
1 T cocoa powder
8 T softened butter
1 T ginger
1/2 c brown sugar, packed
1/2 c molasses
1 t baking soda

1. In a medium bowl, mix flour, ground ginger, cinnamon, cloves, nutmeg, and cocoa.

2. In another bowl, beat butter and ginger until fluffy. Add brown sugar and molasses and mix until combined.

3. In a small bowl, dissolve baking soda in 1 1/2 teaspoons boiling water. Mix half of flour mixture into the butter mixture, then add the baking-soda mixture and the rest of the flour mixture. Mix in chocolate chips.

4. Heat oven to 325°. Roll dough into balls and chill for 15 minutes. Bake until the surfaces crack slightly, 10 to 12 minutes. Let cool 5 minutes; transfer to a wire rack to cool completely.

NOTE: The next day, these cookies were hard as delicious little stones. Still tasty, but they lost that soft/crisp edge.

Labels: , , , ,

Monday, October 10, 2005

thanksgiving pt. 2

It seems that good food and good boardgames go hand in hand at my house. I'm sure my downstairs neighbours never want to hear "Corner on wheat!!!" at 2am ever again, but a good, roaring (and perhaps drunken) game of Pit rounded out a great Thanksgiving meal.

I love this recipe! It's the perfect compliment to any meal and I get rave reviews everytime I make this. This Thanksgiving meal was meatless, but this chutney tasted great alongside the richness of the baked macaroni & cheese and a couple of people used the chutney to top their greens instead of salad dressing. Oh yum.

cranberry chutney
1 12oz bag of fresh or frozen cranberries
1 granny smith apple, chopped
1 red onion, finely chopped
1 celery stalk, finely chopped
1/3 c cider or red wine vinegar
2/3 c packed brown sugar
juice of 1 orange
grated orange rind from 1 orange
½ t salt
½ t cinnamon
½ t nutmeg
1/8 t cloves

1. Combine vinegar, sugar, salt, spices, orange rind, celery, onion, apple, and orange juice in a medium saucepan. Set over medium-high heat and bring to a boil.

2. Reduce heat to a simmer, and stir in the cranberries. Cook until the skin begins to pop, 10 to 15 minutes. Remove from heat.

3. Store in an airtight container, refrigerated, up to 4 weeks.

---


Seeing that I was busy on one side of the kitchen making the chutney and preparing the brussel sprouts, I had Cornelius make this delicious recipe. I have no idea where I found it (it definitely was online somewhere), but I'm making this again. Too delicious for words! I also planned on taking a photograph of this beauty (Cornelius baked it in a pretty bundt pan), but it went really fast. You'll just have to use your imagination.

Pumpkin Chocolate chip cake

1 ¾ c flour
1 t baking soda
2 t pumpkin pie spice*
½ t salt
½ c margarine
1 c granulated sugar
2 large eggs
¾ c pumpkin purée
¾ c semisweet chocolate chips
¾ c walnuts, finely chopped

* If pumpkin pie spice is not available, use 1 teaspoon cinnamon, ½ teaspoon nutmeg and ¼ teaspoon each of ginger and cloves.

Grease bottom and sides of 9 x 5-inch loaf pan*. Preheat oven to 350 degrees F.

Combine flour with baking soda, salt and pumpkin pie spice. Cream margarine in large mixing bowl. Gradually add sugar and cream at high speed of mixer until light and fluffy. Blend in eggs; beat well. Turn mixer to low speed and add dry ingredients, alternating with pumpkin. Begin and end with dry ingredients; blend well after each addition. Stir in chocolate morsels and chopped walnuts and pour into prepared pan. Bake for 45 - 55 minutes or until cake springs back when lightly touched in center. Cool, then glaze with Spicy Glaze.

Spicy Glaze
½ c confectioners' sugar
⅛ teaspoon ground cinnamon
⅛ teaspoon ground nutmeg
1 to 2 tablespoons light cream

Combine confectioners' sugar, nutmeg and cinnamon. Blend in cream until the consistency desired (should be thin).

* We greased and floured a bundt pan.

Labels: , , , , , ,