Thursday, December 24, 2009

merry merry & last-minute peanut brittle

I'm a Christmas lover. Our house is decorated in sparkle and lights and we've got a beautifully scented eucalyptus wreath hanging on the inside of our front door. In the evenings, I burn my favorite fir-scented candle and listen to Christmas records while sipping on rum cocktails. And as you probably guessed, I love giving away homemade candy & baked goods to friends and family.

This year, my baking has taken a bit of a back seat since I've been so busy with work. So the past few days I've been playing catch-up and have whipped up old favorites like rum balls, candy cane bark, almond bark and fudge. But I decided that I needed something new in the mix and decided on peanut brittle. The recipe is adapted from Serious Eats and it's super quick to make (the whole shebang can be done in about 20 minutes!) so it's perfect for last-minute gifting. No candy thermometer or complex ingredients required. Don't have peanuts? Use pumpkin seeds, cashews, or pistachio nuts instead. Wrapped in cellophane and tied with candy-cane coloured twine, it makes a very thoughtful gift.

Enjoy and happy holidays!!

last-minute peanut brittle
(adapted from Serious Eats)
2 c sugar
8 T unsalted butter
1/3 c light corn syrup
1/2 t baking soda
1 T kosher salt
1 1/2 c salted peanuts

Line a baking sheet with a non-stick silpat mat, or lightly grease the baking sheet. Set aside.

In a large pot set on high heat, combine the sugar, butter and corn syrup along with a 1/2 cup of water. Let boil away for 10 minutes without stirring until the mixture turns into a lovely amber shade.

Remove from heat and add in baking soda and salt and fold in peanuts with a wooden spoon. Quickly pour mixture onto prepared tray and spread the candy out evenly. Let cool and then break into pieces.

Labels: , ,

Sunday, May 17, 2009

the no-bake chocolate peanut butter oatmeal "cookie"

To me, no-bake cookies come right out of old cookbooks with worn canvas covers. I've seen plenty of no-bake recipes while browsing through my vintage cookbook collection, but never thought to try them myself. Then I spied these no-bake chocolate peanut butter oatmeal cookies on Ezra Poundcake and something told me....Go! Now! No-bake these immediately! Well, that was last fall and I only made them a few days ago. Obviously, I'm tardy when it comes to following my gut. But no more. These are seriously the easiest cookies anyone could ever make, so what are you waiting for?

I'm actually hesitant to call this a cookie. They remind me of a chocolate haystack candy that my mom made when I was little. They were amazing and this no-bake recipe is the closest thing I've had since I was nine. It's like a sweet bite of memory overload. I followed the original recipe and used tablespoons to drop the mixture onto waxed paper, but in hindsight I'd use just a teaspoon. Smaller lumps would make for better bites. Plus, these babies are sweeeeeeeeeet! Next time I'd cut the sugar and increase the peanut butter, but I'm not sure if that would screw up the recipe. Thoughts? Oh and another bonus? Easy to make vegan by switching in soy milk and soy margarine!

These cookies/candies make use of the stove top, so they are perfect for summer sweets when turning on the oven would be criminal. Plus they are delicious served cold, which makes them a refreshing bite of chocolatey goodness. I tried a keeping a batch in the freezer and a batch in the fridge for testing sake. The ones in the freezer were stickier and gooey and the ones in the fridge were almost sandy in comparison. I liked the sandier fridge chilled cookies best, but do whatchya like! Either way, they'll go quickly.

no-bake chocolate peanut butter oatmeal cookies
(adapted from Ezra Poundcake)
1/2 c butter
2 c sugar (I used a scant 2 cups)
1 t salt
1/2 c milk
4 T cocoa
1/2 c natural peanut butter
3 to 3 1/2 c old-fashioned oats
2 T vanilla

In a medium sized saucepan, mix together the first five ingredients and bring to a boil. Let boil for 1 minute and then remove from heat. Add in remaining ingredients and then use a teaspoon to drop the mixture onto cookie sheets lined with waxed paper. Chill until set. Keep in refrigerator.

Labels: , , , , , , , , ,

Wednesday, February 11, 2009

red hot! cinnamon heart quick pickles

I've always been a fan of Valentine's Day. I don't care that it's some made up holiday geared to sell cards, roses and chocolates. I'm a fan of hearts, sprinkles, cupcakes, the colour pink....and I especially can't wait until those tiny cinnamon hearts to appear in corner drug stores. If crack was a candy, those tiny red spicy hearts would be it. But besides snacking on them by the handful, I wanted to find out what else I could do with these holiday candies. And I stumbled upon pickles. The unfortunate thing is all the recipes I found required actual pickling and canning and a whole lot of waiting around. I wanted instant results, so I decided to come up with my own brand of quick pickles.

I know, I know, for most of you, mixing up candy and condiments probably won't float yer boat. But for those of you who love their sweet with sour, this is the shizznit. It's sweet, it's spicy and the pickle packs a whole lot of zing. And I certainly wouldn't hold it against you if you drank the leftover red brine out of the jar in a moment of midnight weakness. Nope, not at all.

The recipe is pretty flexible when it comes to measurements....just make sure you have enough liquid to cover up your pickles and you'll do fine. I think next time I make these I'll increase the candy portion for an even sweeter bite.

red hot cinnamon heart quick pickles
4-5 large dill pickles, cut into thin rounds
1/2 c cinnamon red hots (cinnamon heart candy)
1/2 c dill pickle brine
1/4 c water

Add cut up pickles into a small jar. In a small pot, heat up the red hots, pickle brine and water together over medium-high heat until the candy melts, stirring often. Pour liquid into jar, covering pickles. Wait a while and eat. Lasts for a few weeks or just an hour or so. How many pickles can you eat in one sitting?

Labels: , , ,

Sunday, November 02, 2008

autumn sweets: salted honey caramel apples

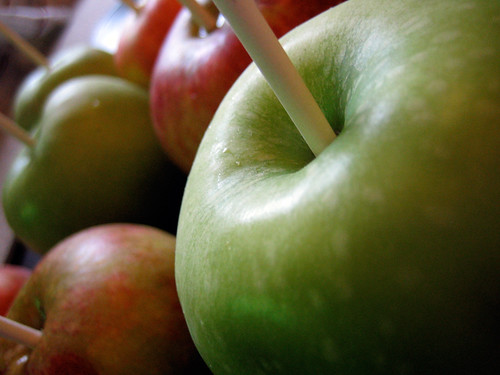
This Halloween I wanted to make something special for our friends. We had a few scary movies planned but I wanted to make an autumn treat. When I saw 101 Cookbook's recipe for caramel apples, I was instantly won over. The ingredients were simple: honey, cream, salt, apples. The previous weekend, I picked up several kinds of apples at a local orchard and I had some local blueberry honey from a previous farm visit. Local heavy cream was easy to find and I figured adding in some imported french fleur de sel wouldn't ruin my almost all-local sweets. I also decided to toast and roughly chop some almonds which not only would provide a nice crunch and counter balance the sweetness, but would also provide some traction to prevent the caramel from sticking to my baking sheet. The resulting apples were beautiful and delicious. I should note, that if you don't like honey, don't make these as as the honey flavour is definitely there, even with a mild-tasting honey.

For the apples, I used Granny Smith's and Cox Orange Pippins which are both very crisp apples with a nice bit of tartness. I purchased the lollipop sticks at a local kitchen shop in Chinatown and got to work on the caramel. It was easy going and while I do have a candy thermometer, I really rely more on the old fashioned cold water test for figuring out which stage my caramel has reached. I can never get my candy thermometer to reach the "hard ball" stage but using my fingers to gauge a bit of caramel dropped in ice water never fails. For me it took about 30-35 minutes to reach caramel perfection. I was afraid that the caramel would slide off the apples, but luckily that didn't happen!

After dipping the apples in the caramel, I had extra caramel leftover, so I spread some out on my silpat mat, adding in some roasted almonds and some fleur de sel and let cool in the refrigerator. Once it was cool and ready to cut, I sliced the caramel into squares and wrapped the golden nuggets in waxed paper.

salted honey caramel apples
(adapted from 101 Cookbooks)
8 tart, crisp apples
8 lollipop or popsicle sticks
1 3/4 c heavy cream
1 3/4 c mild-flavoured honey
2-3 t fleur de sel
1/3 c chopped roasted almonds

Pierce apples with a stick and set aside.

In a large heavy-bottomed pot, heat the cream and salt until small bubbles appear. Whisk in the honey and bring to a boil, stirring constantly with a wooden spoon. You want to bring the mixture to a constant steady boil, so turn down the heat to medium or medium-high. If you are using a candy thermometer, you should reach 250-290F or do the cold water test. It should take 20 - 35 minutes to reach this stage. Look for a rich, golden caramel colour and the mixture should look heavy. The caramel reached as high as 250F and I let it boil away at that temperature for 5 minutes or so, testing always in cold water to make sure I had the correct consistency. Take caramel off the stove and carefully dip each apple in the caramel mixture, setting the finished apples on lightly oiled waxed paper or a silpat mat covered in chopped almonds. Place in fridge to set and then wrap each apple in waxed paper.

If you have any leftover caramel, pour the remaining caramel onto a well oiled sheet or silpat mat and sprinkle with almonds and fleur de sel. Refrigerate until cool and cut into squares, wrapping each square in waxed paper.

Labels: , , , , , , ,

Sunday, April 27, 2008

put the crack in cracker: chocolate-covered caramel crunch

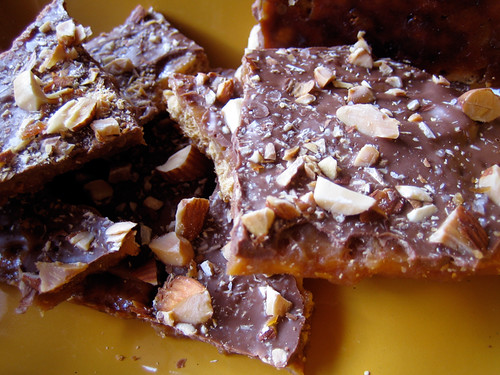
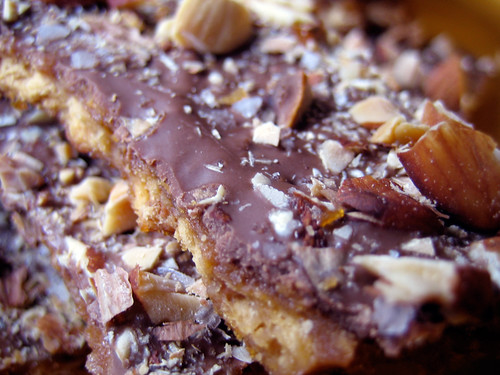
What more can be said about this super addictive snack (crack)? It's been written in about a hundred different places and it all started here. It's seriously good. Insanely addictive. Shall I go on?

The crazy thing about this candy is that it uses Matzoh crackers. For reals. The only Matzoh I had on hand was the ground up meal (perfect for making matzoh balls), but not so good for making candy. So I turned to the next best thing in my cupboards: Stoned Wheat Thins. I actually had to run to my cupboards to double check this and yes, they are indeed, labeled "stoned". The drug-addled theme of this post is not lost on me!

These are easy to make...in fact, too easy to make. No candy thermometer needed. Make a batch, share them with your friends and then pass along the recipe because they will ask for it. They taste like a homemade Skor bar and you'll find yourself going back for "just one more piece". Want to make this vegan? Get yourself some vegan crackers, some Earth Balance and your favorite vegan chocolate. Get hooked today!

chocolate-covered caramel crunch
enough crackers to line a baking sheet
1 c unsalted butter, cut into chunks
1 c packed light brown sugar
big pinch of fleur du sel (optional)
1/2 t vanilla extract
1 c semisweet chocolate chips
1 c toasted coarsely chopped almonds

1. Line baking sheet with foil, making sure you have enough to create a tall rim around the pan. Line pan with crackers, breaking up pieces if you have to, to fill in any cracks. Preheat the oven to 375F.

2. In a medium sized saucepan, melt the butter and brown sugar together over medium heat. Stir frequently until the mixture begins to boil. Boil for 3 minutes, stirring constantly. Remove from heat and add in vanilla. If you are using unsalted crackers, add in salt. Pour caramel over crackers and spread evenly with a silicone spatula.

3. Put the baking sheet in the oven, reducing heat to 350F. Bake for 15 minutes, watching carefully that the caramel does not burn.

4. Remove from heat and cover with chocolate chips. Let stand 5 minutes until chocolate melts and then spread evenly with a spatula. Sprinkle with toasted almonds and fleur du sel or whatever toppings you desire. Let cool completely and then break into pieces, storing in an airtight container.

Labels: , , , , , ,

Tuesday, March 04, 2008

balls! balls! balls! buckeyes and snowballs for all!


My friend just had her birthday a little while ago and because I got sick and then she got sick, I haven't gotten around to passing along her gifts yet. Tonight the hand-off will take place, barring any unforseen sicknesses! After wondering what to give as a special vegan birthday treat, I decided to make 2 different kinds of uber-yummy balls.

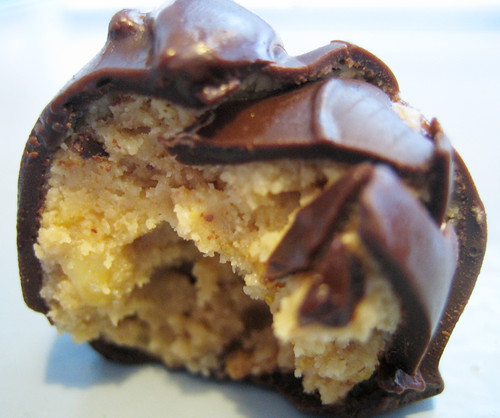
Buckeyes are an insanely addictive peanut butter and chocolate confection that I had seen on my friend's flickr stream. When I googled for the recipe, a ton of variations came up, so I decided to forge ahead and give it a go, cutting back the amount of sugar and butter, along with making it vegan-friendly. Most recipes call for rice krispies but I only had Vector (which is my favorite store-bought cereal because of the cinnamon and crunch, by the way) and it worked out really really well. If I make these again (and Cornelius totally wants me to), I'll add in even more cereal just for more of a crunch. Beware, besides being super addictive, they are also kinda melty, so keep in the fridge and don't eat outside in the hot sun or you'll be a tasty delicious mess.


The next kind of vegan ball (hee hee), is a recipe I found tucked into an old thrifted vintage cookbook. The kind of found hand-written note that someone used as a bookmark. I love it for that reason alone! Besides turning this recipe into one a vegan could love, I also cut the recipe in half because it was a gift and I didn't want to end up eating the leftovers all myself! Feel free to double this recipe as it was meant to be. These aren't super sweet which is nice but you can definitely use sweetened coconut if you want a sweeter flavour. I added in some chopped almonds, but any kind of nut or dried fruit (or not!) would do.

peanut butter buckeyes
1/4 c Earth Balance margarine
1 3/4 c natural crunchy peanut butter
1 c powdered sugar
1 c of crispy cereal (I used Vector)
1 c semi sweet chocolate

1. Get your margarine and peanut butter to room temperature and combine them, adding in the powdered sugar. Stir well. Crush cereal with your hands (oh the power!) and mix them in too. If you aren't using a flake cereal, you may not need to crush (poor you). Roll mixture into balls and freeze.

2. Melt chocolate in microwave and roll each ball in the melted chocolate and place on a cookie sheet. Freeze until firm. Store in sealed container in the fridge.

coconut snowballs

1/2 c sugar
1/4 c Earth Balance margarine
1 t vanilla
1/4 c cocoa
1/4 c almond milk
1/2 c shredded coconut (plus more for snowy coating)
1/4 c chopped almonds
1 1/2 c oats

1. In a medium sized pot, combine the sugar, margarine, vanilla, cocoa and almond milk over medium-high heat until everything is melted and comes to a simmering boil. Let boil for 3 minutes and remove from heat.

2. Add in the coconut, almonds and oats and stir well. If it's a bit too wet, add in a bit more coconut. When cooled slightly, take a tablespoon of the mixture and roll into a ball.

3. Add coconut to a plate and roll ball into it...creating the look of a "snowball". Store balls in a sealed container and refrigerate.

Labels: , , , , ,

Monday, January 14, 2008

be a better person: really easy chocolate fudge with toasted walnuts


I know, what am I doing posting another sugar-fueled recipe shortly after posting about this cake? Well, I tried to stay away from candy-making in January, I mean, this is the time for a bit of dietary restraint, whole grains and all of that I'm-going-to-be-a-better-person-than-the-kind-of-person-that-eats-fudge-in-mother f*cking-January! But then again, I didn't make this recipe for me. I made it to give to someone else, so making fudge in January is perfectly acceptable since I'm being totally selfless and isn't that part of every one's plan to be a better person in 2008?

And to set the record straight, I'm not really one of those people who get obsessed with fudge. I pretty much get my fill after 1 bite since it's sweeter than all get out. But then I made this fudge...and oh, boy, didn't a little part of me get a bit sad when I realized that I had to give away this delicious concoction of condensed milk, chocolate and butter. Yes, this fudge is so incredible and so easy to make that it's taking all my restraint not to whip up another batch. You see those fudgy bits in the photos? Those were the ugly corner and edge bits that didn't look good enough to give away. However, those were the nibbly bits that definitely made it into our mouths.


really easy chocolate fudge with toasted walnuts
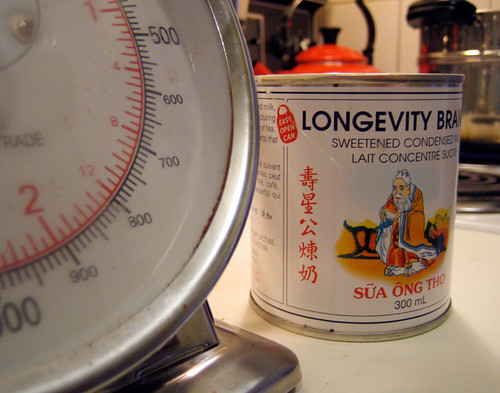
300 ml can of condensed milk
2 T butter
350 g milk or dark chocolate chips (I combined a mix of the two)
1/2 c - 3/4 c walnuts, toasted* & roughly chopped

1. In a double boiler (bain marie or microwave is acceptable too), melt the chocolate chips, butter and condensed milk together, scraping the sides and stirring occasionally.

2. Meanwhile, butter a 8x8 pan and lay in a sheet of waxed paper or parchment paper.

3. When chocolate mixture is melted, remove from heat and add in walnuts. Mix to combine and then pour chocolate into prepared pan. Smooth over the top with a rubber spatula. Let cool and then refrigerate for at least 4 hours until firm. Cut into 1 inch squares.

* To toast walnuts, simply spread out some halves onto a cookie sheet and place in the oven over low heat (200-250 degrees). Shake the pan every once in awhile to check on things, but they should be ready when the skins are golden and fragrant, about 20 minutes or so.

Labels: , , , ,

Sunday, February 18, 2007

it's like taking candy from a baby


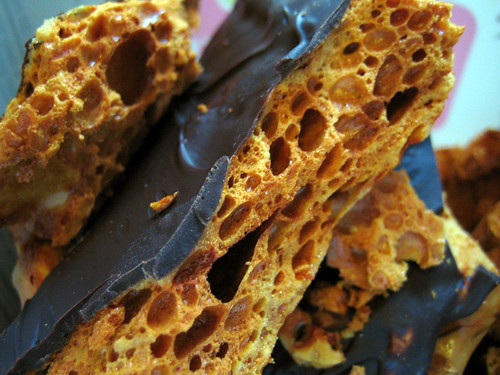
My vegan friend has pretty much given up eating candy bars. It's not that she's taken up the healthy route and has forsaken all manners of 'bad for you' treats...but it's that so many chocolate and candy bars are pumped full of dairy. It's her birthday this week and I decided that a little vegan-friendly candy making session would totally keep things sweet. So after searching for a few ideas, I stumbled upon the honeycomb recipe on the Seattle-ist (via NotMartha). Ohhh, the honeycomb in the Seattle-ist seemed like the sponge candy treats of my childhood (and the very tooth-decaying stuff found inside of a Crunchie Bar). Unfortunately, honey doesn't classify as vegan, so I kept searching until I found a vegan recipe that looked easy enough to make on a leisurely Sunday afternoon.

The last time I made candy, I remember being totally terrified of the chemistry going on in the pot when I was making the caramels, but I had no reason to fear as the results were stunning. Once again, this candy-making experience was a cinch. Making candy is fun, simple and hey, with this recipe you don't even need a candy thermometer to get incredible results! Plus, there is fun and adventure in the making here. A lumpy mass of sugar and syrup dissolve into a bubbling liquid and then with the addition of the baking soda, turns into a whole 'nother beast. When the mixture goes into the pan it hardens quickly yet it still looks wet and shiny and the candy that results is light, airy and melts on your tongue. Who knew making candy was so freakin' exciting?!

sponge toffee

1 c white sugar
4 T white corn syrup
2 t baking soda slightly dissolved into 1-2 teaspoons of water

1 c dark chocolate, chopped into small bits

1. Line a cookie sheet with waxed paper and lightly oil the waxed paper.

2. In a large pot, combine sugar and syrup over medium heat. As the sugar dissolves, turn down heat yet make sure that the mixture keeps to a steady, simmering boil. DO NOT MIX.

3. As soon as the mixture turns a light yellow*, sprinkle in the baking soda mixture. Again, DO NOT MIX! You want to keep the bubbles so the candy remains light and airy. The mixture will bubble up and increase 4 times in volume. Remove from heat and quickly pour mixture onto prepared cookie sheet. It hardens quickly.

4. Melt dark chocolate in a double boiler. When melted, spread over sponge toffee and cool until set. Break sponge into pieces and store well in a tightly-lidded container.

* Do not wait for the mixture to take on a golden hue....or it will be too late. Light yellow is what you're looking for.

Labels: , ,

Wednesday, December 06, 2006

hot drops of bop


I live across the country from my parents, so visiting them requires a four hour flight and a 2 hour drive by car to get me to their doorstep. It's a trip that I take once a year or so and this time, I made sure that I was loaded up with some Christmas treats in order to celebrate the holidays family-style, a little earlier this year. The day before my flight was scheduled to leave, I had the bright idea to make caramels....and not just any caramels, but decadent fleur de sel caramels. I've never tackled candy-making before other than some simple fudge and chocolate bark, so this seemed to be an adventure of epic proportions! The truth is, making candy scared me a whole lot. It seemed to be all about science and timing and temperature, so I made sure I was well prepared, as I'm a girl scout at heart. Before I began, I laid out all my ingredients and all the necessary accoutrements. A candy thermometer was purchased days in advance to keep things in check. But because I didn't want to fail (and because I'm hopelessly superstitious), I also kept an icy glass of water by the stove so that I could double-check the candy stages by dropping the hot liquid into the water in order to test the process by feel as well as science. See, I'm all about keeping it real!

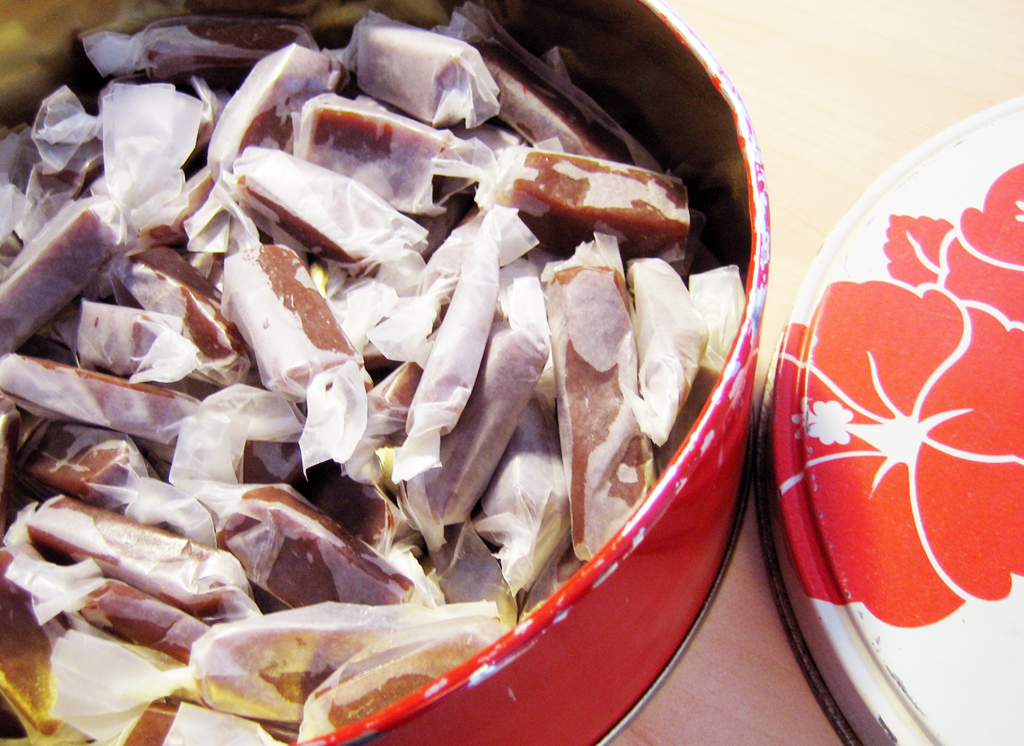
Well, my worries and advance prep were worth their weight in gold. I boiled the candy mixture and managed to get a nice caramel colour after what seemed like forever. When I ever-slowly added in the cream/butter/salt mixture to the sugar/water/syrup mix, there was a lot of bubbling up, but I kept my cool and managed to not let everything boil over. Again, it took a lot of patience to get the temperature high enough and lots of testing the softness/chewiness by adding a drop or two of the hot liquid into the cold water, but I finally reached the point where everything looked like it should. Success! When the mixture cooled off in the pan and I cut it into strips and again into small nuggets of caramel goodness, seeing the end product all wrapped up in waxed paper glory, I felt a definite sense of satisfaction! I conquered the candy making process and it was good!

And how did the caramels actually taste? Well, you'll have to judge that for yourself. Makes a perfect gift....if you can bear to part with them, that is.

fleur de sel caramels
1 c whipping cream
5 T butter, cut into pieces
2 t fleur de sel (you may want to reduce to 1 1/2 t)
1 1/2 c white sugar
1/4 c corn syrup
1/4 c water

1. Lightly grease some waxed paper or parchment and line the bottom and sides of a square 8x8 baking dish.

2. In a small saucepan, bring cream, butter, and fleur de sel to a boil. Set aside.

3. In a larg saucepan, boil together water, corn syrup and white sugar, whisking gently until sugar is dissolved. Boil this mixture and swirl the pan slowly over the stove (don't stir!) until a rich caramel colour is achieved. My candy thermometer read about 300°F at this stage, but depending on your climate or range it could vary from 240°F to 350°F.

4. Very slowly pour in cream mixture (it will bubble up), stirring frequently over a rapid boil until caramel registers around 250°F on thermometer (or reaches the right consistency for your tastes via the water drop method)*, about 10 minutes. Pour into baking pan and cool 2 hours. Cut into small pieces and wrap in waxed paper, twisting the ends.

* The higher you boil the candy, the harder it will become. I like a chewy candy that isn't too soft, so I really liked using the water glass method so that i could actually taste test as I went along.

Labels: , , ,

Thursday, December 15, 2005

minty fresh

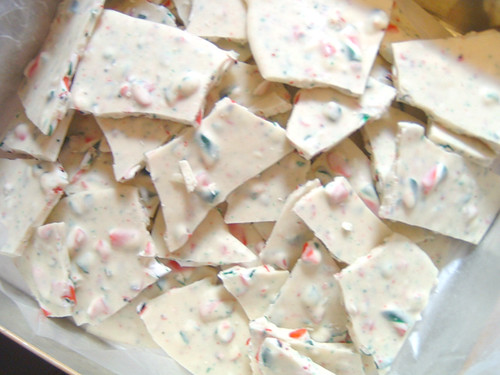
What's the easiest thing to make for the holidays? Candy cane chocolate bark! Two ingredients, chocolate and candy canes. What could be simpler? Not much.

candy cane chocolate bark

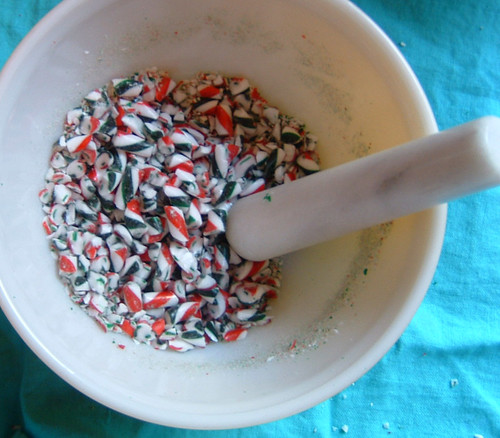
1. Crush 1 package of candy canes (12 regular sized ones will do). How you crush them is a matter of preference. I've tried using a heavy duty freezer bag and a hammer but my favorite method is using a mortar & pestle and pent-up fury. Gets the job done every time!

2. Get your double boiler ready. When the water is boiling, add 500 grams of good chocolate to the double boiler and melt on low heat, stirring constantly until everything is nice and melty. The choice of chocolate is yours. I like using white Belgium chocolate cuz it looks extra pretty and festive.

3. When the chocolate is melted, remove from heat and quickly add and stir in the crushed candy canes.

4. Pour mixture onto a cookie pan lined with waxed paper or parchment paper and spread somewhat thinly with a rubber spatula.

5. Let cool on your counter until the bottom of the pan is no longer warm. Transfer to the fridge to firm up for about 30 minutes or so.

6. Break into bite sized pieces and wrap up nicely to give to someone as a gift.

* I also make this very successfully with mixed nuts. I just add a similar amount of salted mixed nuts instead of the candy canes to some dark or milk chocolate and follow the same directions. I used salted nuts because I love the sweet-salty dichotomy, but if you aren't into that, just use plain nuts!

Labels: , , , ,