Saturday, February 27, 2010

grilled scallop ceviche

I don't tend to make fancy food much and because scallops are pricey, they count as fancy in my book. However, after a trip to the Maritimes last summer where I tried scallops for the very first time, I just couldn't get them out of my head. When it came to making a nice celebratory dinner, I figured scallops were worth the splurge.

I didn't want a recipe that was too heavy with butter or cream, so I decided to make a twist on ceviche. Ceviches usually rely on lemon or lime juice to cook the raw fish, but a recipe found in Gourmet for a grilled scallop ceviche sounded ideal. And it was. It's full of bright, citrus flavours and the cucumber here is very refreshing against the jalapeño heat. It's the kind of meal you'd want to eat lots of in the summer, you know, in between your yacht sailings and Prada shopping sprees. And while this meal feels fancy, it's actually not such a big spend. The recipe only uses 8 large sea scallops and when you think about the cost of eating out, a nice meal in with a bottle of wine is pretty affordable (but go on and strap on some heels for the occasion).

Are you starting from frozen scallops? Use the cold water method to defrost rather than slowly defrosting in the fridge. Put your scallops into a ziplock bag, place bag into a bowl and slowly run cold water from your tap over the scallops until they thaw. Depending on the size of your seafood, this could take anywhere from 10 to 30 minutes. This way results in very fresh tasting scallops and this way your seafood doesn't get swamped with water. This quick thaw method works well for shrimp as well.
grilled scallop ceviche
(recipe adapted from Gourmet)
6-8 large sea scallops
2 T extra-virgin olive oil
1 t kosher salt
1/2 t black pepper
1 small orange
2 T fresh lime juice
3/4 English cucumber, seeded and diced
1/4 of a red onion, finely diced
1-2 jalapeños, seeds removed, minced

1. Sprinkle scallops with salt and pepper and brush lightly with a bit of olive oil before adding them to a hot grill pan. Grill until marks appear (about 1-2 minutes) and flip repeating the process. Scallops don't need to be fully cooked as they will fully cook in the lime juice later. Remove from pan immediately and set aside to cool.

2. Cut away the peel from the orange using a sharp paring knife. Cut segments free from their membranes and then dice. Add oranges, cucumber, red onion, jalapeños and any remaining orange juice into a medium sized bowl.

3. If your scallops are large & you want to be thrifty like me, slice the scallops in half on their sides so that 1 scallop is now 2 coin-shaped scallops (rather than cutting them in half width wise). Add the scallops to the bowl and squeeze lime juice over everything. Sprinkle salt and pepper over top and gently toss. Refrigerate for 1 hour before serving.

Labels: , , , , , , , , ,

Wednesday, January 06, 2010

winter squash & caramelized onion biscuit pie

Last summer I made a pretty spectacular pie. It was filled with sun ripe tomatoes, fresh corn and basil from my garden. I loved it and made it often. But then summer turned to fall and now winter and I still think of that pie. So instead of waiting, I did something about it. I made a great winter pie.

Squash and caramelized onions along with the strong tang of Swiss cheese take a pie that was the star of summer into the land of scarves, mittens and rain boots. This pie is winter and it's good. You can get the recipe for this beauty over at Poppytalk where I'm resuming my Wednesday column after a bit of a holiday break.

Labels: , , ,

Monday, December 21, 2009

maritime fish chowder

I'm a bit of a wuss when it comes to fish and seafood. Generally, I do like fish dishes...but I become a bit more skeptical when it comes to fish stews and broths. If I order pho, ramen or wonton soup I become very picky about the broth. If it's too fishy tasting, I won't eat another bite. However, chowder is something I do like. When we took our summer vacation this past year to the Maritimes, I tried a few different clam and fish chowders. I remember a particularly good one at an Irish pub in Sydney, Nova Scotia. There were large chunks of white fish, salmon and clams along with potatoes, celery and corn and the broth was exceptional. Creamy and buttery without being too rich. It was the perfect bowlful.

So when I found myself with some red snapper in the fridge, along with pretty red skinned potatoes, I knew that I'd try my hand at chowder. I had a tub of flavourful seafood stock in the freezer (tip: next time you make mussels, freeze the leftover liquid!) and some corn niblets that I had frozen myself in September. I wanted to lighten things up, so I used skim milk instead of cream and I just used a tablespoon of butter, but if you want something richer, then go all out and gild that lily! The final result was delicious and came very close to our dreamy Maritime chowder.

maritime fish chowder
(adapted from Simply Recipes)
2 T butter
1 large onion, finely diced
2 stalks celery, finely diced
4 small-ish potatoes, diced
1 t thyme
1 t salt
1 t pepper
1/2 t paprika
1/2 t cayenne pepper
1 1/2 t Old Bay seasoning
1 1/2 c fish stock + water
1 1/2 - 2 lbs Red Snapper (or cod), cut into 2 inch cubes
1/2 c corn
1 1/2 c skim milk

In a large pot, saute the onion and celery in the butter until soft and fragrant. Add in the potatoes and all of the seasonings. Add in the fish stock and add enough water to just cover everything. Cover and simmer over medium heat for 30 minutes until the potatoes are done.

Stir in the fish and cover again for another 15 minutes. Turn down the heat to a low simmer and slowly add in the milk – I had the heat on the very lowest setting. Do not bring this mixture to a boil or the milk may curdle. Add in the corn and let it rest with the lid on for 20 minutes, stirring occasionally. Serve in deep bowls with oyster crackers or hunks of buttered sourdough bread.

Labels: , , , ,

Monday, November 02, 2009

carrot rice soup

It's November which means that it's getting darker earlier and there's a definite chill in the air. It's that time for a quick and simple belly warmer and I think this soup fits the bill perfectly. It's also a nice way to take comfort in something healthy, especially when you've been over-indulging on way too many left-over Halloween-sized chocolate bars. Let's just call this my personal chocolate antidote.

When I made this soup, I debated cooking the rice in the soup or cooking it separately and adding it in later. I choose to cook it all together, blending only half the soup and loved the resulting texture. However, for something different, you could easily make the soup without the rice, blend it well and then add in the rice afterward. Want to use brown rice instead? Go ahead! It's filling and delicious and even my soup-adverse husband had no complaints!

carrot rice soup
1 T olive oil
1 small onion, diced
1 t dried red chilis
1 t marjoram
1/2 c jasmine rice
6 c homemade chicken stock (or veggie broth)
6-8 carrots sliced into coins
1/2 T maple syrup
1/4 c half & half cream
salt & pepper to taste

In a large stock pot, heat olive oil and saute onions until caramelized, about 10 minutes. Add chili, marjoram and rice and saute for a few minutes before adding in stock and carrots. Bring to a boil and then cover and simmer over medium-low until rice and carrots are tender. With an immersion blender, puree half the soup, leaving the other half chunky. Add in maple syrup, cream and salt and pepper.

Labels: , , , , , ,

Monday, September 28, 2009

stewed peppers, tomatoes & onions

There's a lot of good writing out there in the food blog world. I've laughed and I've even cried over someone's personal story telling. But this morning I went to my feed reader and read this post by Tea & Cookies. It touched me deeply. Beautifully written and ringing of truth, I had to comment. So please head over to Tea's blog, read her words and let me know if it stirred similar feelings.
While I feel so many of the same things that Tea has mentioned in her post, I don't have an answer. While I know the life I am living right now is based on my choices, I should feel 100% satisfied and lucky. And most days I am. I love where I live, I love my friends, I'm proud of the work that I accomplish. And my husband? I couldn't imagine a life without him holding my hand, laughing at my tasteless jokes and loving me for who I am. But then there are other days when doing the simplest things seems too overwhelming.

This blog is a comforting place. It started off as a creative outlet, as a way to get back to writing, like in the days when I used to self-publish my own photocopied and stapled zine. It provides relief from my day to day, but sometimes because of life, it gets placed on the back burner. I'm not writing as much (or as well) as I used to, I'm feeling distracted and sometimes writing a post is like checking of an item on my to-do list. It's not a great feeling. All I know is that it's a busy time right now and soon enough I'll find my way back here with a full heart and a full belly. But on with the food, it's why you came here after all!

I made this meal yesterday for dinner and it was the perfect thing. Just fresh peppers from a Chinatown market, a plain old yellow onion, a couple of eggs, and a can of tomatoes from the cupboard. Elements that don't seem like much, but when put together and heated gently for about an hour, turns into something almost magical. Not bam-pop-wow magic, but the kind you feel from inside. It is warmth and comfort and it just feels right. Like a cardigan and knee socks and crisp leaves underfoot. Like hand-holding. And so I hope this blog will continue to feel as comforting and tasty as this meal. Just please forgive my table manners once and a while.

stewed peppers, tomatoes & onions
1 T olive oil
1 large onion or 2 small ones, sliced thinly
4 large cloves garlic, sliced
4 large peppers (any colour), sliced
1-2 red dried chilis, crumbled
1/2 t salt
1 can of 28oz tomatoes, diced
4 eggs, optional

In a large dutch oven, heat oil over medium heat and saute dried chili peppers, garlic and onion until soft, translucent and fragrant, about 10 minutes. Add in peppers and salt and stir occasionally until they soften up a bit. Throw in the tomatoes and combine. Cover for 45 minutes until everything gets soft and melty, stirring up everything when you remember.

If you want to poach the eggs in the sauce, I recommend it. Make 4 indentations with your wooden spoon and crack open an egg into each slight divet. Cover and cook until the whites firm up but the yolks are still runny. Gently ladle into big bowls. Serve with crusty bread.

If you skip the eggs, serve this with crusty bread or with over polenta, on top of pizza or use as a lasagna sauce. I've eaten this every which way and it's always good.

Labels: , , , , , , ,

Wednesday, September 16, 2009

kamut spaghetti with baked tomato crumble

On Monday night I got back from a 5 day trip to visit family back in Ontario. My dad - who never used to cook anything other than fried eggs, potato pancakes or kugelis (a Lithuanian potato dish), has been making the meals for the past couple of years since my mom has been unable to. While he does try his best, his meals often resort to a few frozen pizzas and a can or two of Chef Boy....oh boy. Whenever I visit, I not only bring along some home-baked treats, but I gladly make all the meals from scratch while I'm there. My dad is not a cook and I'm so happy to help out while I'm there. I know that home cooked meals from scratch are always appreciated.

This tomato and pasta dish came about when I spotted 5 beautiful beefsteak tomatoes sitting on my parent's sunny kitchen window ledge. Inspiration struck and within a few minutes, I was slicing the tomatoes up ready for roasting. I didn't think much beyond that but figured some pasta would be a good match. Unfortunately, there wasn't any pasta, and while I could have made due with what I could find, my brother volunteered to go to the store. It's nice to have a handy younger brother who doesn't mind running errands! While rooting through the cupboards, I did spot some saltines-minus-the-salt in the pantry. Perfect! I crushed them to oblivion and made a little crumble topping with the help of the cheese and some melted butter. Scattering over the bubbling red hot mess, it reminded me of a roasted tomato crumble!
This dish was happily gobbled up by both my brother and my dad ( you can see their animated hands in the top photo). The taste was fresh and way better than anything that comes out of a bottle or a can. It was a simple meal to remind them that great doesn't have to mean a lot of fancy ingredients or complicated directions.

kamut spaghetti with baked tomato crumble
4-5 large tomatoes, quartered or cut into eighths
3 T virgin olive oil
salt & pepper
2 T fresh thyme
2 cloves garlic, minced
1/4 c Parmesan cheese
1/4 c crushed cracker crumbs
2 T melted butter
1/4 c fresh basil leaves
250-350 g kamut spaghetti (sub in whatever pasta you've got around)

1. Preheat oven to 350. Lay the tomatoes in a large baking dish and sprinkle the olive oil, salt and pepper, thyme and garlic over top. Gently smoosh things around so that everything gets evenly coated. Bake for 1 hour, turning the tomatoes over at the midway point.

2. Meanwhile cook pasta according to package directions.

3. In a small bowl, combine the cheese and cracker crumbs and stir in the melted butter until a crumble forms. Scatter this mixture over the tomatoes and bake for another 15-20 minutes until the topping turns golden brown.

4. Remove tomatoes from oven. Drain spaghetti and place in a casserole dish, spooning the roasted tomato mixture over top. Tear fresh basil over the dish and serve.

Labels: , , , , , ,

Saturday, September 05, 2009

make this now: tomato & corn biscuit pie

Three weeks vacation is a long vacation and we loved every moment of it. Well, maybe not getting bit by mosquitoes. If I'm thankful for anything about living in expensive Vancouver, I'm very thankful that there are no mosquitoes. Being bug-free, especially when camping for two out of three weeks, would have been miraculous. Highlights included driving the side roads in Quebec along the St. Lawrence, getting our feet mucky in the Bay of Fundy, driving the breath-takingly gorgeous Cabot Trail in Cape Breton, the fairy-tale village of Peggy's Cove, picking up shells off the red sanded beaches of PEI, and visiting the strangely deserted but beautiful city of St. John, NB.

I also fell in love with Montreal. Fell hard...and not just because of the poutine. It was exciting, relaxed, and perfect and I'm almost ready to pack my bags and relocate. French, do I really need to be that fluent? Honestly, it doesn't seem so! I also loved the Vermont town of Montpelier. It was beautiful and had everything I could want in a small town...except that it's not Canada. And as my friend Jason in Montreal beautifully put it, as long as you are in Canada, you are home.

Oh, and the food! We ate some pretty wonderful meals and I even managed to discover a love of cucumbers, peaches, plums and I even tried scallops for the first time (but definitely not the last). And while it was fun trying new foods, eating at new restaurants and beach-side shacks, it also feels good to be in my own kitchen. The first real meal I cooked when I returned was this pie. I had seen the recipe in my August copy of Gourmet magazine and it just looked perfect. Comforting and homey yet full of seasonal, fresh ingredients. It was the perfect meal to come home to.


The beauty of this recipe is that it takes all the complicated pie-making stuff and throws it out the window. Instead of a tricky pie crust, this one uses biscuit dough which is so much easier to roll out into a round-ish shape. If I had some zucchini, I'd even toss in a layer of that for a pretty green, red and yellow pie. It seems like a forgiving dish. And it's the perfect thing to make on a weeknight and it's good enough to serve to guests for brunch. If you aren't in your kitchen now cutting up your fragrant garden tomatoes or gently stirring up a batch of biscuits, you are clearly in the wrong. This meal must be made. Now. Get to it, I'll be waiting.

tomato & corn biscuit pie
(liberally adapted from Gourmet)
1 recipe of your favorite biscuit dough (minus the dill, onion & cheddar - but add some 1 t fresh oregano if you wish)
2 T mayonnaise
zest of 1 lemon
juice from 1/2 lemon
4-5 med-large tomatoes, deseeded & sliced
2 tablespoons finely chopped basil
2-4 fat green onions (about 1/2 c), sliced
1 c corn (freshly de-cobbed or frozen)
1/2 teaspoon black pepper
a pinch or two of kosher salt
1/4 c old cheddar cheese, shredded
egg wash, milk or melted butter

1. Preheat oven to 400 degrees. Mix up your biscuit dough and divide the dough in half. Roll out one ball of dough into a circular shape and line it into a pie plate.

2. In the meantime, mix together the mayo with the lemon zest and juice and set aside.

3. Layer in half of the tomatoes to line the bottom and sprinkle with half of the fresh basil. Grind some black pepper over it all and a small pinch of kosher salt. Add half the corn and half the green onions and drizzle over half of the mayo mixture. Repeat. Sprinkle the top of the pie with cheddar cheese.

4. Roll out the remaining ball of dough and top the pie with it. Seal the edges and make it look pretty like Martha would (or be like me, cross your fingers and just try your best). Cut in a few vents to let the steam escape and brush the top with a bit of egg wash, milk or melted butter. Put in the oven to bake for about 30 minutes until the filling is bubbling and the top is golden. Remove from oven and serve.

Labels: , , , , , , , , , ,

Wednesday, August 26, 2009

mexican black bean & roasted pineapple bowl

My vacation should be wrapping up pretty soon. I could be sitting at a sidewalk cafe in Quebec City and sipping on some red wine or trying some french fries cooked in duck fat in Montreal. This meal isn't as exciting as whatever it is I could be doing, but then again, I could be stuck in traffic, which would make this meal glamorous and exciting in comparison. That's not saying that this meal was a let-down. In fact, it was quite the opposite. I like to think of this as a deconstructed burrito inspired by my favorite burrito at a local vegan Mexican restaurant. With roasted pineapple, fresh salsa and black beans, you can't go wrong. It's delicious, filling and I can see this meal becoming a habit. It may look like there are a lot of steps involved here, but it's quite simple to put together. Then again, I love chopping and general prep work, so turn on your favorite summer jams and get this meal started.

mexican black bean & roasted pineapple bowl
1 c rice (white or brown - above I used both)

1 T olive oil
3 cloves garlic, minced
1/2 small red onion, diced
1/2 red pepper, diced
1 t red chili flakes
1 t cumin
1 t chili powder
1 can of black beans, rinsed & drained

1/2 fresh pineapple, sliced in rounds

3 small tomatoes, diced
1/2 red onion, diced
1/2 lime zested & juiced
2 T fresh cilantro
1/4 t cayenne pepper or hot sauce
salt & pepper

1/4 c grated cheese
sour cream
additional hot sauce

1. Prepare rice as usual. Everyone has their tricks for making great rice, so make it your way.

2. Create a quick salsa, by combining the tomatoes, onion, lime juice & zest, cilantro and spices. Set aside.

3. Roast pineapple over a grill or under the broiler in your oven until in gets charred in places. Flip, roast and dice. Set aside.

4. In a large pan, heat oil and add in garlic, onion, and red pepper. Saute until it gets soft, add in spices and black beans. Heat through.

5. Layer all ingredients into a bowl. Rice on the bottom, then black beans, pineapple, salsa and then top with a sprinkle of cheese, a spoonful of sour cream and a sprinkle or more of your favorite hot sauce.

Labels: , , , , , ,

Friday, August 21, 2009

mexican nacho pizza

My pizza dough recipe was wack. You made it and you liked it. Phew! I've made some pretty interesting pizzas in my past. Remember when I made a pizza with goat cheese, spinach and figs? Or that time when I threw apples on there and called it awesome? Right now I could be in Halifax dipping my pizza crusts into donair sauce. I'm not sure what donair sauce is, but I'm sure I'll find out. Maybe I'm eating potato pizzas in PEI while laying on a red sand beach. But for the sake of this post, I'm going to take a trip down Mexico way or at least dip into Tex-Mex territory and talk about a pizza topped with refried beans, sour cream and cilantro. Don't be afraid, it's a good combo. I made this vegetarian, but feel free to add some sauteed ground beef or some chorizo sausage to top up this baby. This is a weighty pizza...those refried beans aren't lightweight, so it's filling and there will be extras for the following day. And that's okay, because this pizza tastes great the second day.

mexican nacho pizza
1 pizza dough, half baked
1 can of refried beans
1 T cumin
1 T chili powder
1 t cayenne pepper
1/4 t salt
1 c grated cheddar cheese
1 c fresh salsa
1/2 c sour cream
1/4 c cilantro, chopped

Preheat oven to 425. Half-bake your pizza dough for 10 minutes, remove from oven and set aside. In a bowl, mash together the refried beans and spices. Spread bean mixture over pizza dough. Sprinkle cheese evenly over top. Spread cheese layer with fresh salsa and bake until the pizza is heated through and cheese starts to bubble, about 10 - 15 minutes. Spread sour cream over pizza and sprinkle with cilantro. Cut and serve.

Labels: , , , , , , ,

Monday, June 29, 2009

baked mini corn dogs

Last night I posed a question to my husband: would he like a stir fry or corn dogs for dinner? Obviously not a very fair question. Sorry, stir fry, your time will come. After my husband closed his gaping maw, I got down to work. After a bit of Google-ing, I spotted this near-perfect recipe. I made it more perfect by adding in some chili-powder for flavour and a kick of spicy cayenne for bite. These would be a perfect addition to your Canada Day or July 4th holiday party.

The end result isn't the cylindrical n' greasy meat-pop of your carnival dreams, but it does satisfy any food-on-stick craving you might be hankering for. These corn dogs are flat at the bottom, but they are crispy and the flavour is just right. I wasn't sure about adding all that sugar, but it actually helped them taste more authentic. I liked the sweetness but feel free to cut it down or leave it out completely.

I had some lollypop sticks leftover from some fall-time caramel apple making and they worked perfectly for this meal. Please note that this recipe makes a lot of batter! So feel free to increase the hot dog amount to 8 if you are feeding a crowd or do like we did and use the batter the next morning to make a really great corn bread. Just fry up a small amount of bacon - or just heat up some vegetable oil or bacon grease in a cast iron pan. When hot, pour in the batter and place in a pre-heated 375F degree oven for 15-20 minutes. Slice into quarters and eat hot.

baked mini corn dogs
1 c cornmeal
1 c flour
2 T brown sugar
1 T chili powder
1/2 t cayenne pepper
1 1/2 t baking powder
1/2 t baking soda
1/2 t salt
1 1/4 c milk (feel free to use almond/soy/rice milk)
1 egg
1 T canola oil
4-8 hot dogs, cut in half (use tofu or veggie dogs, if you like)
8-16 lollypop sticks

Preheat oven to 400F. In a large bowl, combine the first 6 ingredients. In a smaller bowl, mix together the milk, egg and canola oil. Pour the wet into the dry and mix gently with a fork.

Cut your hot dogs in half (mini-dogs not skinny-dogs) and pierce each half with a stick. Dredge each half into the cornmeal batter and place onto a silpat-covered cookie sheet. Bake for 15 minutes or until the batter becomes golden brown.

Labels: , , , , , , , ,

Tuesday, June 23, 2009

farm fresh dinner: new potatoes, braised greens and a beet salad

This weekend we got out into the country. On Saturday there was a hike to Lindeman Lake (don't listen to your guidebook, it's definitely not "easy") and afterward, there was time to check out a few local farm markets. I was hoping we could find a flat or two of local strawberries, but since we were nearing the end of the afternoon, everywhere seemed to be sold out. Our first stop was Wisbey Veggies in Chilliwack where I walked out with 2 very full bags full of local farm fresh produce for $20. Beets, turnips, broccoli, cauliflower, tomatoes, snow peas, new potatoes, carrots, raspberries, zucchinis and mushrooms...all locally grown, all so delicious. A few minutes away, we discovered a goat cheese dairy selling all kinds of goat cheese products from ice cream to yogurt to gouda! I walked away with cheese curds (not goat) and some goat cheese feta. I was already imagining all the menu possiblities.

On Sunday, after a big breakfast and a little garage sale snooping, we decided to head out to visit our CSA farm in Langley for their open house weekend. It's a beautiful farm and we got a great tour from the very enthusiastic farmer, Stephen. We also got to pick out some seedlings to take home and harvest some of our own rhubarb and greens (kale, mustard, chard and arugula)! We even dug into the farm's cooler and into a tub containing mouldy leeks. Stripping off the gooey outter layers revealed a perfectly good leek, so we took a few of those home too. I think it's safe to say that when you harvest your own food, it tastes so much better and you get bragging rights which is always a good thing.

After looking through my haul on Sunday evening, I got to work. First I tackled the beets. I knew I wanted a beet and arugula salad topped with feta. Recalling a similar salad I made last summer, I decided to stick with a good thing but still make a few tweeks here and there. The beets were incredibly sweet and worked so well with the feta and the tangy dressing. It was a beautiful, beautiful thing. For the new potatoes, I took the simple road. Boiled, buttered and sprinkled with fresh herbs from my garden. The mint made this dish and made the potatoes sing. I couldn't leave well enough alone, and as i gathered the beet greens, I decided to make use of the kale and chard as well, braising them simply with the leeks and a lemon. It was a farm fresh dinner from start to finish.

buttered new potatoes with mint & parsley
8 new potatoes
1 T fresh mint, chopped
1 T fresh parsley, chopped
1 T unsalted butter
kosher salt & black pepper

Boil potatoes in water until tender. Drain. Coat with butter, fresh herbs and salt & pepper. Serve.

beet & arugula salad with goat cheese & pecans
8 baby beets, quartered or cut in half
arugula, torn
1/4 c goat cheese feta
2 T pecans, chopped
1 T sour cherry jam
1/4 c olive oil
1 t dijon mustard
2 T cider vinegar
salt & pepper

Boil the beets until tender, about 40 minutes. Cool slightly so that removing the skin from the beets isn't too painful. Further chop the larger pieces of beets, if necessary. Set aside. Mix the dressing by combining the jam, olive oil, mustard, vinegar and salt and pepper until thick. Adjust seasonings to taste. Scatter arugula on plate, then the beets, feta and pecans. Drizzle with dressing and serve.

braised greens with leeks & lemon
2 lbs of assorted greens (chard, kale, beet greens is what I used)
1 T olive oil
1/2 t red pepper flakes
3 leeks, sliced thinly
zest & juice of 1 lemon
salt & pepper

Rinse the greens very well to get rid of any dirt hidden within the leaves. Remove the tough ribs from the kale and discard. Chop the greens and set aside.

In a large pot, heat olive oil and saute the leeks and red chilies until fragrant. Add in the toughest leaves first (kale) and then the chard and then the beet greens. Reduce heat. What looks like a massive amount of greens will soon wilt into a very manageable amount. Add in the lemon juice and zest and sprinkle with a bit of salt and pepper and stir about until all the leaves become wilted and tender, about 10 minutes. Serve.

Labels: , , , , , , , , , , , , , , , ,

Tuesday, November 25, 2008

warm up with winter squash, red lentil & tofu curry

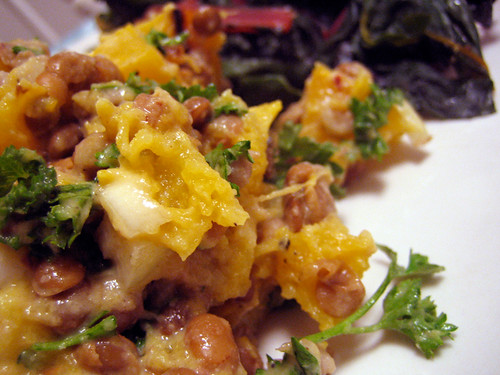
It's definitely winter-ish outside.The air is crisp and cold and it rains more often than not. Yesterday I wore my winter coat for the first time and while I was glad for the warmth it also was a bit of a bummer. Oh how I would have loved to tuck into a bowl of this warming, spicy curry when I got home from my bike ride. It would have been just the thing to warm up my bones. Too bad for me that I had made this a week or so ago, and all I've got are delicious memories of curries past.

This lentil curry uses up some of that winter squash that is so plentiful right now. I used kabocha, but any squash from butternut to buttercup would work well here. The squash definitely adds a touch of sweetness to an otherwise spicy dish. I even threw in a block of diced tofu and it was a wonderful addition adding in a nice texture and extra protein to the dish. This meal will definitely be making the dinner rounds again. It's nothing fancy, but it's easy to make, very nutritious and a perfect warmer to these colder evenings. Serve over brown rice, top with yogurt or mango chutney and enjoy.

winter squash, red lentil & tofu curry
1 T canola oil
1 onion, diced
4 garlic cloves, minced
2 inch knob of ginger
2 stalks celery, diced
1 t salt
1 heaping T of garam masala curry paste (or use regular curry/garam masala powder)
1 T ground cumin
1/2 small kabocha squash (or any other winter squash), diced
1 c red lentils
5 c veggie broth or water
1 block of tofu, diced

In a large heavy pot, heat up oil over med-high heat, add in onions, garlic, ginger and celery and saute until soft and fragrant. Sprinkle in salt, cumin and curry paste and stir until spices coat vegetables. Stir in the squash and lentils. Add in water or broth, lower heat and cover pot. Simmer for 15 minutes and then stir in tofu. Let simmer until most of the liquid has been absorbed and the lentils are soft, about another 5 minutes. Serve over brown rice.

Labels: , , , , , , ,

Monday, October 27, 2008

warm lentil & butternut squash salad with tahini dressing


Normally when autumn arrives, it arrives with a shove. There's rain every day and grey skies day in and day out. However, this fall, we Vancouverites seem blessed. It's sunny, there's a nip to the air that I find refreshing, and the leaves have just been so incredible lately. Oh, the colours! I'm finding beauty in almost everything. Even the humble butternut squash.

I saw this recipe for a warm chickpea and butternut salad with tahini dressing on Molly's blog and it sounded too perfect. So I cut the squash, put it in to roast and noticed that I didn't have a can of chickpeas after all. Instead, I took out a can of lentils and hoped all would be well. After I had mixed all the ingredients and poured myself a glass of wine, the mess in the bowl did not look very pretty and it certainly it didn't look as composed as Molly's photo. I had my fingers crossed as my husband took his first bite. But I had no need to worry, he loved it (and he normally doesn't even like squash!) and so did I. It was tangy and had a lovely lemony bite that worked so well with the nuttiness of the tahini. This recipe is a keeper and even if it's not a beauty on a plate, it definitely will make this fall seem sweeter.

warm lentil & butternut squash salad with tahini dressing
(adapted from Orangette)
1 medium butternut squash (about 2 to 2 ½ lb.), peeled, seeded, and cut into 1 ½-inch pieces
2 garlic cloves, roughly chopped
1 t ground cumin
½ t red chili flakes
½ t ground allspice
2 T olive oil
salt & pepper
One 15-ounce can lentils (or chickpeas), drained and rinsed
¼ of a medium red onion, finely chopped
¼ cup coarsely chopped parsley (or cilantro) leaves
½ t sumac

For tahini sauce:
2 garlic cloves, finely minced with a pinch of salt
juice of 1 lemon
3 T. tahini
2 T water
2 T olive oil, plus more to taste

1. Preheat oven to 425F. In a large bowl, toss butternut squash with olive oil, salt, pepper, cumin, allspice, cumin, garlic and red chili flakes. Once it's all well coated, dump onto a baking sheet and roast for about 25 minutes until soft and golden.

2. Meanwhile, make the dressing by combining all the ingredients and whisking until smooth. Taste and add more water or olive oil if needed.

3. To assemble the salad, gently toss the lentils, the warm roasted squash, red onion, and parsley in a serving bowl along with most of the dressing. Reserve the remaining of the dressing to serve at the table.

Labels: , , , , , ,

Wednesday, October 01, 2008

thrifty and quick: bowtie pasta with prosciutto & peas

First off, I want to thank everyone who came out to the craft fair on Sunday. Sure, I'm aware of how many people read my blog thanks to stats counters, but seeing so many of you come out for a visit was amazing. Thank you! But now, onto the food! I made this as a super quick lunch idea. I had half a package of pasta, some frozen peas, a tiny chunk of prosciutto and some parmesan and before I knew it, I had 2 large heaping bowls of food ready for my husband and I. It was delicious and deceptively simple to prepare. It also cost next to nothing.

I never really breakdown food costs, but I can imagine this meal costing about $1.50 in total for both bowls. I'm the first to admit that math isn't my strong suit, but here's how I came to that figure. Ages ago, I bought a wedge of organic parmesan for $8 and I used my fingers to specify how much I wanted to the old Italian guy at the counter and still am grating away at it. Really, I have no idea if I grated 25 cents worth of parmesan onto my pasta, but it seems about right! I bought the prosciutto as a "meat end" at the deli counter and it was a small hunk priced at $1. I was able to use that peice of meat for 4 meals, so that's another quarter right there. Organic pasta is $1.50 a bag at my local grocer, so half that is easy to figure out. As for the peas and half n' half, it's a wild guess. The 750 g bag cost $3 so my handful of peas probably works out to mere nickles and I can't even remember how much my 1L container of half and half cost me. I know this $1.50 cost breakdown is pretty crunky! I'm no math wiz so you'll just have to get by with my less than shoddy accounting.

But really, who wants numbers anyway, this is lunch! And it's a delicious one at that. Cornelius was bummed that he couldn't have seconds (and truth be told, so was I). It was quick, it was tasty and it was budget concious. Yum.

bowtie pasta with prosciutto & peas
250 g bowtie pasta
3 T prosciutto
1/3 c frozen peas
2 T half & half
2 T grated parmesan cheese
pepper to taste

Cook up pasta the usual way. When the pasta is about 2 minutes close to being done, add in the peas. Cook for the remaining 2 minutes. Drain most of the pasta water out of the pot. Add in the prosciutto, half & half and the parmesan. Add pepper to taste. Serve in 2 large bowls. Lick bowls if necessary.

Labels: , , , ,

Tuesday, September 16, 2008

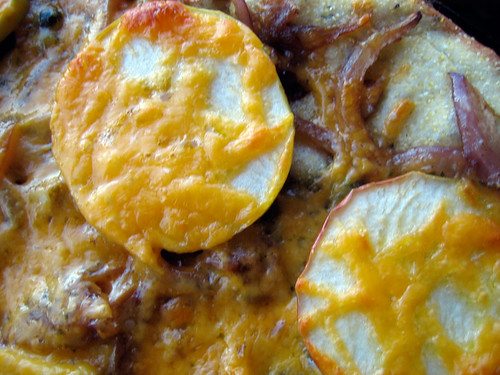
the mac daddy: apple, onion and cheddar pizza

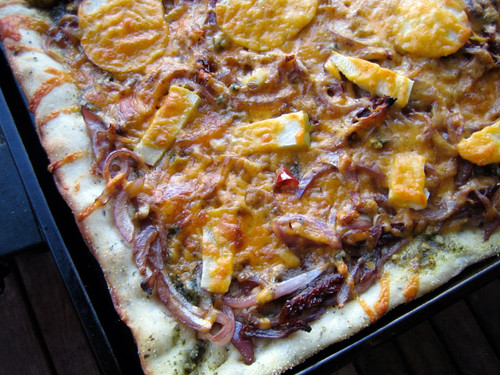
Sundays are often a night we head out with friends to a local brew pub and eat cheap thin crust pizzas, drink delicious pints and play cards. One of the pizzas I like at this pub is called the "Johnny Mac" because it's topped with MacIntosh apples. I kid you not. It also has ranch dressing instead of tomato sauce, along with fresh tomatoes, bacon and cheddar cheese. I could do without the ranch dressing, but the pizza itself is delicious. This Sunday I was sick, so I stayed inside and dealt with the hand I was given. But not wanting to ruin the fun, I decided to make pizza at home for dinner. And as luck would have it, I had a huge bag of local, organic MacIntosh apples! Forget the Johnny Mac, this was gonna be the Mac Daddy of pizzas.

I kept the cheddar and apples, but did away with everything else and worked with what I had available. I caramelized a whack load of onions, threw on some salty capers along with some chewy sun dried tomatoes and a few dabs of pesto for good measure. The Johnny who?? This pizza was delicious.

apple, onion & cheddar pizza
2 T olive oil
2 large red onions, sliced thin
5 cloves garlic, sliced
1 T balsamic vinegar
1 ball of pizza dough (store bought or homemade)
1 T capers
1/4 c sliced sun-dried tomatoes
3 T pesto
2 MacIntosh apples (or any tart apple), sliced thinly
1 c cheddar cheese, grated

1. Preheat oven to 375. In a large pan, heat olive oil over medium heat, adding in onions and garlic. Stir until onions turn soft, about 10 minutes. Add in balsamic vinegar and turn down heat to medium-low, stirring occassionally. The onions should be soft, glossy and caramelized, if they get too dry, add in a little water. Remove from heat.

2. Roll out your pizza dough and place on sheet. Spread dough with a thin layer of pesto and cover with caramelized onions and sprinkle with capers, and sun-dried tomatoes. Spread a layer of apples over top and then cover with cheese. Bake in oven for about 15-20 minutes or until crust is golden and cheese is bubbly.

Labels: , , , ,

Saturday, September 13, 2008

waste not, want not: beet greens & fried potatoes topped with a poached egg

It's a real shame that people don't eat beet greens. When I was talking to my dad last weekend and I prepared him Swiss Chard for the first time (which he loved), I told him that the chard was very similar in taste to beet greens. "Beet greens?", He said, "I just throw those out at the supermarket!" What a waste. I'm gonna let you in on a little secret....beet greens are delicious. Really.

I made this meal after a trip to the green grocer. I bought two bunches of fresh local beets and I used the beets to make a tangy salad. I wasn't sure what I'd do with the greens, but when dinner reared it's head a couple days later, I pulled the greens out of the crisper along with a couple of potatoes and decided to fry the two together. The idea for the poached eggs came moments later when the beet greens shrunk considerably while sauteing, leaving the meal less hearty than I had hoped for. The eggs were a good call, making the meal an ideal rustic home-style dinner that would work equally well for a brunch.

I used proscuitto in this recipe, but you could easily leave it out for a vegetarian dish or sub in some salty feta instead for a nice bite. I've made beet greens before and I'll make them again. Hopefully you will too.

beet greens & fried potatoes topped with poached eggs
2 large potatoes
1-2 T olive oil
1 small onion, sliced
3 cloves garlic, minced
2 slices of proscuitto, diced
1 large bunch of beet greens, rinsed thoroughly & roughly chopped
1/2 t red pepper flakes
1 T fresh rosemary
2 T fresh parsley
salt & pepper
4 poached eggs

Boil potatoes until tender. Slice into rounds and set aside. Heat olive oil in a large skillet and saute garlic, onions, and proscuitto add in sliced potatoes and fry until golden on both sides.

Boil water in a medium sized pot and start poaching your eggs. Meanwhile, move potatoes to one side of the pan and add in beet greens, red pepper flakes, salt and pepper. When beet greens get wilty, about 2 minutes or so, toss with fresh rosemary and parsley and stir around the potatoes into the mix. Divide mixture onto 2 plates and top with poached eggs.

Labels: , , , , , ,

Friday, August 08, 2008

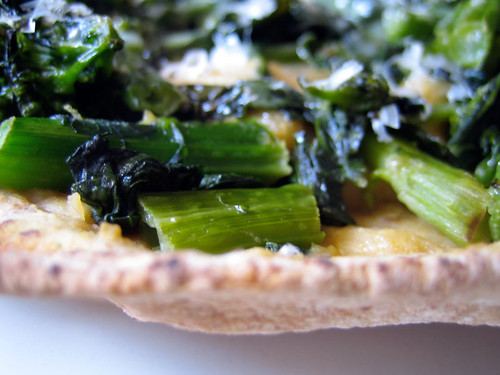
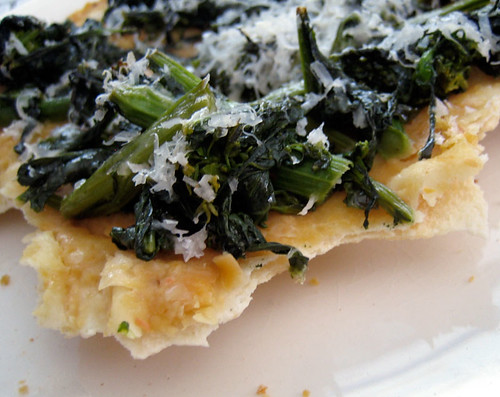
a cheap healthy lunch: chickpea rapini melt


I'm pretty lucky to live where I do. Just around the corner and down the street a couple of blocks is my favorite market on the edges of Chinatown. Earlier this week I spied beautiful bunches of beets–2 bunches for one buck. A few rows down was rapini (also known as broccoli rabe) for the same. I didn't want 2 bunches worth of rapini, so I threw one bunch into my basket. Fifty cents. Imagine that.

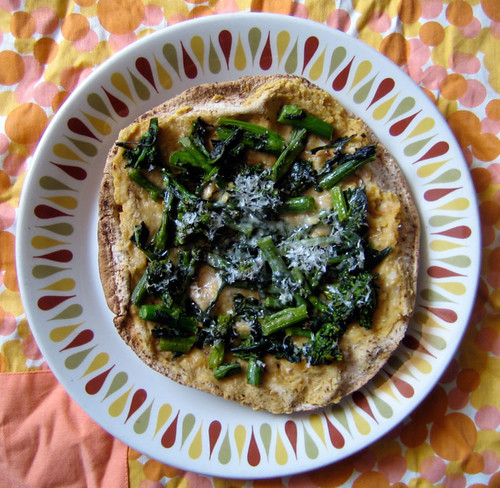
Sadly, I haven't been in a cooking mood. Sure, I'll make dinner after a lot of cupboard door banging and grumbling about not wanting to cook. But, in the end, because I don't want to give in to my husband's suggestion to just order in pizza, I'll end up cooking something. This afternoon, I looked into the fridge and stared at that languishing bunch of rapini, just starting to wilt and figured that I had to do something with it quick. After an internet search, I found this on a farmer's website. Rapini chickpea pizza? Well, I had all the ingredients and got to work. I made a few changes and oh my, it was good. Really, really good. But it didn't seem like pizza. Maybe because of the pita bread, it was more of a melt in my eyes, so that's what I'm calling it. Make this as a healthy lunch, dinner or cut it up into triangles for a unusual appetizer. It's easy enough to make vegan by getting rid of the cheese.

rapini - chickpea melt
(adapted from here)
1 bunch rapini, chopped
splash of hot sauce
6 cloves garlic, roughly chopped
4 T olive oil + 1 T oil for later
1/2 t red chili flakes
1/4 t kosher salt
1 14oz can of chickpeas
1/4 c water + more for later
4 whole wheat pitas
parmesan cheese, optional

1. In a large skillet, heat 4 tablespoons of olive oil over medium high heat, adding garlic, salt and chili flakes. Stir mixture constantly as you want the garlic to get golden and have everything infuse the oil. This should take about 4 minutes or so.

2. Add chickpeas and 1/4 cup of water to a blender or food processor. Add in chili/garlic/oil mixture and set aside the skillet for later. Blend mixture until smooth and set aside.

3. Using the same skillet, add the remaining tablespoon of oil and add chopped rapini to the pan. Saute for a few minutes and then add about 1/4 cup of water, a pinch of salt and a splash (or more) of hot sauce. Let the rapini steam away until all the liquid evaporates.

4. Spread chickpea mixture over the 4 pitas. I spread the mixture thinly, so I have leftover spread (which will be ideal for a snack later on). Divide the rapini over top and then top with grated parmesan, if using. Bake at 350 degrees for 10 minutes or until the pita is golden at the sides and crispy.

Labels: , , , , , , , , , ,

Friday, May 02, 2008

tart it up: simple tomato phyllo tart


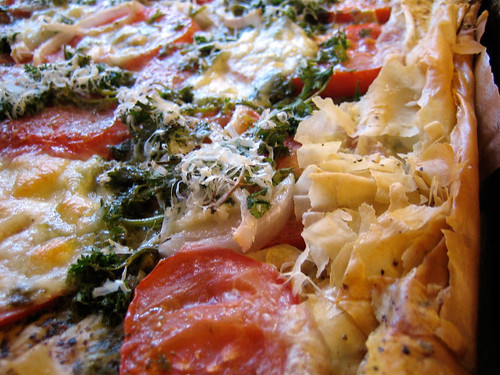
A few months ago I bought some phyllo dough with the intention of creating something fantastic out of it. It languished in my freezer for quite a while before a near-empty fridge made the decision for me that it was time to play with that phyllo pastry. So with a bit of store bought pesto, a couple of beautiful looking tomatoes and more olive oil than I cared to admit, I turned that phyllo into a pretty stunning tomato tart.


Phyllo has a bad rap, but I'm here to dispel the myth. It's not hard to work with it. Really. Repeat it 5 times. Trust me. All you need to have a successful go is a damp tea towel and a bowl of olive oil–plus a pastry brush. Phyllo is thin and brittle and tears like a mofo but don't sweat it if your sheet of phyllo rips in two. No one is going to notice once it bakes up. It's very forgiving that way. However, phyllo does dry out quickly which is the reason for the damp towel, so cover up what sheets you aren't currently slathering olive oil onto and you'll do just fine.


As for my tomato tart? Totally impressive in taste and appearance. Cornelius wondered why I called it a tart when he figured it should be called a pizza. Whatever, I'm being fancy so tart trumps pizza. Serve this for guests and they'll think you pulled out all the stops, so just bow and accept your accolades. I just made it on a Sunday night when it was just the two of us watching a movie (Zodiac, btw, which was sooooo beautiful in terms of lighting and camera work and made me swoon, as did my eternal crush, Mark Ruffalo).

One more thing totally food unrelated, next week, I'll be taking a little birthday road trip to the wilds of central and north eastern Oregon. We'll be around Bend, the John Day area and the painted hills for some camping and hiking. If anyone has any good food recommendations or cute towns or great thrift shops we must stop at, fill me in! We'll also head to my favorite city, Portland, for a couple days as well. Send me your recommendations please!!

tomato phyllo tart
6-8 sheets of phyllo dough, defrosted if frozen
1/3 c really good olive oil
3 T pesto
4 farm fresh tomatoes, sliced thin
1 small red onion, sliced thin
3 cloves garlic, sliced thin
1 bocconcini, sliced thin
1/3 c parmesan cheese
1/3 c fresh parsley, chopped

1. Preheat oven to 400 degrees. Prep your work area by making sure you have got your olive oil and pastry brush at hand. Oil up the bottom and sides of a baking sheet and then rinse a clean tea towel and squeeze it dry. Open up the phyllo package and unroll the sheets of dough. Remove 1 sheet and then immediately cover with damp towel. Place sheet on baking tray and brush with olive oil. Repeat until you have several layers for the base and create a rim along the sides by folding over the edges slightly. Wrap up tightly any unused portions of phyllo and return to the fridge for another use.

2. With the same brush used for the olive oil, brush on the pesto into an even, thin layer. Layer tomatoes over the pastry, followed by the onions and then sprinkle on the garlic. Add the bocconcini and parmesan and then top with parsley.

3. Bake in oven for 25 minutes or until the phyllo turns golden and crispy. Remove and let sit for 5 minutes, then cut into squares.

Labels: , , , , ,

Saturday, February 09, 2008

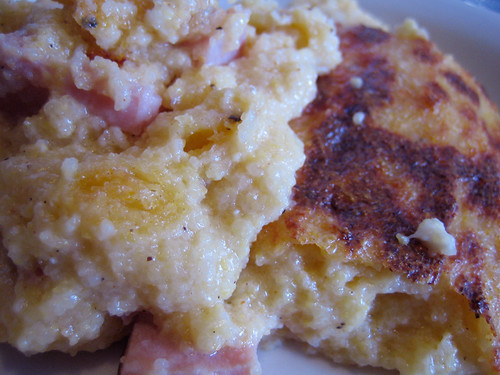
a blanket of richness: ham and cheese spoonbread


This past week, I spent a lot of time opening and closing cupboards in the hopes that something would grab my attention. I was trying to eek out a couple of meals out of my barren cupboards and I wanted something to take the chill out of this winter weather. My cards were selling like hotcakes because of a certain February holiday and a recent mention on the blog, Mighty Goods, plus my own busy work schedule didn't leave a whole lot of time for grocery shopping. I ended up eating a lot out of cupboards, including making polenta more than once since I seemed to have a huge stockpile of cornmeal hidden away in vintage glass jars.


A few years ago, I made this polenta casserole, which was delicious, but sometimes my polenta experiments are a bit bland and less than ideal. But this time 'round, I struck gold and discovered my new favorite cornmeal-based recipe: spoonbread. Spoonbread is very much like polenta only way, way better. It's light and fluffy because of the added egg and it could easily resemble a fancy souffle but without any of the fuss. This recipe is stuffed to the gullet with cheese (which is never a bad thing in my books) and I like to think of it as a soft and savoury corn pudding...comfort through and through. The added spices add a nice bite too.

This meal could easily be eaten for breakfast or brunch but we ate it for lunch (and again at dinner) with some sauteed rapini. The richness of this dish kind of calls out for something sharp and bitter but it's also really yummy on it's own, kinda like watching a few episodes of Friday Night Lights (I'm halfway through season 1) wrapped in an afghan. A guilty pleasure, maybe, but totally comforting and oh so worth it.

ham n' cheese spoonbread
I used a mixture of fontina and asiago since that is what I had on hand, but either would work well. A strong cheese is essential here to combat the dreaded blandness.
2 c water
1 c milk
2 T butter
1 t salt
1/2 t smoked paprika
1/2 t sweet paprika
1/2 t cayenne pepper
1/8 t nutmeg
3/4 c cornmeal
1 c ham, cubed
1 egg, beaten
3/4 c grated fontina or asiago cheese
1/4 c grated parmesan cheese

In a large pot, mix the water, milk, butter and spices and bring to a boil. Gradually whisk in the cornmeal. It will bubble and pop and get thick. Once it gets nice and thick, remove from heat and stir in the ham, cheese (reserve 1/2 the parmesan for the next step) and egg. Oil up a baking dish and pour in the cornmeal mixture. Sprinkle with the remaining parmesan cheese and bake in a 450 degree oven for 20 minutes or until the dish gets a bit brown on top. Remove and dig in.

Labels: , , , , , , , ,

Friday, January 18, 2008

don't adjust your monitor: purple shepherd's pie


Forget about the fudge, the cake, the cookies. We are well into January now and it seems like a wholesome tasty dinner recipe is needed. If it's comforting, colourful and nutritious, well, then it kind of is like icing on the cake, isn't it? This meal fits the bill. I even give it bonus points because when I started boiling up the potatoes and chopping the red cabbage, I still had no idea—not even an inkling, of what I was going to make for dinner. I'm a bit spontaneous like that!


So elbow deep in shreds of purple, I decided I'd make a Shepherd's Pie of sorts. I haven't had much practice in the vegetable pie department, but I did make a very successful pate chinois a while back and figured I had the chops to handle dinner on the fly. So along with the red cabbage, I chopped up some celery, a red onion and got out some frozen corn from the freezer. I wasn't sure how this mess o' vegetables would come together, but it turned out way better than I could have ever imagined. Not only was dinner uber-delicious, it was also frighteningly colourful enough to beat the dickens out of grey January skies. Purple food? Why not!

And if purple vegetables aren't your thing, why not check out my new post over at Food Network Canada to read about my foray into adventurous dining at Vancouver's The Brave Bull's House of Steaks.


purple shepherd's pie
4 potatoes, quartered
2 T butter or Earth Balance margarine
3 T milk (rice or soy works well)

1 T olive oil
1/2 purple cabbage, chopped into strands
1 red onion, diced
4 cloves garlic, diced
2 stalks celery, diced
1 c frozen corn
1 t each dried thyme + basil
2 T hot sauce
salt & pepper
1 1/2 cups vegetable stock

1 T olive oil
2 T flour, heaping
1/2 c vegetable stock

grated cheese (optional for top - I used smoked applewood cheddar)

1. Add quartered potatoes to salted boiling water. Cook until tender. Mash with butter and milk. Add salt and pepper to taste. Set aside.

2. In a large pot, heat 1 tablespoon of olive oil over medium-high heat. Add in onions, garlic and celery and stir around until it starts to sweat. Add in cabbage and saute until everything gets slightly wilty, about 3-5 minutes. Add in herbs, hot sauce and corn and 1 and a half cups of vegetable stock. Salt and pepper if necessary. Bring to the boil.

3. Meanwhile, In a small saucepan, heat up 1 tablespoon of oil, add in 2 tablespoons of flour and whisk around quickly, taking care not to burn the flour. Slowly add in the remaining 1/2 cup of stock and whisk until thickened. Add this to the cabbage mixture, stirring until the sauce thickens up nicely.

4. Add cabbage mixture into an oven proof dish and top with mashed potatoes, spreading the top smooth. Add grated cheese to the top, if necessary, and bake in a 350 degree oven uncovered for 20 minutes or until the top is golden brown.

Labels: , , , , , , ,