Monday, July 27, 2009

cherry buttermilk sherbet

I have been seeing homemade ice creams, sorbets, granitas and sherbets popping up on food blogs all summer long and it's been driving me bonkers! I really, really wanted to make some ice cream but I also didn't want to find all the ice cubes needed for my ancient-but-oh-so-beautiful turqouise ice cream maker. I wondered if it was possible to make ice cream without an ice cream maker? And then I remembered that last year I did make a Seville orange ice cream sans and it turned out just fine indeed.

It's cherry season around here and I had some dark, sweet Bing cherries from the Okanagan just waiting to be used up...perfect for an icy treat. I also had buttermilk in the fridge and figured it would add the perfect amount of creamy tang to this sherbet. From the photo above, I obviously didn't have a cherry pitter*, so I just used a knife to un-pit the cherries. They were going to be blended up so I wasn't looking for intact-looking cherries. I just put on some loud music and got my pitting groove on!

Once you finish pitting, the hard part is over. The ingredients are easy enough to come by and the process is simple. I didn't strain the liquid after blending which would have removed the cherry skin, but I actually liked the added texture of the itty-bitty nubbly bits. If you don't, go ahead and strain the mixture before adding in the sugar. Now, the only thing you have to do is wait it out...and the wait can be a bit of a buzz-kill, especially when it's really, really hot outside.

However, once the wait is over, scoop on in. The resulting sherbet is ripe and bursting with cherry flavour: it's heady and gorgeous in taste and well, just look at the damn thing! It's beautiful and it scoops like a dream. Enjoy this now while cherries are at their peak. I mean it, just do it.

* Uh, little did I know, I did have a cherry pitter. Cornelius brought it to my attention. He inherited it from his grandma and it sat unbeknownst to me in our drawer of strange kitchen things. Next time.

cherry buttermilk sherbet
3 1/3 c cherries
3/4 c sugar
1/3 c pomegranate-cherry juice blend
1 3/4 c buttermilk
2 T bourbon
1 t almond extract
1/4 c lime juice

Pit the cherries and place into a medium-sized saucepan. Add in the juice and bring to a boil. Lower heat and simmer until cherries are soft, about 20 minutes. Use a hand blender or transfer the hot mixture to a blender and blend well until everything is totally liquefied. Stir in sugar until it has dissolved completely. Refrigerate for at least 1 hour.

When the cherry mixture has chilled, add buttermilk, bourbon, almond extract and lime juice and stir to combine. If you have an ice cream maker, pour into maker and churn. Otherwise, pour mixture into a large rectangular cake pan and put in the freezer. Whisk the mixture every hour or so until it sets. Transfer to a lidded container and freeze for at least 4 hours.

Labels: , , , , , , ,

Tuesday, February 19, 2008

my prince charming: bitter orange ice cream


I'm sure I've gushed again and again how much I love Sour. Sweet is nice, but sour is where it's at in my book. Soon after I started getting interested in food as more than just "what's for dinner" kind of thinking, I had heard about Seville oranges: the sourest of all oranges. It became a bit of a quest, my holy grail, to find a Seville orange. No matter where I looked, I couldn't find a trace of that sour orange. I searched in high-end markets in February (the month when Sevilles are supposedly in store) with no luck. But then last week, after walking down Main Street in search of a pretty skirt, I lucked into a unassuming Asian market where the sign "Marmalade Oranges" caught my eye. Yes, I had finally struck Seville gold!

So I bagged up nearly a dozen oranges and made my way over to the house of a nearby friend who is also a bit of a sour fiend. We cut open the orange and checked it over. It had a very thick rind and a huge amount of seeds, but the essence of orange was strong. We cut a small segment each and sucked on it, laughing at our puckered reactions! Holy Sour Nirvana!! While we quickly decided that the Seville orange isn't meant to be eaten out of hand, I started thinking up all kinds of things I could do with them. A great orangeade and a vinaigrette, for sure, but when I got home, I hopped on my computer and Google found the perfect recipe for me. Yes, another Nigella Lawson recipe with the enchanting (at least to me) name, Bitter Orange Ice Cream.

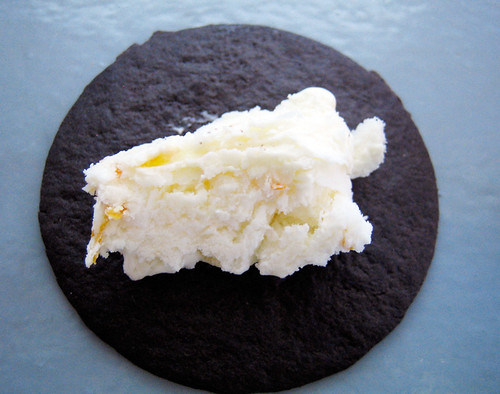
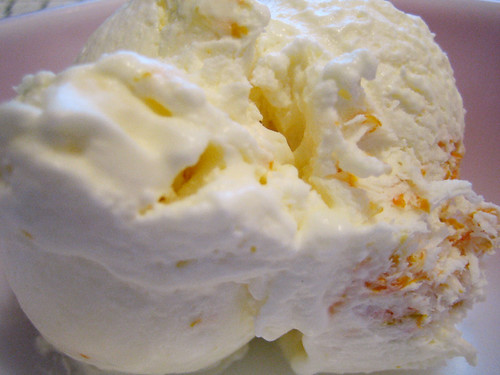
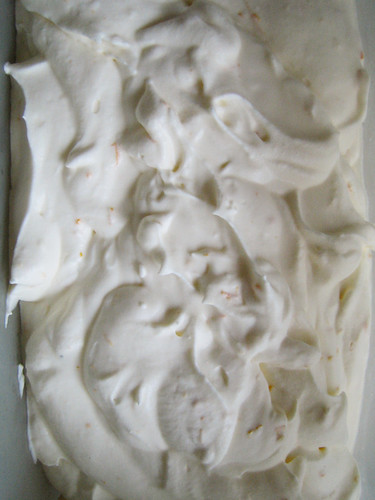
The best thing about this ice cream is that you don't need an ice-cream maker or any special stirring techniques. Nope, just whip it and freeze it and a few hours later you have creamy frozen goodness. While this certainly isn't traditional ice cream per se, it does scoop up nice into a firm little ball which is perfect for serving in a martini glass or in a dainty vintage sundae cup. If it were the season for fresh strawberries, I'd suggest eating it over a bowlful of those, but it is almost as nice to eat plain out of a bowl or atop a chocolate wafer.

This is a very rich dessert, so I'd suggest keeping serving sizes small but I certainly wouldn't be against walking by the freezer with a spoon in hand in case of ice cream emergencies. I didn't adjust or tweak the proportions in the original recipe one bit. It's perfect as it is with the nicest balance of sweet and sour. And if you don't have a Seville at hand, use 1 orange and 2 limes to make up the difference.

bitter orange ice cream
3 Seville oranges, or 1 navel orange and 2 limes
1 c + 2 T confectioners' sugar
2 1/2 c heavy cream

Zest and juice the oranges and place in a large metal bowl. Stir in sugar, mixing to melt. Add in heavy cream and whip until soft peaks form. Pour mixture into a lidded shallow container and freeze for at least 3-4 hours until firm. Remove from freezer and let stand for 15 minutes to soften slightly. Use an ice cream scoop to make small balls and serve over fruit salad or eat with chocolate wafers. Or just stroll by the freezer with a spoon and dig in.

Labels: , , , , ,

Monday, October 22, 2007

like a velvet glove cast in iron: espresso ice-cream cups


Some days require advance planning, much organization and a roadmap to see you through. This weekend we had a house guest and while it was fun checking out our city through the eyes of a tourist and sharing our home with a new friend, it still required work. Work to search out recipes, work to grocery shop, work to prepare brunches and dinners. On Sunday evening, when all the hustle and bustle was over, Cornelius and I poured ourselves into flannel coziness and put on a tv-on-dvd guilty pleasure. We also put our new Bialetti stovetop espresso maker to work and made the simplest, most decadent dessert imaginable: espresso ice-cream cups. Believe me, there is no roadmap or recipe needed here.

A few years ago on a visit to my favorite city, Portland, OR, I stumbled into the Pied Cow Coffeehouse and had something called a "black velvet" or a "velvet glove". The name never stuck, but the memory of that dessert always did. When I'd tell my friends about how glorious it was, I had already re-named the dish into the title of my favorite Daniel Clowes graphic novel, "Like a Velvet Glove Cast in Iron". I would enjoy every spoonful and slurp and once the experience was over, I wanted to repeat it again and again. It was simplicity at it's best. A study in contrast. A scoop or two of vanilla ice-cream in your favorite pint glass or mug and a shot or two of hot espresso poured over top. That's it, there you have it. It's the perfect stress-free way to end a fancy dinner party with friends or the best way to unwind with your loved one afterwards.

Labels: , , , ,

Tuesday, July 10, 2007

coolio


Vancouver is in the middle of a heat wave and I couldn't be happier. For some crazy reason, even though the temperature is climbing, we haven't needed to turn on a fan. Our apartment seems to exist in some crazy netherworld of cool. Not that I'm complaining one bit. It doesn't hurt that we've got a few pints of homemade ice cream in our freezer too.

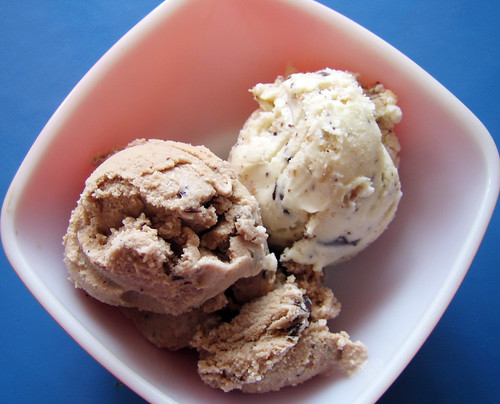
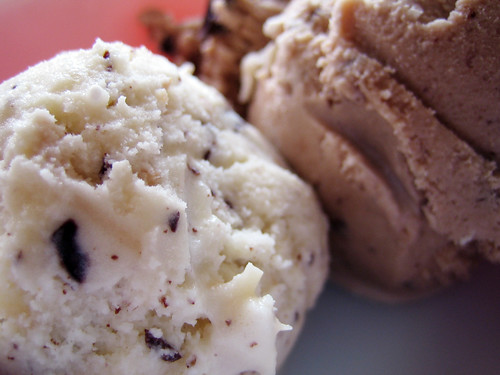
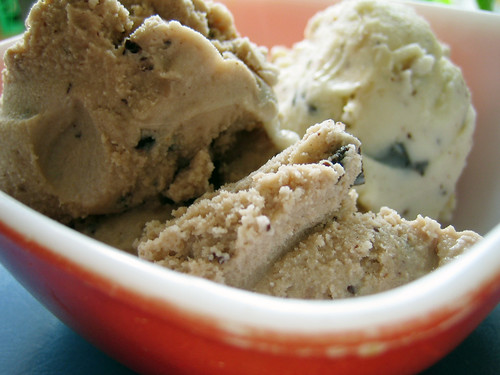
For the Canada Day long weekend, Cornelius and I decided to pull out our ancient (but oh-so-pretty!) teal-coloured Sears ice cream maker out of storage and put it to good use. Wanting to rival our favorite gelato at our neighbourhood shop, I decided to make a coconut chocolate chunk ice cream and just to be on the safe side, we also made a mexican chocolate version. Actually, my mexican chocolate version started out being only cinnamon-flavoured, but when I told Cornelius I was making cinnamon ice cream, he balked. I gave in to pressure and turned the cinnamon into something pretty special. 2 different kinds of hand churned ice cream? Oh yeah.


coconut chocolate chunk
3/4 c shredded coconut, unsweetened
1 c sugar
3 eggs
1 t cornstarch
1/4 t salt
1 c half and half
1 1/2 c unsweetened coconut milk
1 c heavy cream
2 t vanilla
1/2 bar of dark chocolate rittersport, chopped

1. Take 1/2 c of the coconut and toast in a small cast iron pan until it turns golden. Set aside.

2. In a medium sized bowl, beat the sugar into the eggs. Add in cornstarch and salt. Set aside.

3. In a medium sized pot, heat the half and half with the coconut milk over medium heat. Bring to a boil and then remove from heat. Slowly beat the hot liquid into the sugar/egg mixture, then pour the entire mixture back into the pot and place on low heat. Stir constantly until mixture thickens. Be careful not to let it boil or you'll end up with an egg scramble. Remove from heat and strain into a large bowl. Cool slightly and then add in the toasted coconut, the remaining untoasted coconut, cream and vanilla. Cover and refrigerate overnight.

4. Take the cooled mixture and pour it into your ice cream maker and start churning. Add in the chocolate chunks when the ice cream becomes semi-frozen. Keep churning until it gets very hard and then it's all done. Pour into containers and freeze.


mexican chocolate ice cream
3 c half and half
2/3 c sugar
1 egg
1 t cornstarch
1/4 t vanilla
1 t cinnamon, heaping
2 T dark cocoa
1/8 - 1/4 t cayenne pepper
1/2 bar of dark chocolate rittersport, chopped

1. Heat cream in a large pot over medium heat until hot, but not boiling. Remove from heat and whisk in sugar, vanilla, cocoa, cinnamon and cayenne.

2. In a medium sized bowl, mix egg and cornstarch together. Slowly pour hot liquid into egg mixture, whisking to make sure the eggs don't scramble. Pour back into pot and gently heat until the mixture thickens somewhat. Cool to room temperature and then cover and place in fridge overnight.

3. Take the cooled mixture and pour it into your ice cream maker and start churning. Add in the chocolate chunks when the ice cream becomes semi-frozen. Keep churning until it gets very hard and then it's all done. Pour into containers and freeze.

Labels: , , ,

Sunday, July 30, 2006

fudge-a-licious

Love and leftovers can make you do the darndest things. Cornelius loves ice cream. So much so that he once was tempted to officially change his middle name after his most favorite dessert. I'm so glad he didn't. I think we both would have died of embarassment at our wedding ceremony if the officiant had said, "Do you, Cornelius Ice Cream Bergen, take this woman to be your wife..." Indeed!

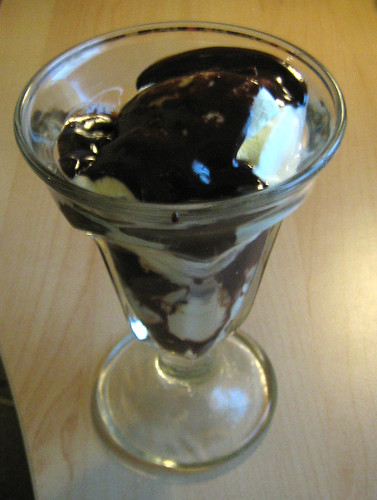
When it comes to ice cream, I'm more of a purist. I like my ice cream hard and icy without much fuss or muss. And while I appreciate the asthetic retro charm of a nicely composed sundae, I can do without the overly sweet sauce and day-glo cherry. Cornelius, on the other hand, keeps his sweet tooth at the ready all the time. So when I had a small amount of leftover whipping cream in the fridge, I figured I would do my best to meet his sweet tooth half way. Spying a recipe from Entertaining for a Veggie Planet, I figured I would do my best to make an ice cream topping worthy of the prettiest ice cream sundae. Although, I made a few changes to the recipe to cut down some of the fat and sugar, the recipe didn't suffer from the changes. Cornelius downed his first bowl in record time and while eating his second bowl of hot fudge topped ice cream, demanded that we buy larger bowls! Rich, sweet and guaranteed to satisfy any sweet tooth.

world's best peanut butter - hot fudge sauce
Recipe adapted from Didi Emmons' Entertaining for a Veggie Planet

1/4 c heavy cream
1/4 c milk
2 T unsalted butter, cut into small peices
1/4 c sugar
1/4 c brown sugar
1/2 c good quality cocoa powder
1/4 c natural crunchy peanut butter
pinch of salt

1. In a heavy saucepan, heat the cream and butter over medium heat. When the mixture simmers, add the sugars and stir until dissolved.

2. Reduce heat to low and add the cocoa powder, peanut butter and salt. Whisk until smooth. If you find it too thick, add some more milk and combine until smooth. Remove from heat. Serve immediately or keep warm.

This sauce can be kept for up to 3 weeks in the fridge. Reheat in microwave or in a heavy saucepan over low heat, adding water if too thick.

Labels: , , ,

Tuesday, September 13, 2005

i scream, you scream

Last night, Cornelius and I were craving ice cream and decided to put our honeymoon gift (a prettyprettypretty teal old-old fashioned) ice cream maker to the test. We had actually used it in August to make a batch of strawberry ice cream and though the results were good, they weren't super-fantastico. Last night I tried a new recipe and decided to make mint chocolate chip ice cream. The recipe I chose was a custard based recipe from Bruce Weinstein's book, The Ultimate Ice Cream Book. It turned out fantastic and it may be the best mint chocolate chip ice cream that I've ever eaten. I'm a full believer that hand-churning makes ice cream taste extra special.

Mint ice cream
3/4 c sugar
2 large eggs
1 tbsp cornstarch
2 cups half-and-half (I used only 2% with a small glug of heavy cream)
2 tsp peppermint extract
6 drops of green food colouring (because i don't like straight green as the results end up too limey, I added 3 green and 3 blue for a perfect minty shade!)

I also added 3/4 c of chopped chocolate chips half way through the churning process.

In a medium mixing bowl, beat the sugar into the eggs until thickened and pale yellow. Beat in cornstarch and set aside.

Bring the half & half to a simmer in a heavy medium saucepan. Slowly beat the hot half and half into the eggs and sugar. Pour the entire mixture back into the pan and place over low heat. Stir constantly with a whisk until the custard thickens slightly. Be careful not to let the mixture boil or the eggs will scramble. Remove from the heat and allow the mixture to cool slightly, then add the heavy cream, peppermint extract and food colouring. Cover and refrigerate.

At this point in the recipe, I decided to cool the mixture in the fridge in a shallow baking dish to cool off faster. It worked like a charm. Once cooled, we just poured it into the prepared container and started churning. We added the chocolate chips when the ice cream was semifrozen. When churning became difficult, we stopped and put the mixture into an empty ice cream container and we licked the beater and ate up whatever wouldn't fit.

I can't wait to try more recipes and make up some of my own!

Labels: , ,